Shelly

Taking Your Toddler to the Waterpark

We have an amazing waterpark in our town that I love visiting with Sophie. I was nervous the first time we went because I’d never taken her to such a large area with so much water and running/screaming children. Now, I feel completely confident in taking her for several hours in the afternoon. There’s no better way to ensure a good night’s sleep than a trip to the waterpark for a toddler. Taking your toddler to the waterpark can be intimidating so here are my top 5 tips to ensure less stress.
Tips for taking your toddler to the waterpark
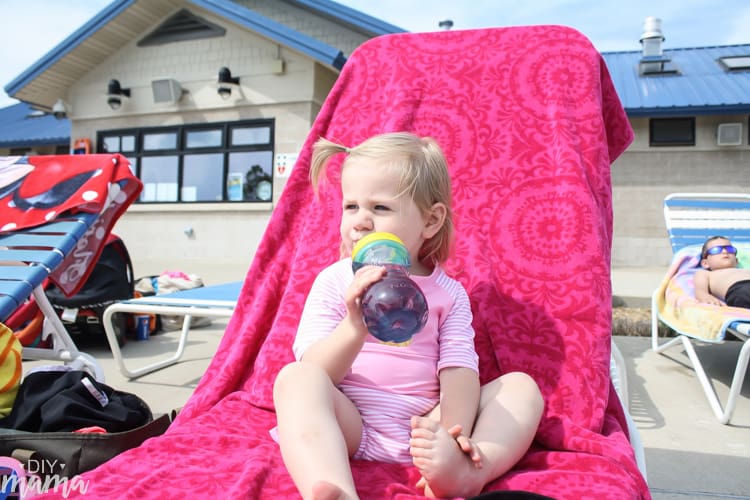
Tip 1: Hydrate. If I know I’m taking Soph to the waterpark (or any day of extensive outdoor play) I’ll make sure she’s drinking a ton starting the day prior. It’s hard to remember to make sure everyone is drinking plenty when you’re having so much fun.

Tips for taking your toddler to the waterpark

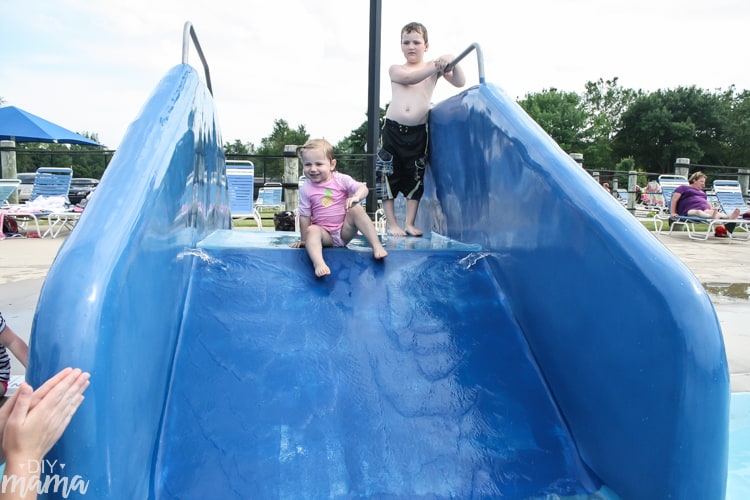
Tip 2: Safety. Although there are lifeguards every 10 feet, they have a ton of people to watch. Your child is your responsibility, so stay within reach at all times. Many toddlers have no fear and will want to go on the bigger slides. Be there to help them if they need it as well as monitoring bigger kids if they’re getting too aggressive around your toddler.

Tips for taking your toddler to the waterpark

Tip 3: Let them try. I think safety is most important but I also think a child’s independence and satisfaction at mastering a skill is close behind. Soph wasn’t interested in the kiddie pool as much as the big slides and playground. She would have gone on the adult waterslide if she were tall enough. If they are safe, let them try everything!

Tips for taking your toddler to the waterpark

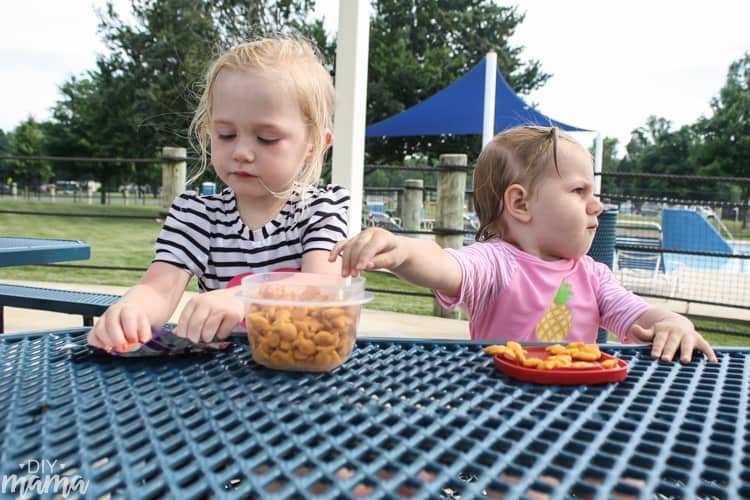
Tip 4: Bring snacks. Their little bodies will need food for energy if you’re going for more than an hour. It’s also a good way to force them to take a breather and calm down from the sensory overload. We usually bring goldfish, fruit, gummy snacks and a protein bar.

Tips for taking your toddler to the waterpark

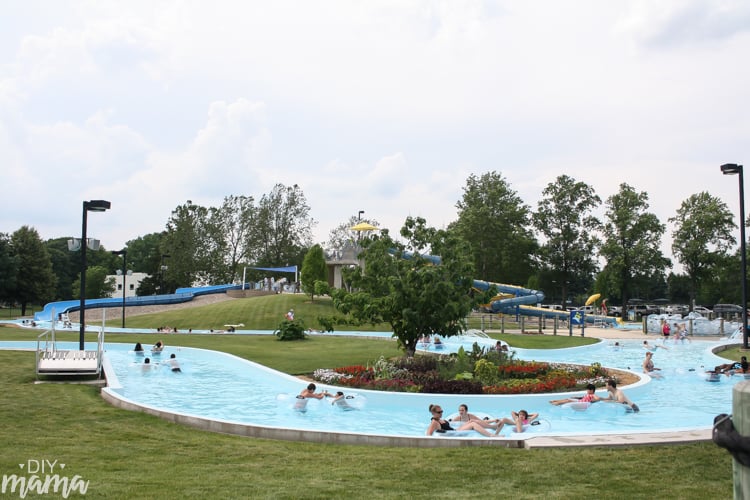
Tip 5: Take a break. Snacks are a great way to take a break but Soph is constantly dancing and wanting to go back to the pool while she eats. I take her in the lazy river every time we go to let her sit back and chill. We’ll spin and do waves but the main reason we float is for both of us to calm down.

You’ll be more likely to continue taking your toddler to the waterpark if you do these 5 steps. I think taking a toddler to the waterpark alone can be overwhelming but can also be so fun for the both of you. Plus, it’s a great way to make friends!

Comfort Zone

Great things never came from comfort zones.I like comfort zones. I’ve always been fond of comfort zones. I’m now realizing that I’m always happiest when I step out of my comfort zone. My favorite decisions in life only happened because I was brave enough to try. Maybe for you, talking to people is difficult. Perhaps taking a trip alone sounds like an anxiety attack waiting to happen. It may be as small as taking your baby with you to the grocery. When I had just had Sophie, simple tasks were a huge chore. I had to tell myself to ‘just do it‘ and I was much happier once I did. Things always got easier. If you stay in your comfort zone, you’ll never grow.

Worst Thing Possible

quote

When I’ve got a lot going on, I get pretty anxious. Tension headaches that keep me from playing outside with Sophie and no motivation to do simple tasks. I’m learning to deal with my stress through working out, meditation and a healthy diet. I’m also using a new mantra that was presented to me by Jeffrey right before BlogU15. What’s the worst that could happen? What is the worst thing possible? I was worried about flying alone, the pain in my ears, missing the layover, getting lost in a new place etc. Jeffrey asked ‘what is the second worst thing that could happen?’ (insinuating that dying in a firy plane crash would be the worst.) My answer was ‘I’d ask for help, I’d get on the next flight, I’d be late to the conference’ (in other words, nothing bad at all!) We have some major changes happening in our family right now and I’m needing to remind myself ‘What’s the worst that could happen’ more than once per day. It has really helped me to use this mantra in times of anxiety. What’s your mantra?

Page Turners Book Selection: July

This post contains affiliate links through Amazon.
First, Lisa and I are a week late in announcing our July book. Apologies! But no worries because our July pick is a relatively short book:

2015-PageTurners-07Perks1(large)

The Perks of Being a Wallflower by Stephen Chbosky

I’ve read this book and loved it. Loved the movie (especially since Hermoine plays Sam in the movie). In fact, I loved it so much that I’ve been wanting to read it again and thought book club would be the perfect time. Jeff O’Neal (Book Riot Podcast) recommended this on the recent Moms, Dads, and Grads Recommendation Show to someone looking for a good YA book.

2015-PageTurners-07Perks2(large)

Hope you’ll join us! And don’t forget, we’ll be discussing Ready Player One: A Novel
on July 3.

Page Turners book club by Expandng & DIY Mama

 Please let us know if there are any books you’re interested in reading for Page Tuners book club! You can check out some of our favorites on our Pinterest board:

Follow Shelly @ DIY Mama’s board Book Club on Pinterest.

DIY Photo Background

As one of my goals for June, I’ve made a few DIY photo backgrounds to spice up my photography. I had realized that my white foam board wasn’t cutting it anymore as it had hot glue and paw prints mucking it up. These photo backgrounds were extremely easy to execute but took several days as I had to wait during drying times for the glue and paint. The hardest part of the project was only choosing five paint colors!

Photo Background

Materials needed (for three backgrounds):

  • Pine plank paneling (found in the flooring department and cut to desired size)
  • Wood glue
  • Spare wood (I used wooden stakes but a 1×2 would work as well)
  • Paint (I used Valspar sample paint from Lowes)
  • Paint rollers (I suggest the rollers made for doors and cabinets)
  • Clamps or weights (I used paver stones)

Photo Background Materials Photo_Backgrounds_Layout (1 of 1) Photo BackgroundThis project was simple and cost under $20 for six photography backgrounds. My first, and most important suggestion is to lay out the pattern of your planks and make sure they all fit snug. A few of my boards were warped and I hadn’t realized until I’d already added the glue.

Photo BackgroundPhoto BackgroundOriginally I thought the planks would be sturdy enough. I let the glue dry between the planks and felt unsure about the longevity of my backgrounds. I used wood glue to add spare wood as braces on the back. I let the glue dry overnight being weighted by a heavy paver stone (a project Jeffrey is working on).

Photo Backgrounds Photo_Backgrounds_Background3 (1 of 1) Photo_Backgrounds_Background1 (1 of 1)
I rolled one thin coat of each color of paint, making sure it was evenly covering the board. I left one board bare on one side for a natural feel but painted every other side.

Let me know if you’ve made similar photo backgrounds or used different materials that are easy to store. I’m excited to start taking photos with my new backgrounds and hope they enhance your viewing experience.

Google+