Hidy ho crafters and green thumbers! Anyone else having beautiful weather today? It’s supposed to be nice here all week and I am extremely excited about that! I am still missing my lil bean but Lexi is getting better every day and today I was confident enough to run errands, which was a big boost to my mood (especially because I bought clothes for Soph!) I have been seeing pots on sale everywhere I go lately, which means it’s a great time to buy pots for next year’s spring lay-out OR to put some new greenery inside your home for the winter. I love how inexpensive terracotta is but never buy it because it cracks if left outside year round here in the midwest. I saw some small pots for $0.50 and couldn’t resist doing a little diy to bring some more green into our home.
 Not pictured: me spray painting three coats of white Rustolium on the outsides of my pots. You never want to paint the insides of vases or pots where the dirt or water will get exposed to paint. The bare inside is never exposed once the plant is inside, so there’s no need to worry that it’ll look unfinished.
 Materials Used:
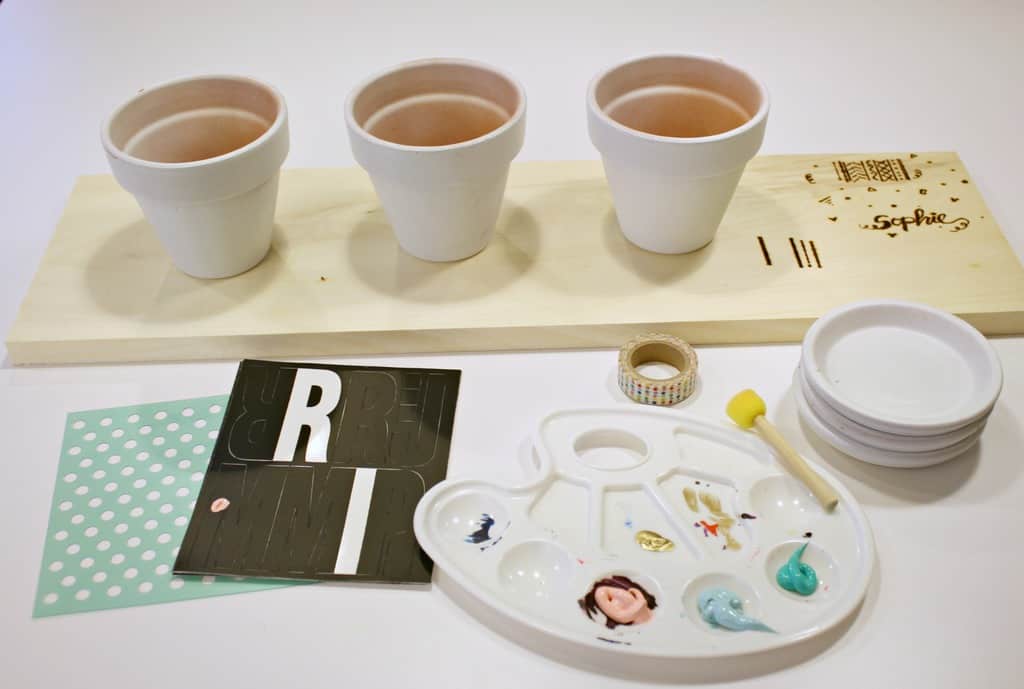
- Terracotta Pots
- Terracotta Drip Trays
- Heidi Swapp Stencil
- Mailbox Letters
- Paint Tray (Or Paper Plate)
- Tape
- Sponge
- Acrylic Paint
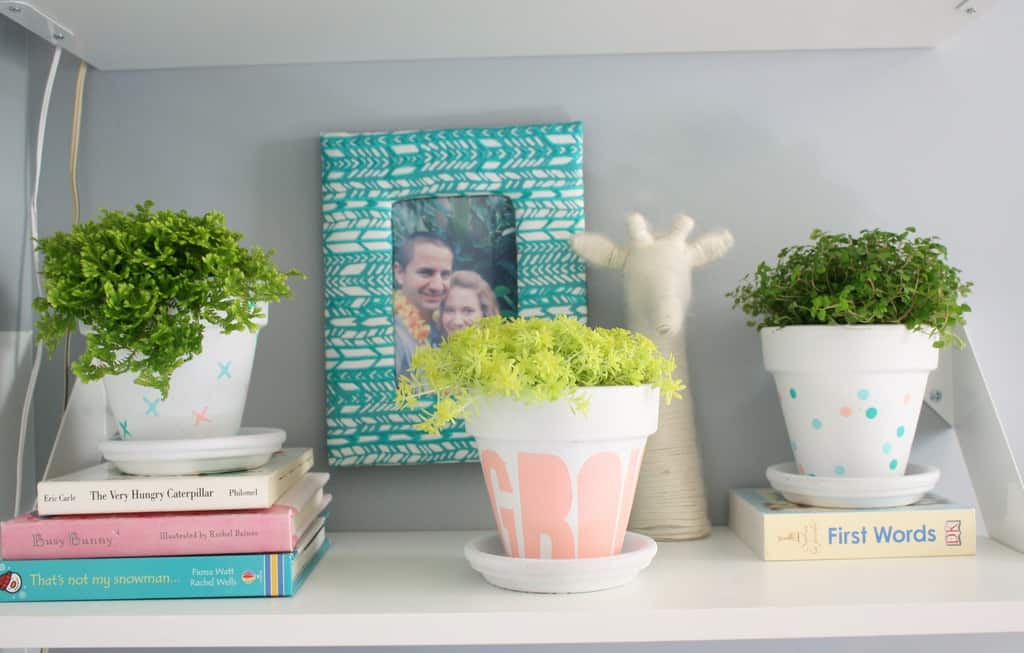
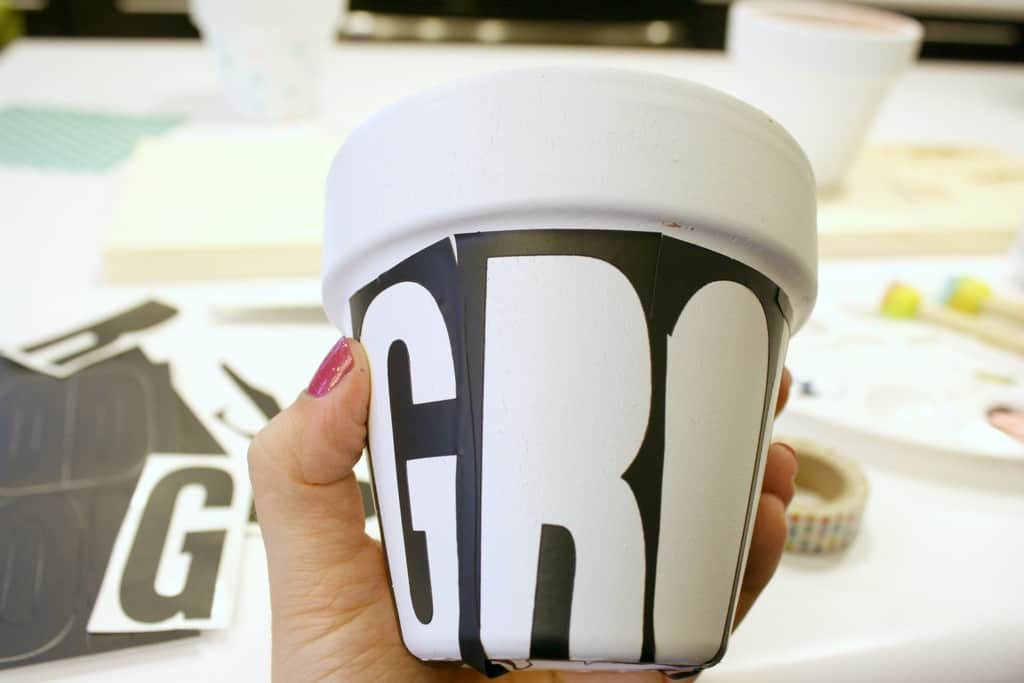 I have a ton of these mailbox letters that I found at a local hardware store for a painting I’d done. I thought it’d be fitting to stencil the word GROW on the pot to encourage the little bugger to stay alive. I also thought it’d be fitting since I was going to put one pot in Sophie’s room. As you see, I had to overlap the letters to accommodate the taper at the bottom of the pot.
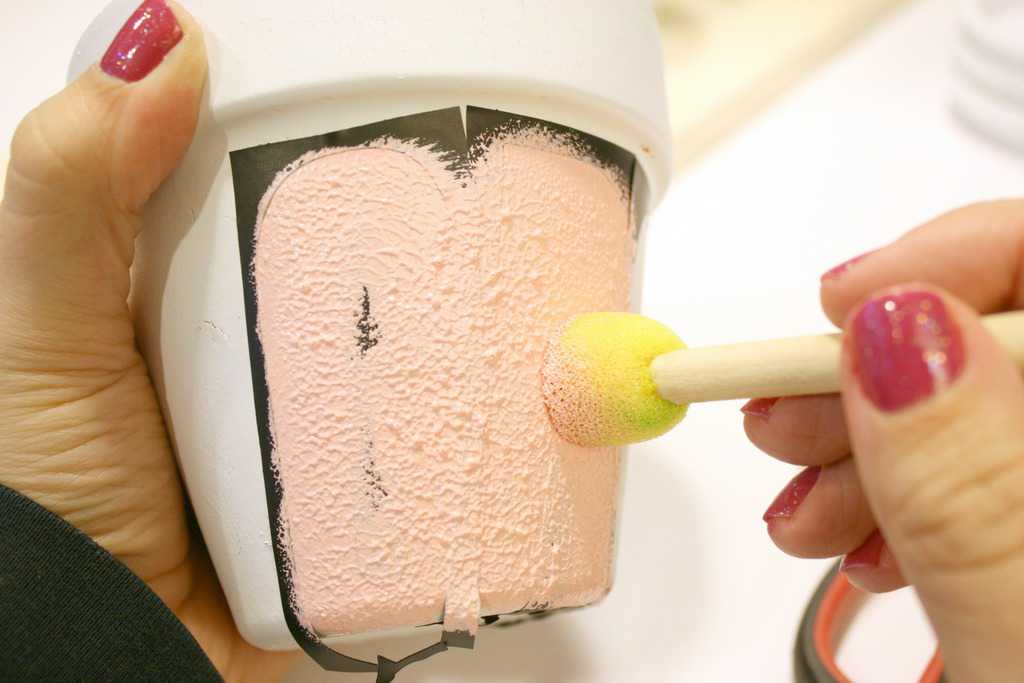 I used my sponge brush to dab pink paint onto the stencil. I used a sponge brush because I liked the textured effect it gives when applied thick.
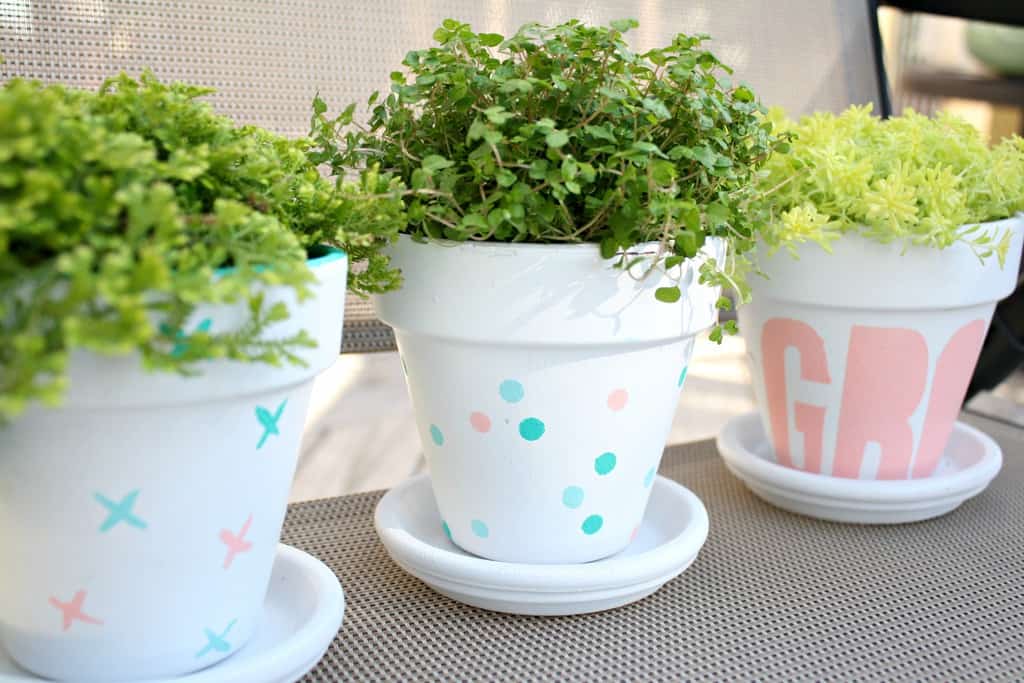
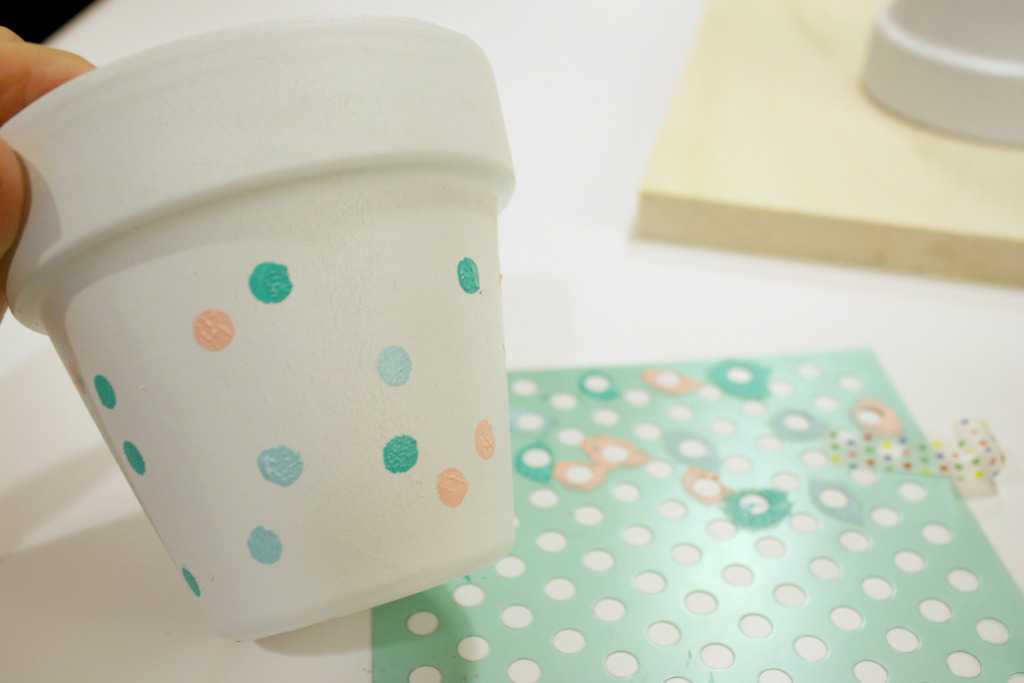 With the confetti pot I taped a dot stencil onto the pot and did random colors around the pot. I used washi tape to hold the stencil, which was a terrible idea, because it kept coming off as I’d paint. We have at least 5 rolls of painters tape in the garage but I was too lazy to go get them and my project suffered. It turned out pretty cute in the end though. It’s a nod to Sophie’s 1st Birthday theme which will be ‘Confetti & Sprinkles.’ If you don’t have a dot stencil you could easily use the eraser end of a pencil as your dotting stamp.
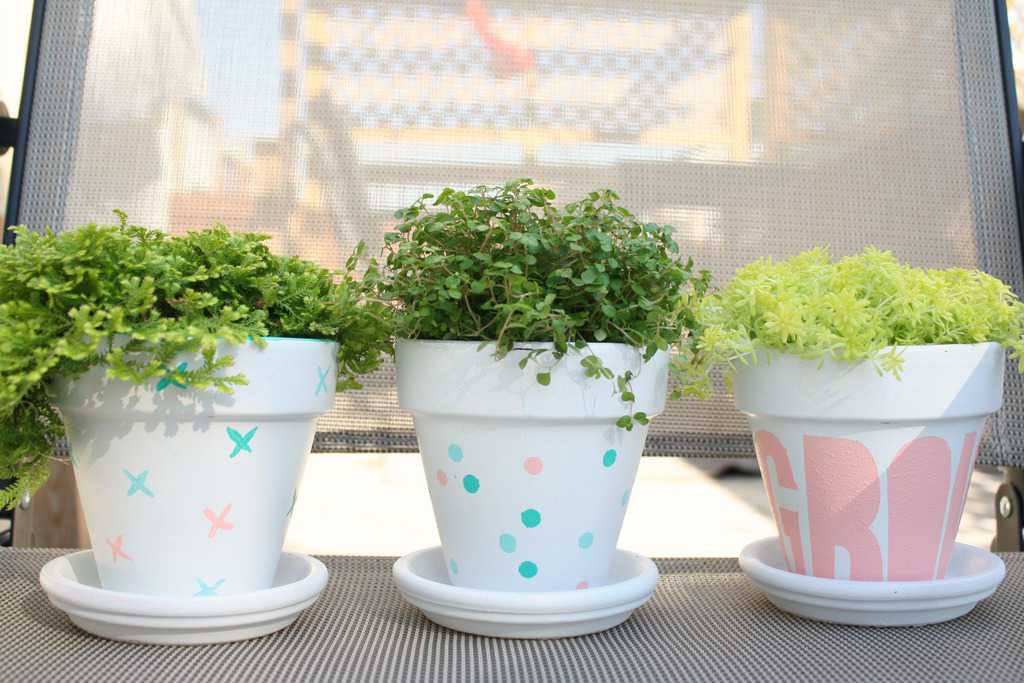 For the X (kisses) pot I used a flat paint brush. I also used the same paint brush to paint the rim teal.
I think they turned out super sweet. I don’t use a lot of pastels in my decorating because I like bold colors, but I had Sophie in mind while painting these and wanted them to mimic her sweet personality.
 Now to see how long I can keep them alive. 😉 They’re supposed to do well in shade so I’m hoping they’ll last longer inside than some of my previous plants. Have you ever made over a pot to have it match your decor? With ceramic pots being the price they are, I’m tempted to just spray paint all terracotta pots from now on! There are so many options of design and color I could implement, especially with Frog Tape having designer tape. Which pattern is your favorite? I think I like the kisses pot the best.
Let us know how the paint holds up — I tried painting pots once but all the paint peeled off after using them for a few months. (watering the plants caused the problem, I assume?)
Great point Sarah! I have a few different spray top coats. I will look into what’s best for acrylic and terracotta today and put a coat on before it’s too late!! I really appreciate it! I would have been bummed!
I love how those turned out and I like the confetti one best. Unfortunately, I am your friendly neighborhood unintentional yet professional plant killer. I always forget to water them. Always :(. Maybe because they don’t scream for attention and food just silently… suffer?
The confetti one is pretty darling! There are some extremely realistic fake plants out there! I have one above my desk because I know I’ll never remember to water anything in the office. If it’s not something that’s in your face every day (my plant watering reminder is a whole bunch of plants right by my kitchen sink) then it’s easy to forget!
Just about the cutest pots I ever did see!
Those are super super CUTE! Easy for anyone to do and really spruces up those ugly terracotta colored pots to match any decor style! I must say I am kinda in love with your color choice right now! I am going to have to make a couple like these for my porch!! Thanks for sharing, I am excited about this right now lol!
Jess
I’m glad you like my colors Jess! I was on the fence about them when I chose them but once they were finished I was really happy with them too! I’d love to see yours on your porch once you’re done!
Pretty pretty pretty! I especially like the Grow one – it’s like you are willing the plant to do well.
Apart from the occasional disaster I usually keep plants alive pretty well, the key is light (all plants need at least some natural light, even the shade loving ones, water – but not too much, overwatering is not good for plants, and a drop or two of plant food once in a blue moon, ie 4 times a year is fine)
Good luck, I’m sure you are gonna be fine!
Haha! It’s true Julie! I am willing the little bugger to grow! They’re all still healthy!
Great idea, looks so pretty a must try!
Thanks Mari! I’d love to see yours when they’re done!