halloween

Halloween Home Tour

Happy hauntings friendly ghosts! I super love Halloween. I loved it growing up because we’d always carve pumpkins, decorate our home, listen to spooky music, watch Halloween cartoons and (my favorite) go Trick or Treating!

outside

I’m looking forward to Halloween this year because Sophie really understands what Trick-or-Treating is! We’ve gone to the pumpkin patch a couple times and have made quite a few home made Halloween decorations this year. I’ve been asked a few times to put my home decorations up on the blog but was hesitant, since I did not make tutorials for everything I made this year, but still wanted to share our fun and spooky house.

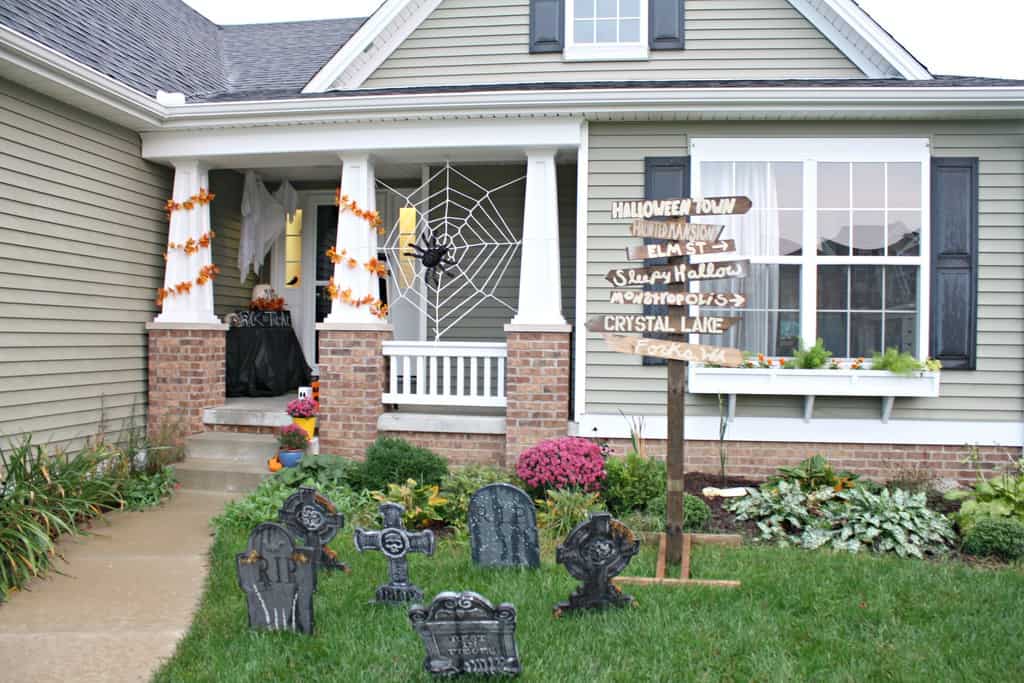
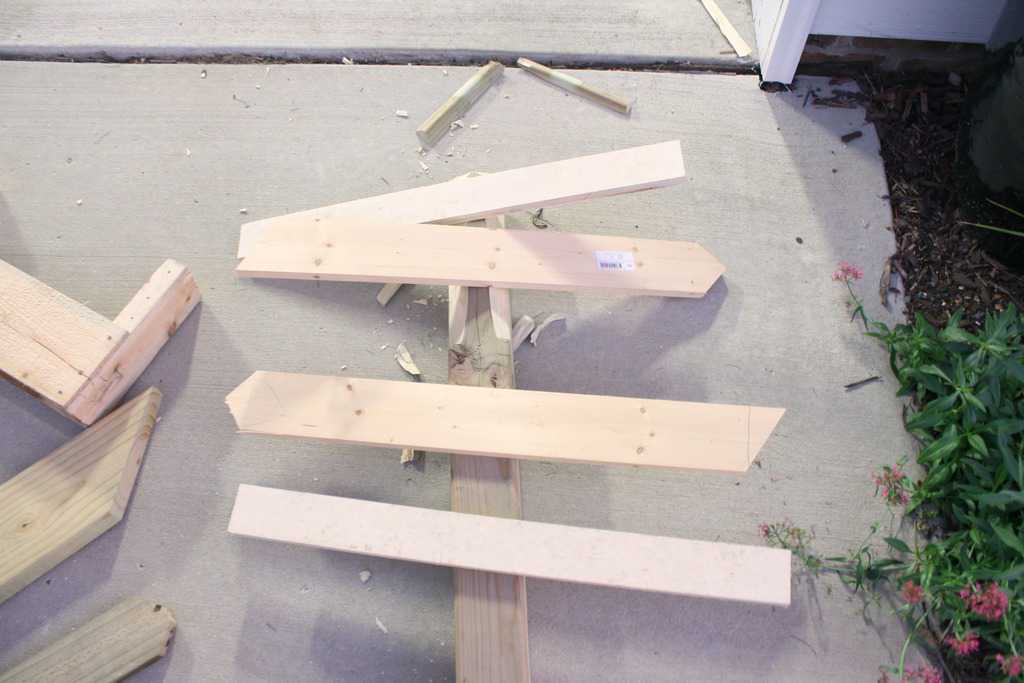
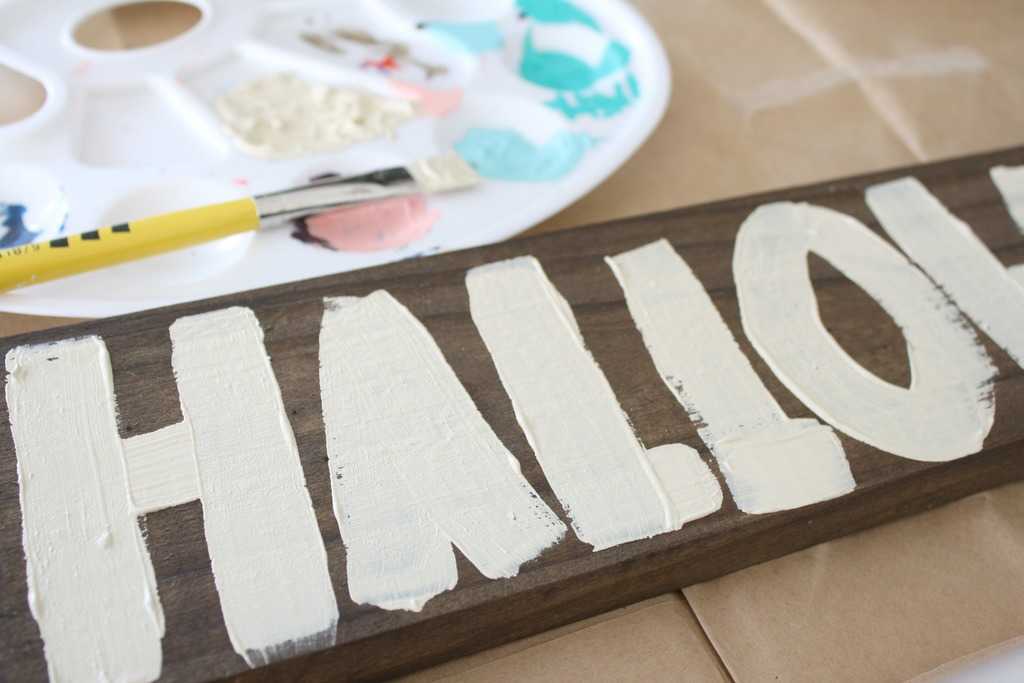
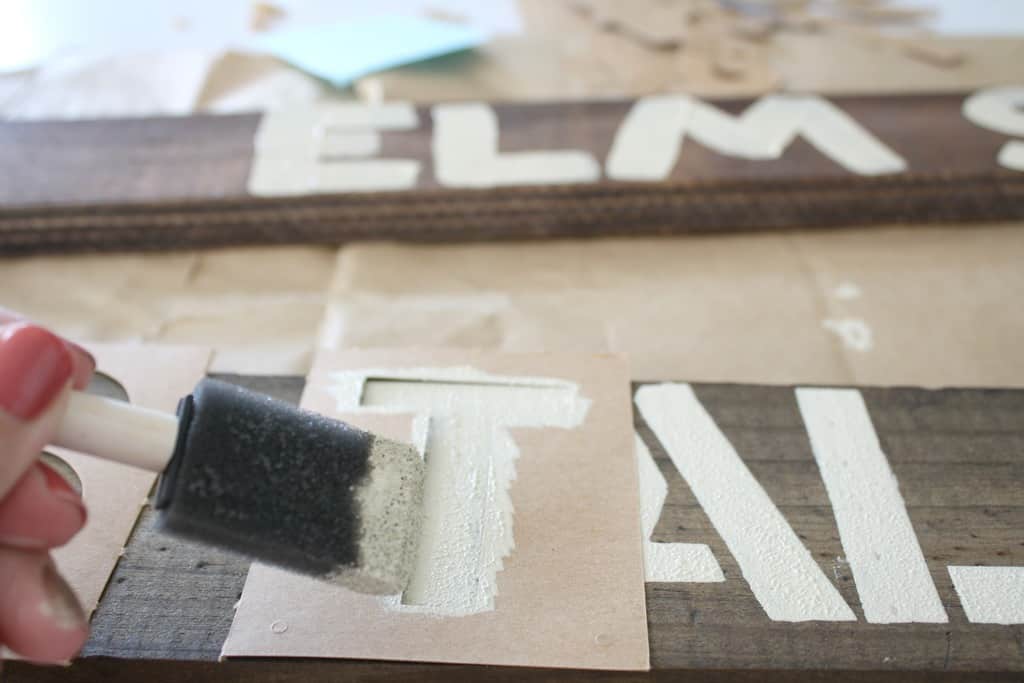
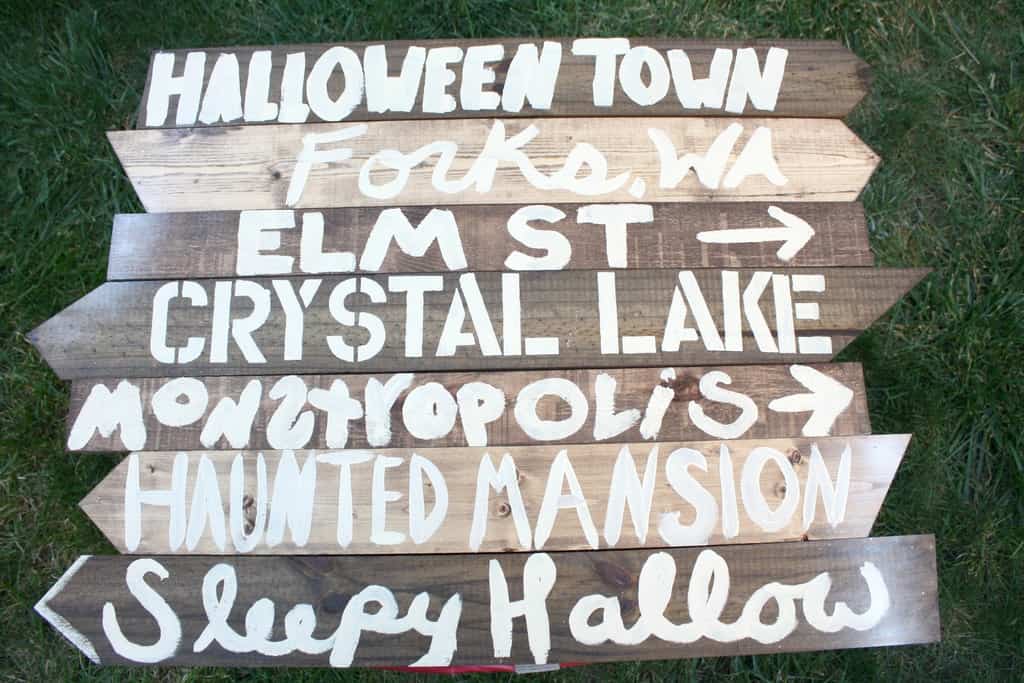
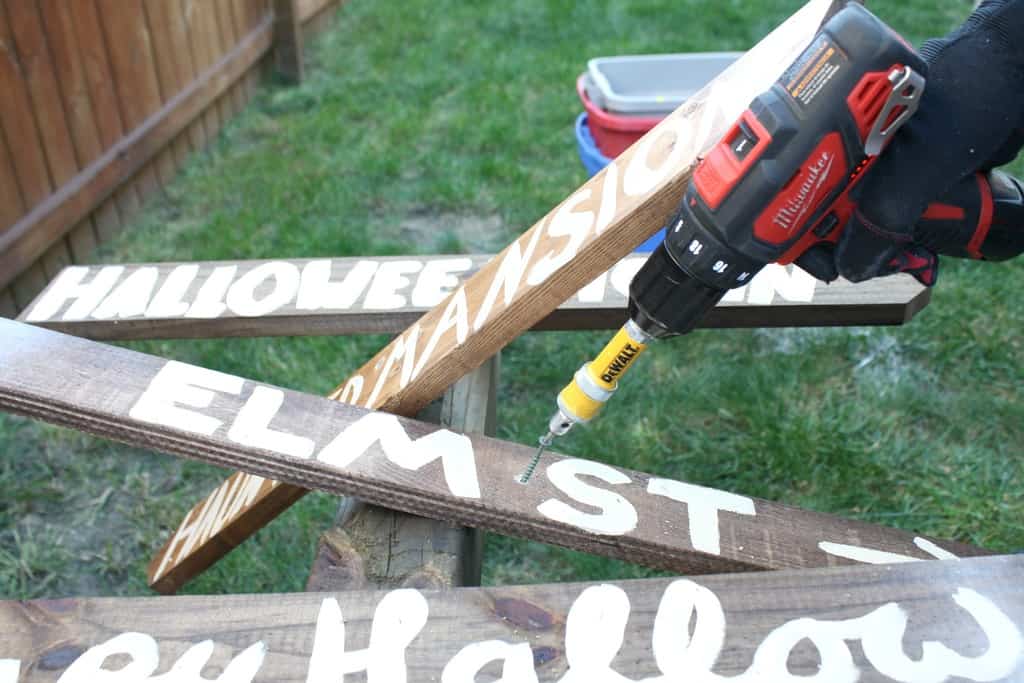
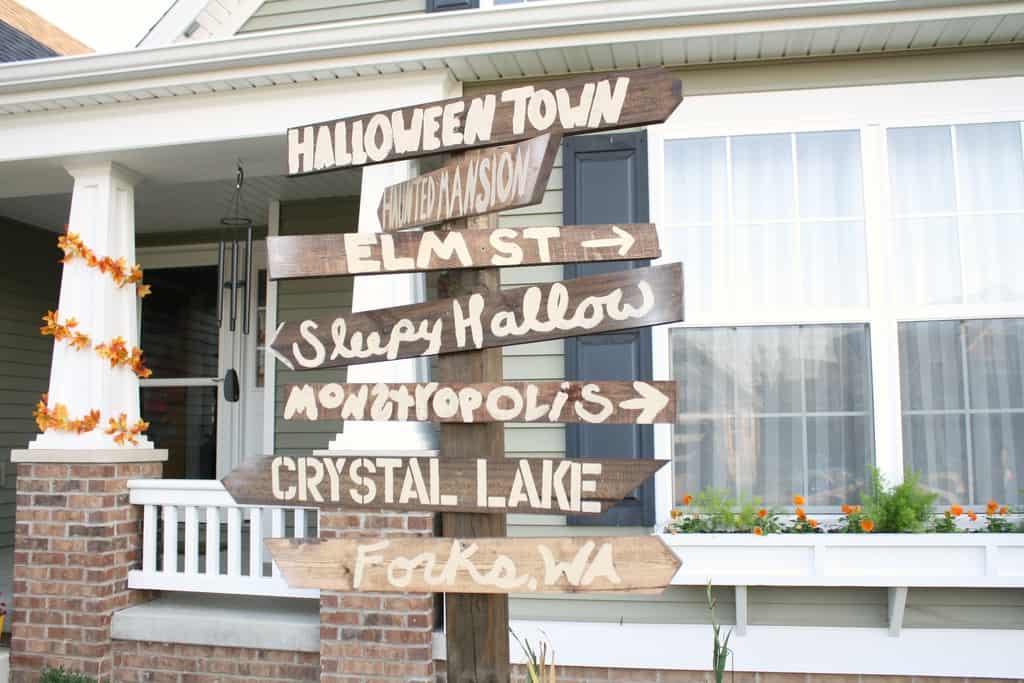
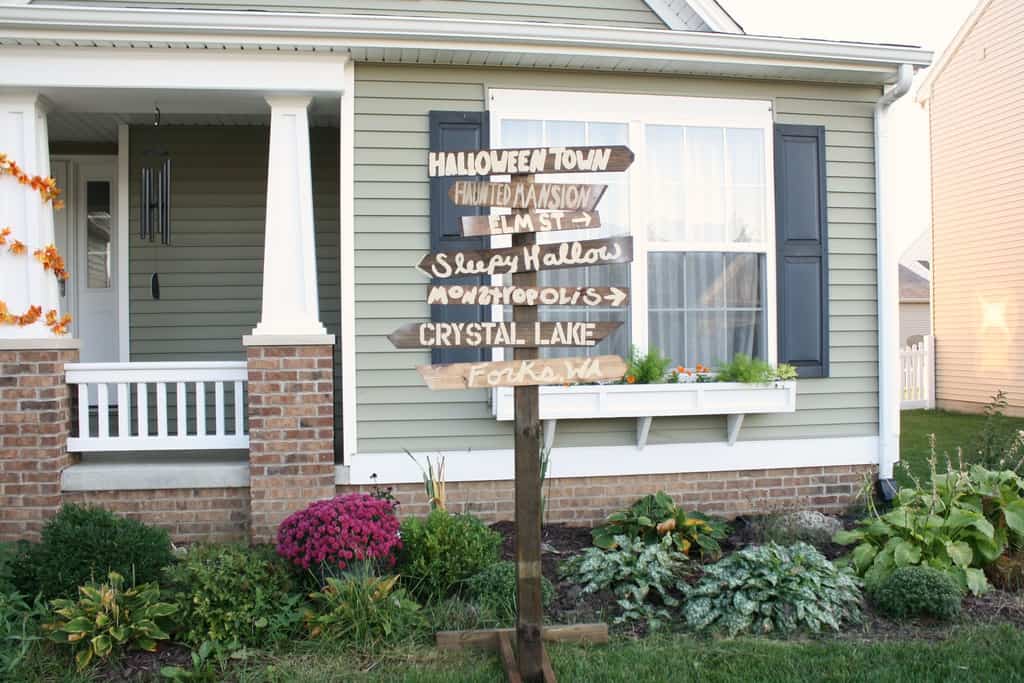
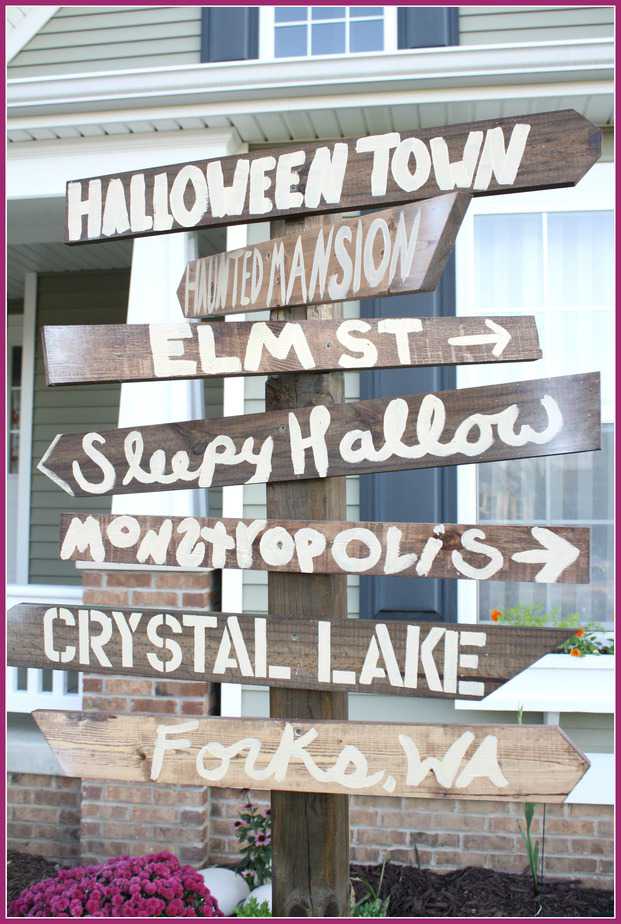
I’ll start with the outside of our home, as if you’re coming to Trick or Treat! You may have already read about our Halloween Street Sign out front. I added a few styrofoam tomb stones near the sign. Next year I’d like to get some lighting for the sign and tomb stone to make it a bit spookier at night. I made a rope spiderweb hanging between the columns of our porch with a friendly sparkly spider (because I’m afraid of spiders and I hate the ones that look real!) I left up the leaf garland on the columns from our fall decor to add a little color.

halloween-porch

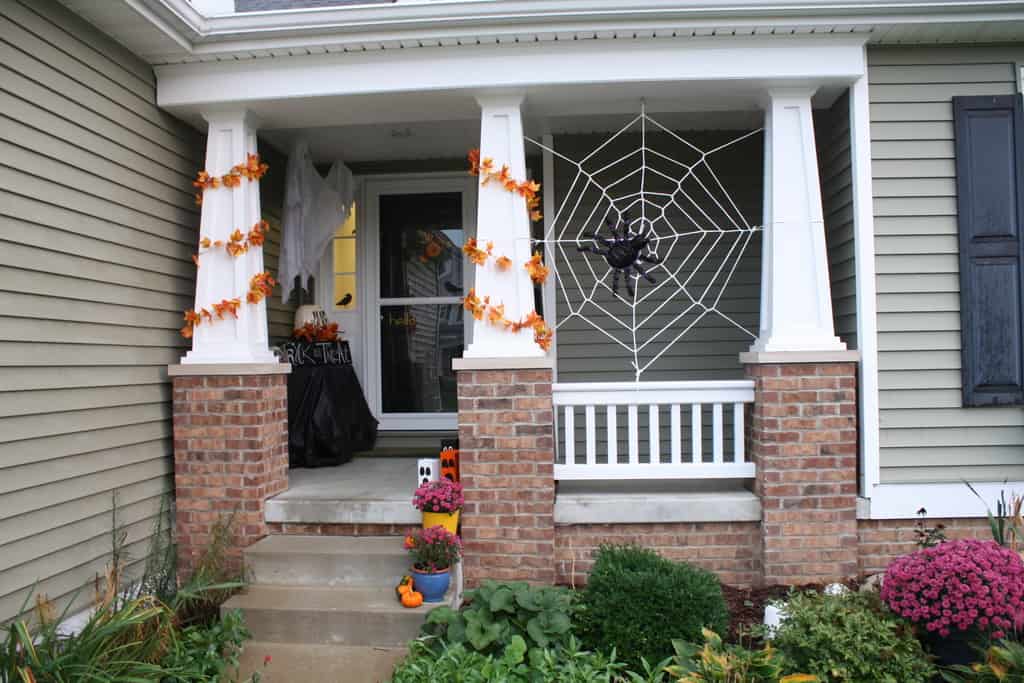
As you walk up the steps I have a few potted mums surrounded by some tiny pumpkins and gourds.

halloween-posts
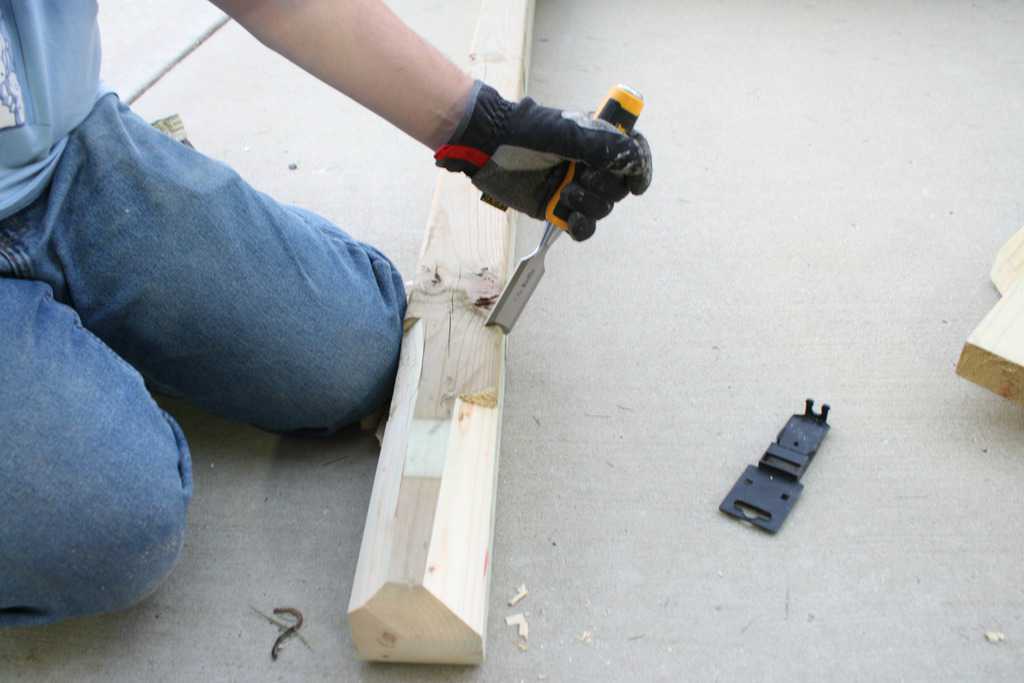
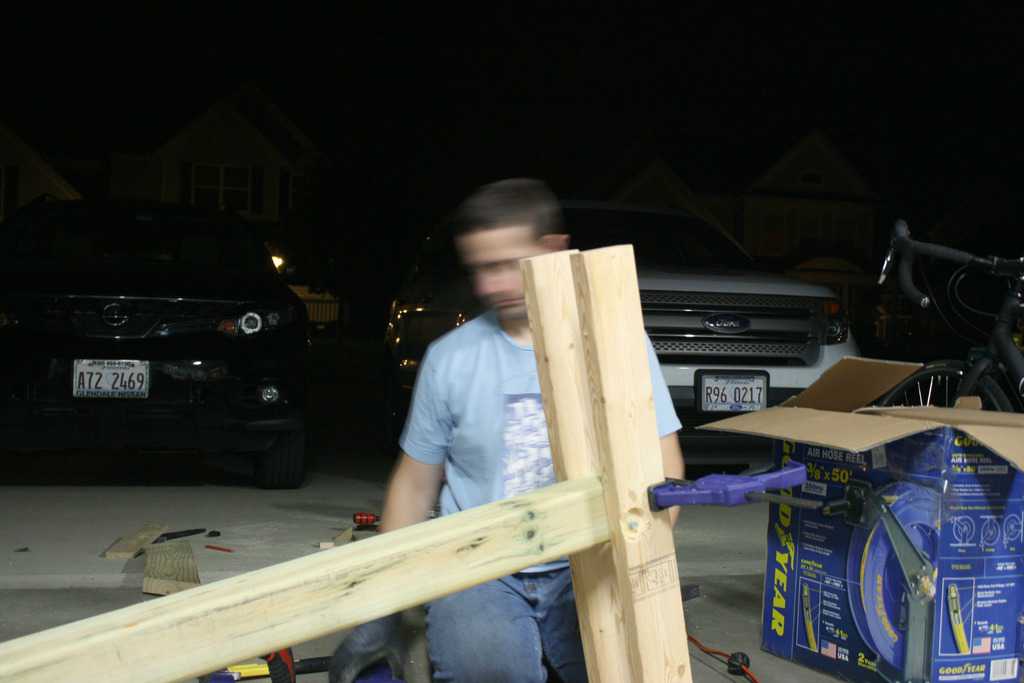
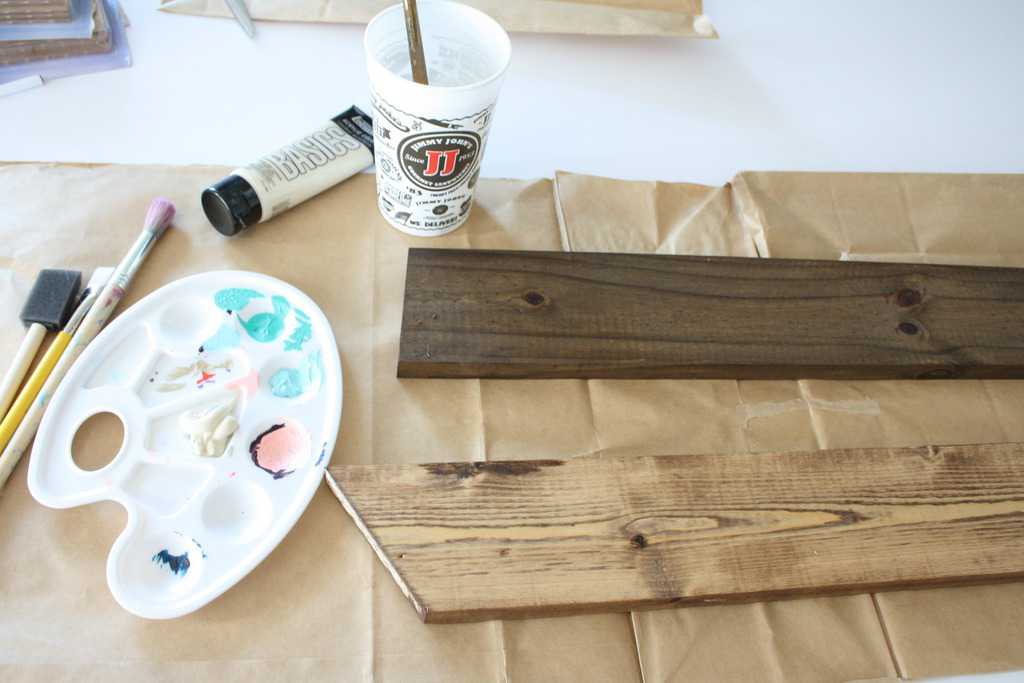
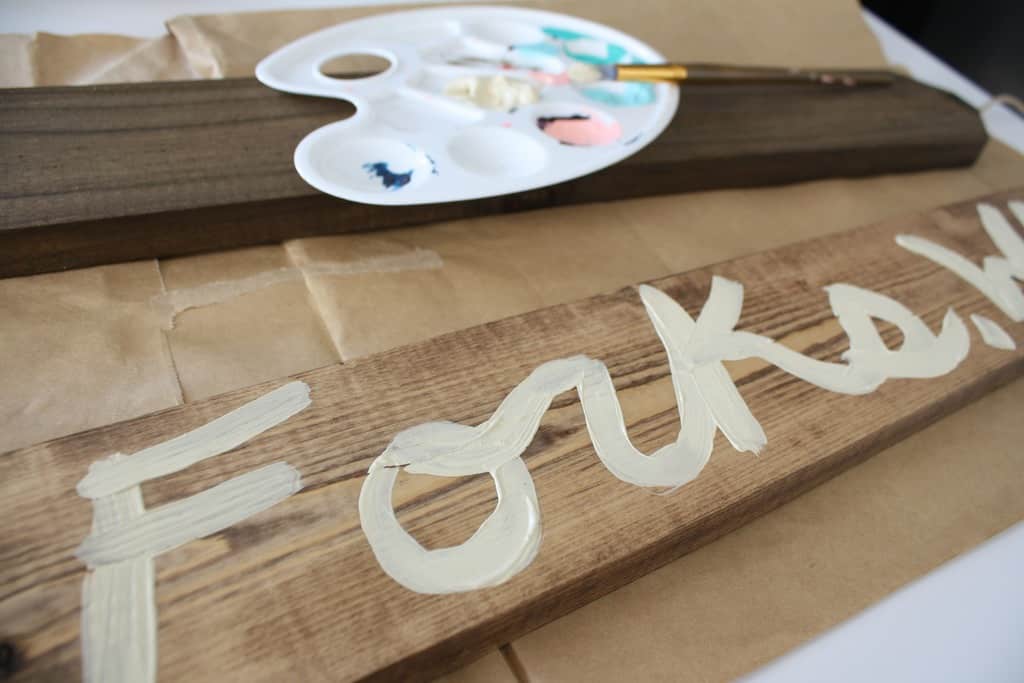
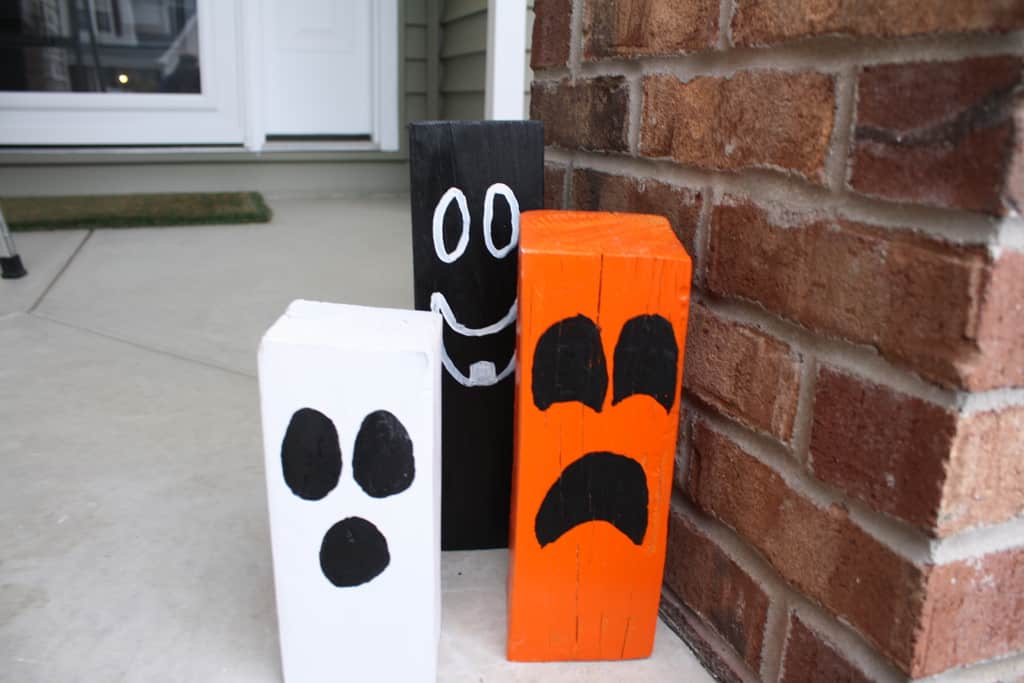
At the top of the stairs are these CUTE Halloween decorations that my parents made for me out of 4x4s!

porch-decorations-door

Up on the porch I hung a few friendly ghosts from clear 3m hooks. I left my Fall wreath up but will need to make a fun Halloween wreath next year. I bought a large white styrofoam pumpkin and used my Cricut to cut out Happy Haunting and some black crows in black vinyl. It worked better than I thought it would! I wanted something that I could peel off and change each year since the pumpkin was a bit pricey. The pumpkin is sitting in a culdron with leaves around it to fill in the gap. I spray painted some scrap wood with chalkboard paint and wrote a fun Trick or Treat for our little ghosts and goblins this year. I also used my Cricut to cut out a few black ravens and put them around the porch.

halloween-entry

Welcome inside! The entry way has light up fall leaves framing the door as well as bats flying around. I scored these cardstock bats two years ago for $1 as a garland and somehow they’ve held up for the third year!

console-halloween

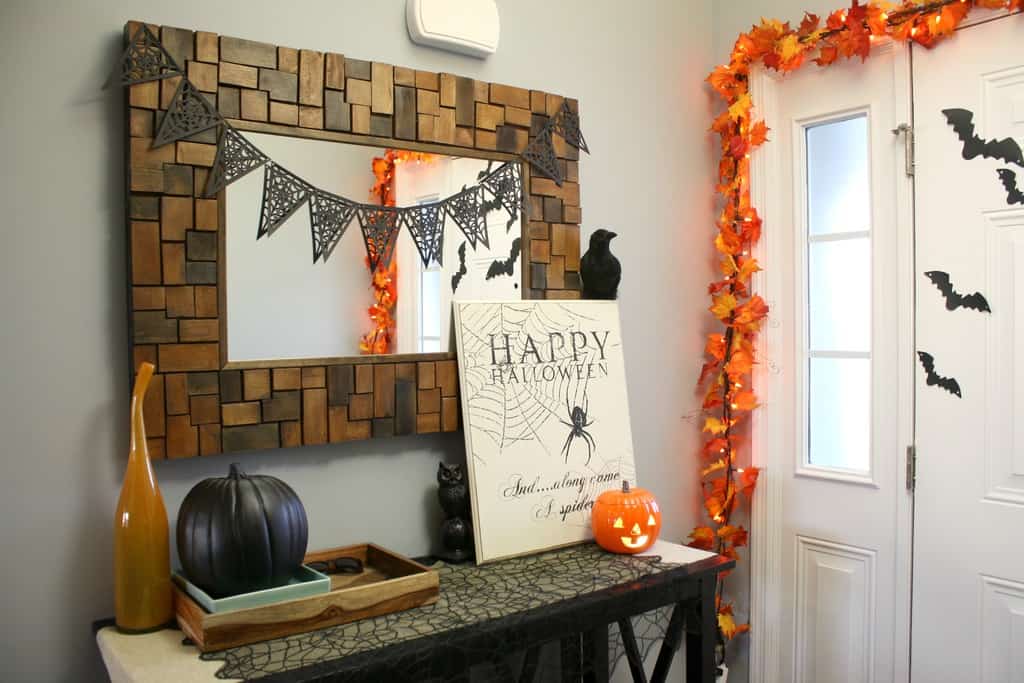
Our console table has a lot of spider stuff going on, which is strange, since I’m so afraid of them! I cut out the spider web bunting from a free SVG file with, once again, my Cricut. I spray painted a styrofoam pumpkin with chalkboard paint to entice Jeffrey to decorate it because ‘it’s manly’. It hasn’t happened yet. The little light up pumpkin is a ceramic pumpkin Jeffrey’s grandma made, fired, painted and handed down to him. The black crow, owl and spiderweb cloth were all found on clearance after last year’s Halloween decorations went on 90%off!

halloween-kitchen
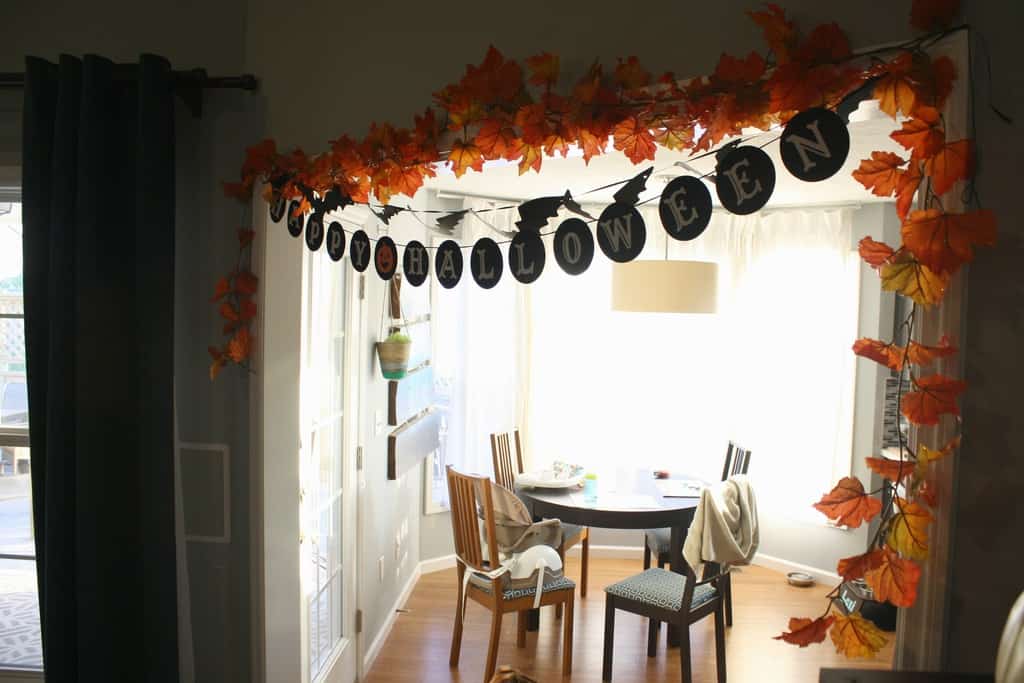
The entry to the kitchen is decorated with more fall leaves, the other half of the bat garland and a sweet Happy Halloween sign I found at Michael’s.

halloween-garland
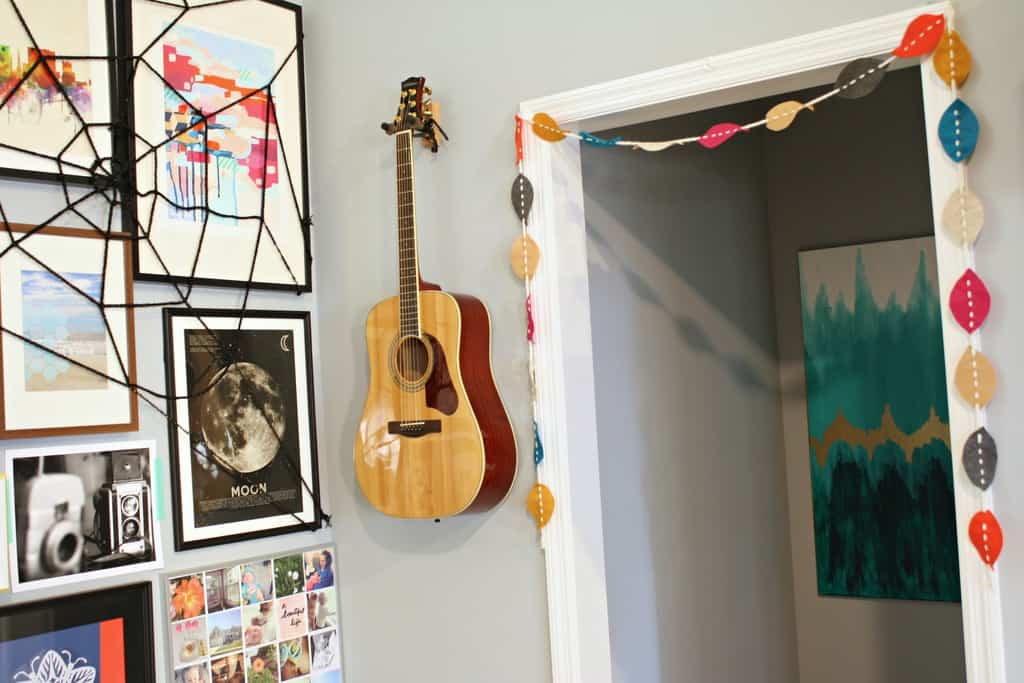
I decided to leave up the happy fall felt leaf garland I’d made over the entryways to our bedrooms. They were too cute and happy to put away.

halloween-mantle
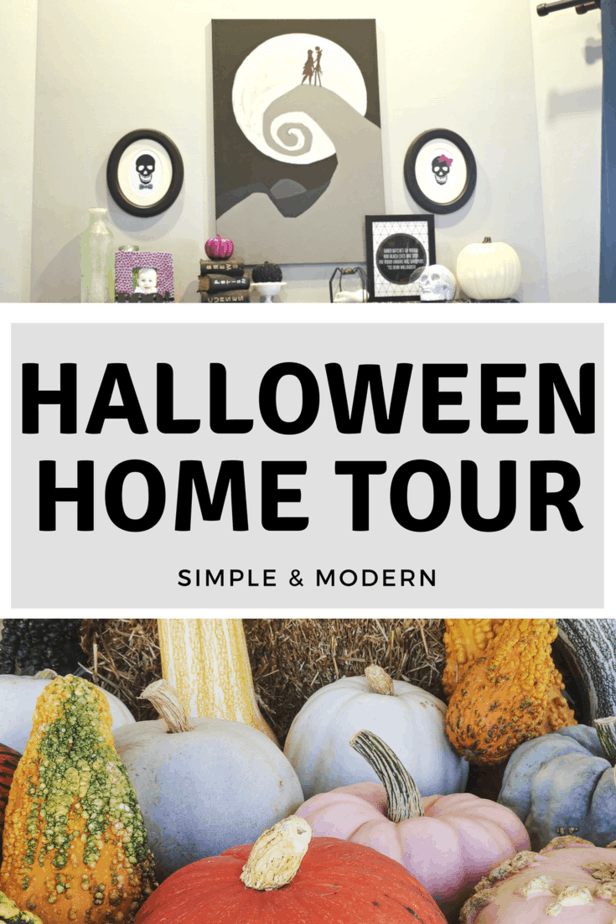
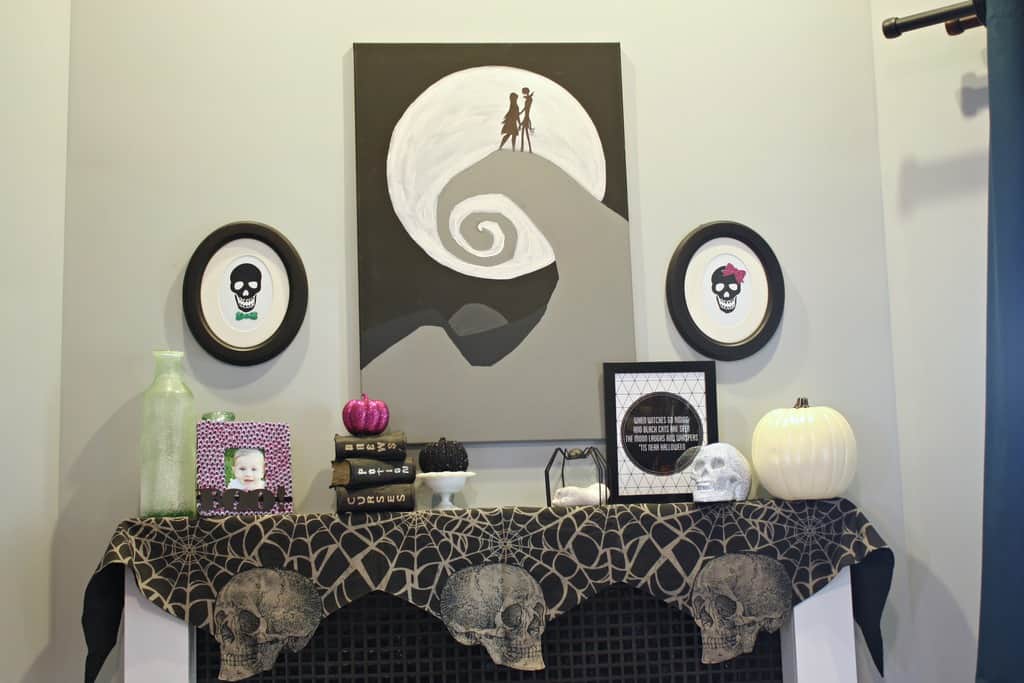
The mantle is my favorite part of our home to decorate for Halloween and Christmas. I change it every year and this year’s is definitely my favorite so far. The amazing skull bunting was found 6 years ago and is my favorite Halloween decoration. The giant canvas was painted by yours truly, as a nod to Jeffrey’s favorite Halloween movie, and the Jack and Sally were cut out by my Cricut.

halloween-mantle-left

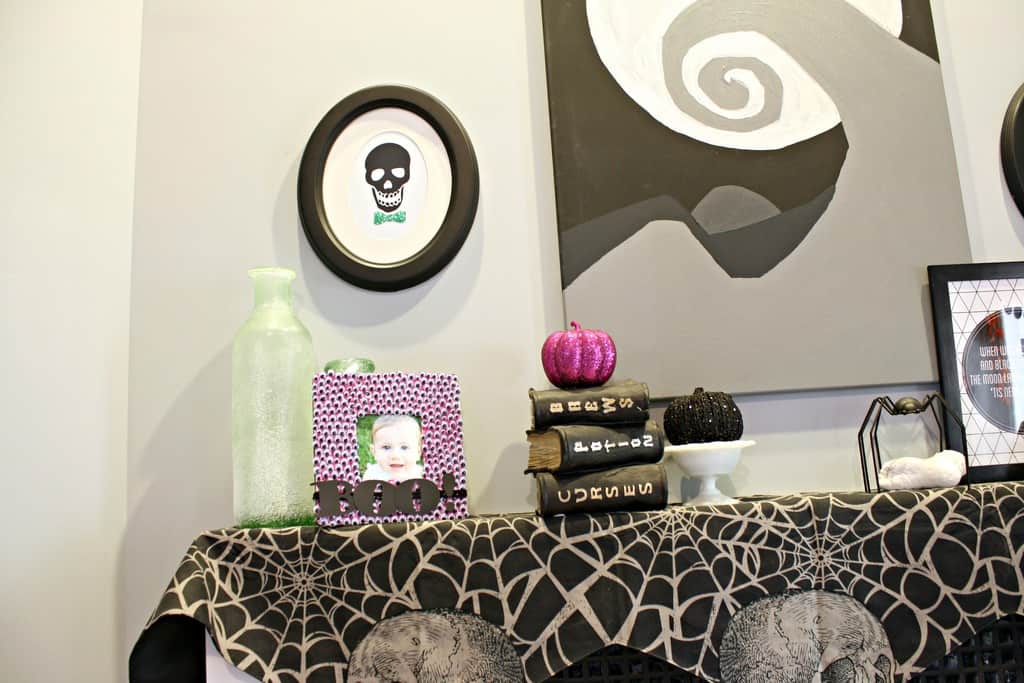
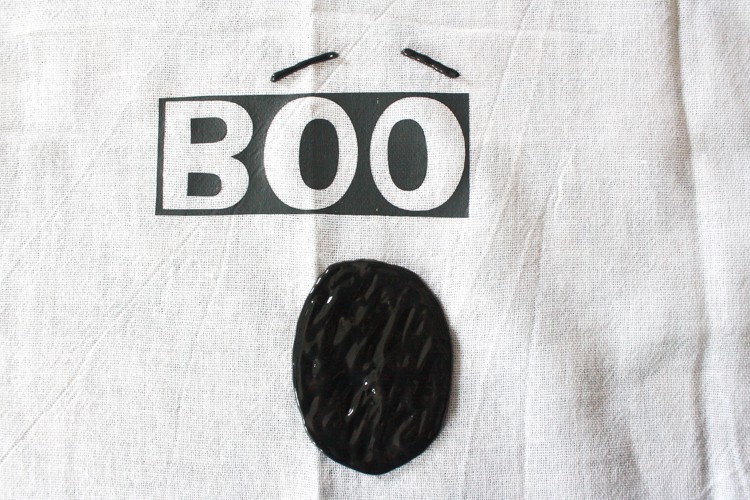
I made this fun googly eyed BOO! frame as a fun craft with my friend earlier this year. The sweet skull with the bowtie was a free printable from Persia Lou that I changed up a bit by using glitter scrapbook paper rather than gold flakes.

halloween-mantle-rightJeffrey and Soph made me Sophie’s foot cast for Mother’s Day this year and I think it’s the cutest thing ever, but also looks really creepy under the spider! I love the geometric/modern look of the Witch printable from Eighteen25 and even better, it’s free! The white pumpkin is my pumpkin to decorate when Jeffrey does his. We still have a few days, right?

sophie-spider-shirt

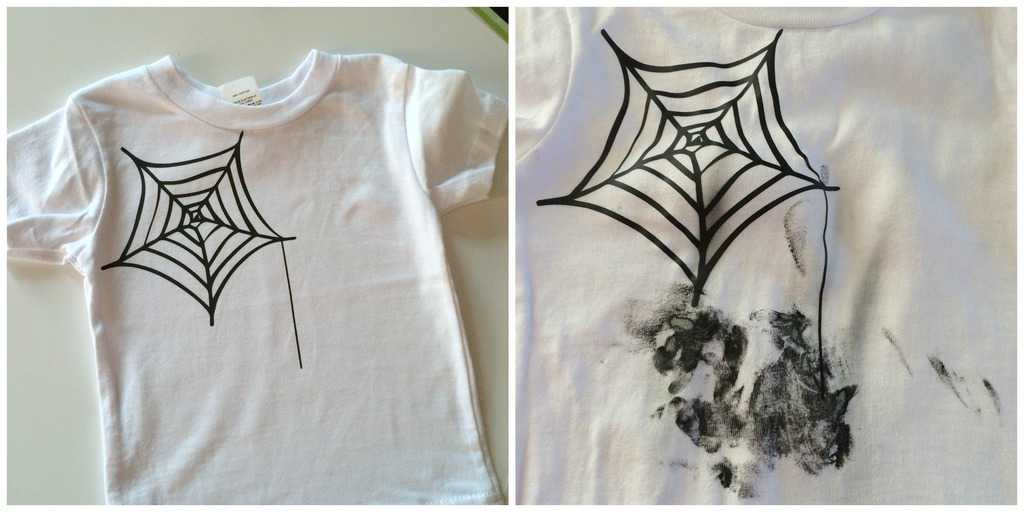
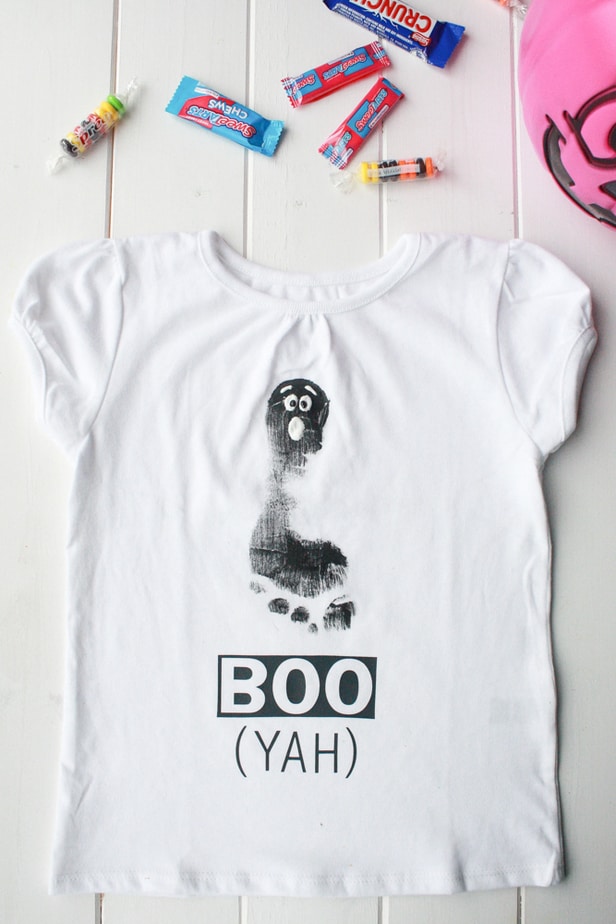
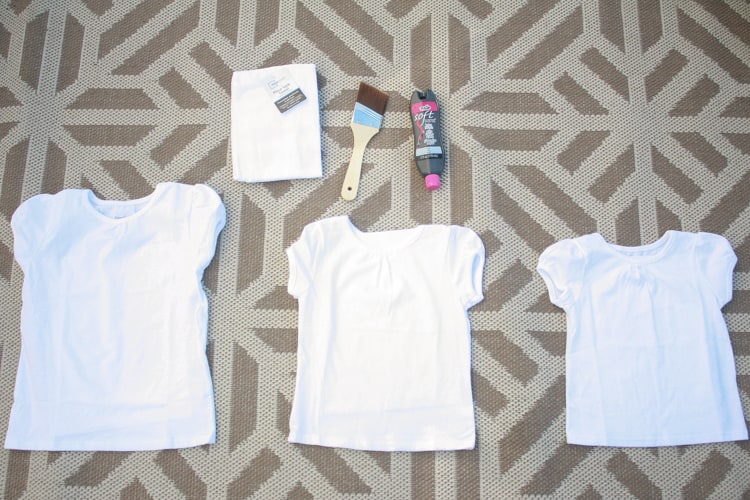
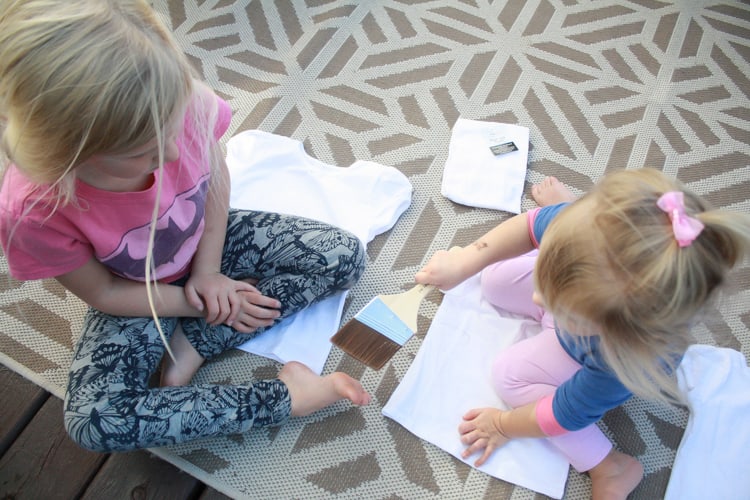
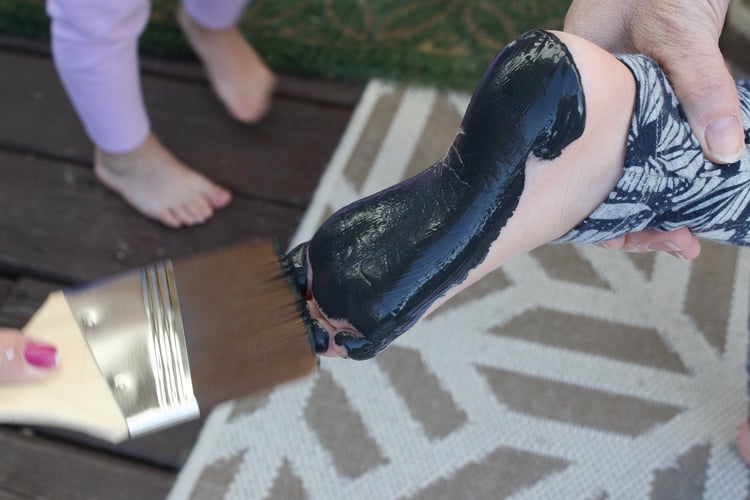
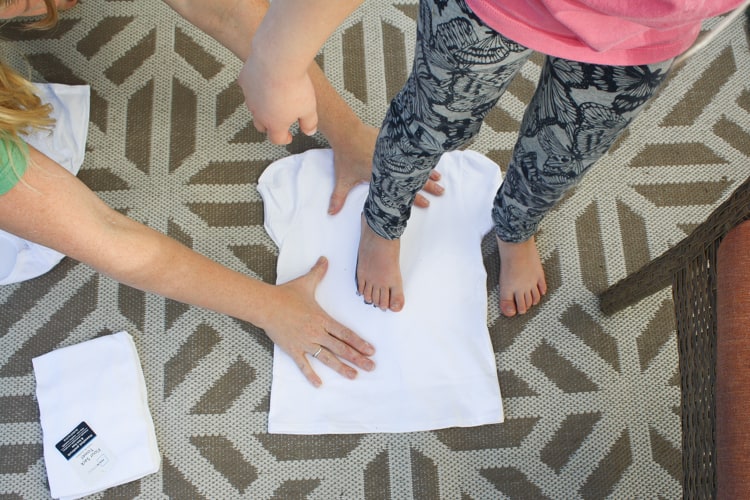
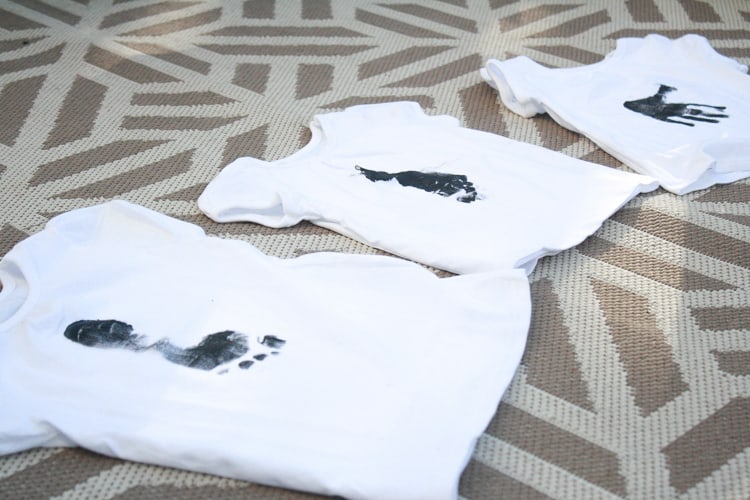
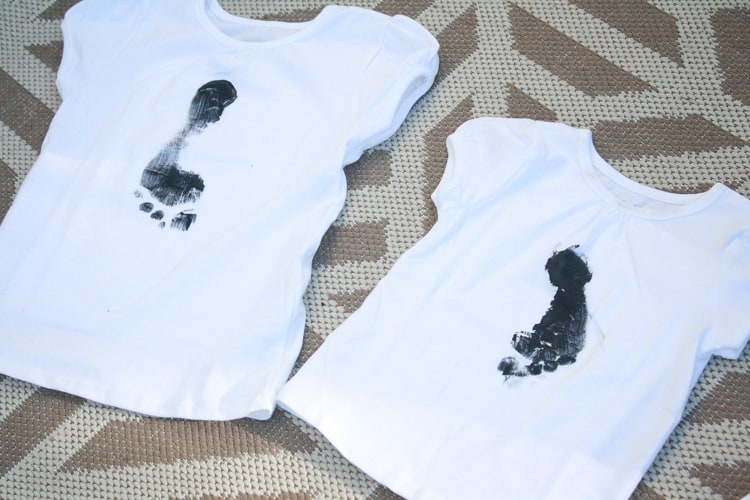
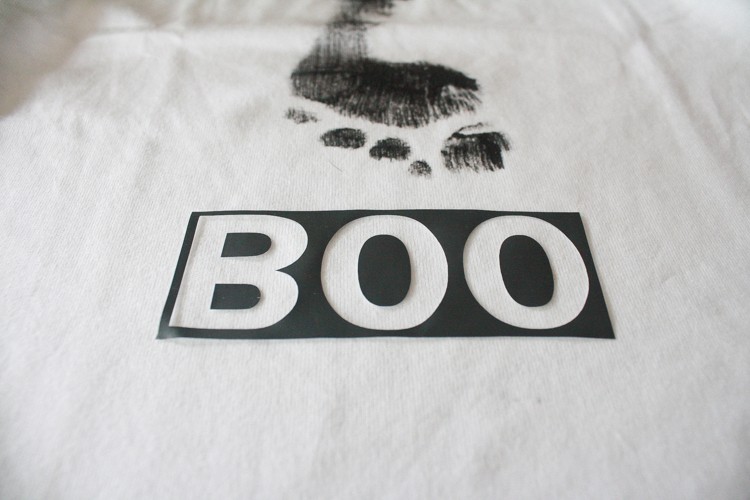
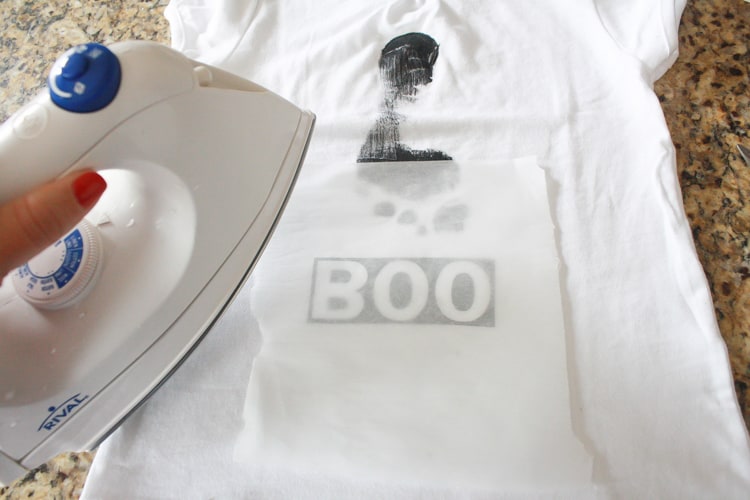
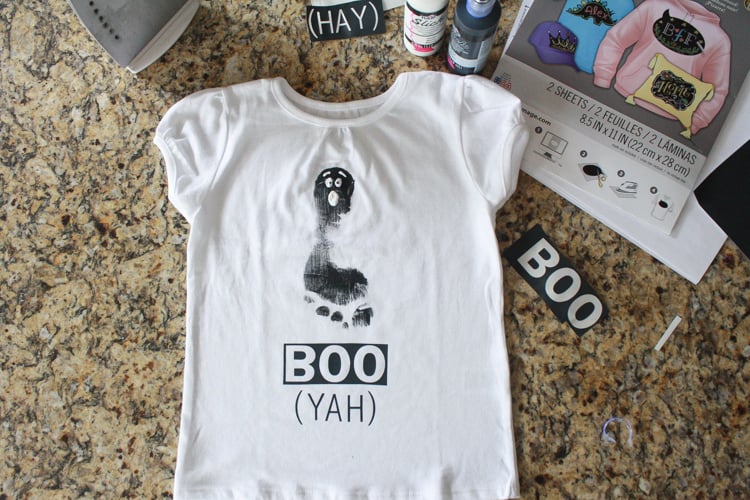
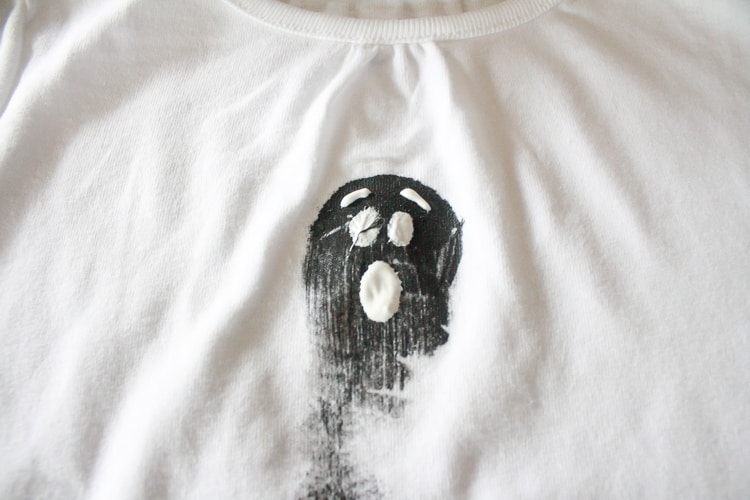
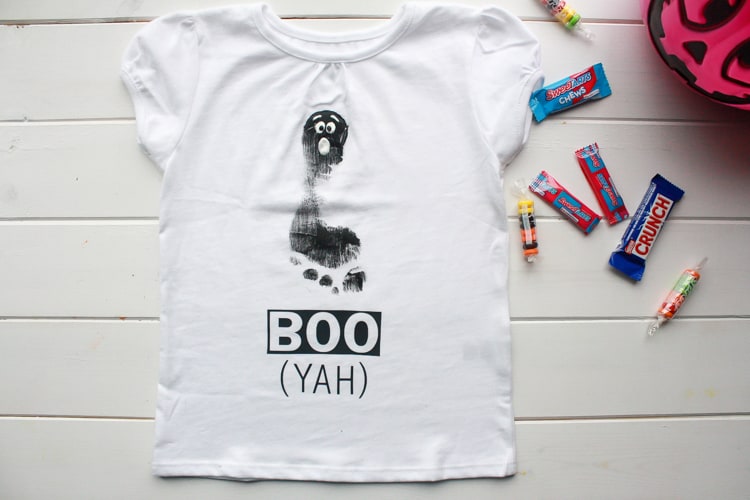
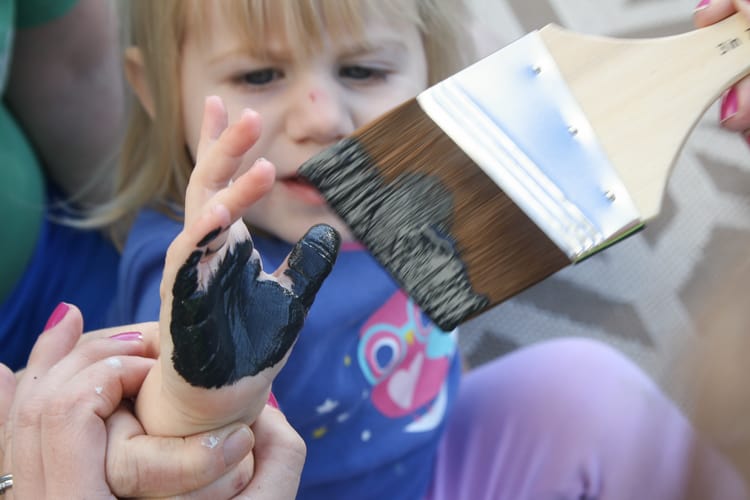
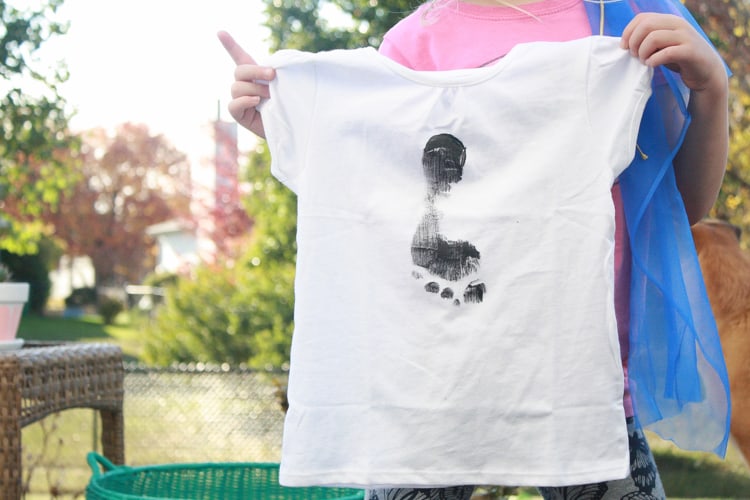
I have tons of other random pumpkins throughout the house and LOTS of awesome fall candles like ‘pumpkin waffles’ and ‘carmel cider’ so it feels like fall (and I’m constantly hungry.) I’ve done a few other Halloween crafts, that are not shown because they were fails, or I just didn’t finish them…like Sophie’s Spider Handprint shirt. We’re just going to say it was a spider that got smashed by Mommy. 🙂

Have you finished with Halloween decorations yet for this year? Do you decorate inside only or outside as well?

For more Halloween posts:

Halloween Street Sign

Halloween Ghost Toddler Shirt

Pin it for later:

DIY Halloween Home Tour


Halloween Street Sign

Hello to all you people itching to decorate for Halloween! I started early this year, by a week, and my husband was NOT happy. I had to though because our October weekends are already full and I really wanted to make a Halloween street sign! I’d seen street signs like this for weddings and have always thought they were cool but didn’t know when I’d ever use one…until now!

I loved making this sign because I could put our personalities into it. We made a list of scary/Halloween places and narrowed it down to our top 7 favorites. Unfortunately, the Shrieking Shack did not make the cut but I’m pretty happy with the ones that made it on the sign. Obviously to represent #teamEdward, I had to have Forks, WA. I also had a few nods to Disney with Jeffrey’s favorite Disney movie, Nightmare Before Christmas (as well as Monstropolis and The Haunted Mansion.) I’ve been told Crystal Lake and Elm St. are from popular scary movies of which I will never watch. I’m pretty sure everybody, young or old, knows the tale of The Headless Horseman so we threw Sleepy Hallow on as well. For us, this project was 100% free because we had every item on hand, but it would still be a fairly cheap project if you were looking to buy the materials. Check out the scrap wood pile at your local hardware store for free wood.

Materials Needed:

  • 7 ft 4×4
  • Several 1×3, 1×4, 1×5 or 1×6 boards cut at varied lengths
  • 8ft 2×4
  • Miter or Hand Saw
  • Chisel (optional)
  • Wood Stain
  • Brush and Rag for Stain
  • Screws
  • 2 Bolts & 2 Nuts
  • Acrylic Paint & Brushes
  • Letter Stencils
  • Polyurethane Spray

jeans

chisel-topThe first step is to wear the proper clothing. Flip flops are not the proper protection when working with large lumber and a saw but I can’t wear shoes because of my broken toe. Your husband’s jeans are the other piece of attire that you will want to wear, as you will get sawdust and stain on your clothes (don’t forget to ask first.)

Jeffrey had the great idea to have some of the boards angled, so he used the miter saw to cut the corners off the 4×4 and finished them off with a chisel to make the angles longer. This step is optional.

lay-out

base

As you cut boards, lay them on the sign to see how you like them spaced. By laying them out we decided which ones we wanted to have points on the end and made sure we didn’t have too many that looked the same. (Please forgive the photo as it was dark when we were building.)

For the base, Jeffrey used nuts and bolts to attach two 2ft 2x4s and screwed two 2ft 2x4s perpendicular on the ends of those boards, making an H.

painting-materials

forks

I stained the wood pieces according to the directions on the can. I stained them by the motion detective security light that constantly was turning off. Mistake number two (the first was wearing flip flops.) Thankfully, I didn’t mind if the stain was uneven and having some boards darker than others, because I wanted them to look different, as if they were added at different times. I also liked that we had several types of wood so the stain ended up being varying shades of brown.

I was not meticulous on my hand writing or the evenness of the paint. Not sure why, but in my mind, the people who would write the signs didn’t really care that they looked nice? Not sure where I got that, but I feel since it is for Halloween, it can be a bit sloppy. I used a round tip brush for the cursive signs.

halloween-town

stencilFor one sign, I did a sloppy job of painting an alphabet stencil. My husband suggested I use Sophie’s hand in red paint to smear on the sign. I thought using a baby’s hand print would be too creepy. Also, by adding another element on top of the words, I’d probably mess up the sign and make them too hard to read.

street-signs

attatching-signs

Once I wrote on all of the signs, we sprayed a clear polyurethane on the front of the boards. See the bottom right area where it’s sprayed white? I had the wrong can of spray paint and used white instead of clear! Mistake 3. I mimicked the white spray paint up in the top left to even it out and didn’t worry about it. Mistakes happen!

We attached the boards by pre-drilling a hole in each sign and then screwing it to the 4×4. We used only one screw in each board so we could adjust them once they were all added to the post.

Tada! Our sign up in the yard! I still want to do quite a bit more decorating on the porch for Halloween (the leaves are just fall decor.)

finished-sign

finsihed-sign-2I’m going to add tomb stones around the base and light everything with can lights. I may add a few skulls or bone or spiderwebs as well. What do you do to decorate for Halloween? Do you decorate outside too? Are you the playful Halloween decor type  person or a gruesome decor type person? Sorry, neighbors, for being ‘that neighbor’ who puts their Halloween stuff up in September!

Pin it for later:

office-garland

Fall Leaf Garland

Halloween Ghost Toddler Shirt

This DIY Halloween Ghost Toddler Shirt was so fun to make but I highly suggest having more than one adult help with the process so you do not have little black painted foot prints around your house!


Halloween Ghost Craft

If You Can’t Find What You Want, Make It.

I searched through several stores in town (Kohl’s, Walmart and Target) to find a Halloween shirt for Sophie and found zero in her size. I’d found one pair of PJs but knew in my heart that it would look like she was wearing PJs to school if I sent her in that shirt. It’s possible that there was a huge baby boom around Sophie’s birth date because I’ve always had a hard time finding her size in stores.

A friend suggested I make a shirt. After last year’s failed attempt, I knew I wanted a second shot at the ole ‘footprint character’ project. You know the one…where you turn a foot or hand into pretty much any object.

Halloween Ghost Shirt

Halloween Ghost Shirt

Halloween Ghost Shirt

Halloween Ghost Toddler Shirt

Materials Needed (affiliate links included):

  • Tshirt (any color works but be sure to use a contrasting color for the paint)
  • Paint brush (any type of paint brush works, just use what  you have on hand)
  • Matte fabric paint
  • Puffy Paint
  • Scrub brush
  • Dish with water (or nearby sink)
  • Tshirt Transfer Paper
  • Parchment paper
  • Iron
  • Cutting machine (I used a Cricut Explore but you could also print out the text on your printer or use a stencil to cut your text out of transfer paper)


Halloween Ghost Shirt

Halloween Ghost Shirt

Halloween Ghost Shirt

Game Plan

With a water dish for clean up nearby, paint a thick, even coat of paint on the child’s hand or foot. We had Fiona (5) do it first so the little girls could watch the process. Once the foot is covered, have them hold on to a chair while you press their foot down evenly onto the shirt.

Pay attention to the direction of their foot. The heel should be at the neck of the tshirt. Make sure to leave room for your text. You could also put the foot lower and have them write a ‘BOO’ speech bubble from the ghost.

Halloween Ghost Shirt

Halloween Ghost Baby Shirt

You Need a Helper

If you are doing this project with children under 5, I suggest having two people help the child. One person paints while the other holds their foot and places it on the tshirt. Once the footprint is on the shirt, the painter gets the dish and scrub brush ready to quickly transfer the child’s foot to the water. The fabric paint dries quickly and is difficult to clean if not addressed after a minute.

If your child, like mine, does not want to have paint on their feet, suggest their hand. It won’t look as much like a ghost but it’s still darling and will be a fun memory for you to share. We let the tshirts dry over night before adding the text and faces.

Halloween Ghost Shirt

Halloween Ghost Shirt

Halloween Ghost Shirt

Cricut Cutting Machine

I created the BOO (YAH) text on my cutting machine and had it cut on leftover chalk board transfer paper from last year’s project. Use your transfer paper’s instructions on cutting (whether it should be a mirror image) and applying. The chalk board transfer paper isn’t recommended for this project only because it’s more expensive and won’t be used as a chalk board.

I urge you to read the instructions twice or even have a second pair of eyes read it over. My husband and I both read the instructions and I still did it wrong the first time.

Halloween Ghost Shirt

Halloween Ghost Shirt Mistake

Try Try Again

Once the text is applied and cooled you can add your ghost’s face using puffy paint. We wanted each of the girl’s shirts a bit different so I made the text and faces different on each shirt. I also put my hand in Fiona’s shirt when I was moving it to a better drying location. I simply touched it up with more puffy paint and it worked out fine!

It’s literally impossible for me to make a DIY project without messing up at least one thing. It never deters me from trying again.

Halloween Ghost Shirt

Halloween Ghost Craft

I also found a white tea towel at the grocery to make a festive Halloween Kitchen Towel. I often make things for other people because it brings me the most joy, but I was happy to have a reminder of our craft day together that I’ll be able to pull out each year with my Halloween decorations.

Have you attempted the ‘foot character’ craft with your kids yet? Any epic fails like my smooshed spider shirt? I think this craft would be even more fun with older kids (5-10) at a Halloween party because they could do their own ghost faces and word bubbles. Will you attempt a Halloween ghost toddler shirt this year or will your child be wearing Halloween PJs to school (or maybe you’ve found the jackpot of Halloween shirts)!

Related Posts to Halloween Ghost Toddler Shirt

Pin it for later:

Halloween Ghost Toddler Shirt

This past week we had a ton of fun celebrating fall break. Since we’ve been working so hard on the house lately, I wanted to take time to really focus on our friends and family. We started the week by celebrating Sophie and her Great Grandma’s (91) Birthdays in Chicago. I had a fun Girl’s Morning Out with my niece Fiona by getting a manicure at the cutest nail salon. We picked up Sophie and went to explore the 1830s at Conner Prairie. That night we made these cute Halloween ghost shirts with the girls, played board games, and had our first cousin sleepover at our new house. The rest of the week was spent visiting with friends at Conner Prairie and The Children’s Museum of Indianapolis. We finished the week off by more Birthday celebrations at my parent’s house.

Fall Break Activities with Kids

Today I’m over at my friend Jocelyn’s site, Home Tome to share how I made this adorable Halloween ghost toddler shirt with Sophie and her cousins. It was a super easy project but was very helpful to have a second set of hands to help me because our artists ranged from age 1 to 5 years.
Halloween Ghost Craft

Halloween Ghost Shirt

What did you do on your fall break? I’d love to know about any Halloween crafts or treats you made!

Google+