Organization

Organizing Craft Supplies

Organizing craft supplies in a small space is my worst nightmare. I am one of those people that ENJOYS emptying spaces and re-organizing them. I especially get a kick out of doing it for other people (which is why I was a Personal Organizer back in Illinois!) However, organizing a small space that has to hold a LOT of ‘necessary’ items is frustrating.

There are two things I have learned through my years of helping others organize.

  1. You need to take out (donate, trash, sell) way more than you think. It’s likely that your space needs to be thinned by 50%. When you take everything out, only put half as much back in. I can admit that this closet from my craft room needs to be thinned by 50%. When I got to organize it again next year, that’s what I’ll do. Which leads me to number 2.
  2. You might have to re-organize a space every year (or every 6 months) for a couple years before you find a system that works for your family. Over the years this closet could look dramatically different. There might be more kid crafting supplies and board games and less scrapbooking stuff. Who knows? The point is, give yourself grace when the need comes to re-organize.

Organizing Craft Supplies

Organizing crafts is messy and I wasn’t sure exactly how to show you everything since there is SO much in such a small area. I thought numbering the shelves and describing what’s on them would be the most efficient way to show you my goods.

craft closet

The Amazon links below are affiliate links. I will earn a small percentage of your purchase. 

Craft Closet 1

Guitar amp, a bag with ancient gaming consoles and my book bag with supplies from my art class a couple years ago.

CRAFT CLOSET 2

Disney puzzles, chess, hammock, a basket with misc. cords and coloring books.

CRAFT CLOSET 3

Party board games, shoeboxes full of cards for Sophie, our wedding memorabilia and cards to send out, Smash Book basket (whatever current Smash book I’m working on has all supplies in there for easy access), sewing machine, computer/photo paper in magazine folder, and large paper cutter.

CRAFT CLOSET 4

Tote filled with fun crafts (buttons, pipe cleaners, friendship string, heat beads), tote of punches, glue gun and embossing gun, tote of scrapbook paper, magazine folder of misc. scrapbook paper, a Recollections storage unit with stamps in the left drawer and stickers on the right, a photo album of my plant tags (so I know how to care for the plants in my yard), twine, and a 3 hole punch.

CRAFT CLOSET 5

This is the messy part. The floor holds fabric for projects yet to be completed, (stockings and a blanket for Lexi) Scrabble, Rock Band drum kit, transfer paper for my Cricut, all the current scrapbooks/Smash books I’m working on and my Cricut (I know, I need a better place for it!)

CRAFT CLOSET 6

Rarely used games, a tote of cards and dice games and a tote of poker chips.

CRAFT CLOSET 7

Our most played games, (these get played about once/month) our camera bag and photo reflectors. Under the camera equipment sits my Dad’s tripod and a few prepped canvases for a quick craft. I like prepping canvas all at once so they have time to dry so I can get to the painting part when I’m inspired.

CRAFT CLOSET 8

This 6 cube storage unit holds a TON. On top is my massive bead box. Top left: crayons, colored pencils, markers, watercolor, and kid scissors. Top right: ribbons and a few magazines. Middle left: acrylic paints filled to the top (my inspiration for getting this organizer b/c they were spread between 3 totes before.) Middle right: paint brushes, gesso, brush cleaner and other tools. Bottom left: tulle and small scraps of fabrics. Bottom right: sewing supplies (needles, pins, thread, quilt cutter, measuring tape, heat’n bond.)

While I look at this photo, the closet still looks insane and unorganized to me. I at least know where everything is and it’s easy to put away. The main thing is that the floor access to the crawl space is clear for tornado warnings!
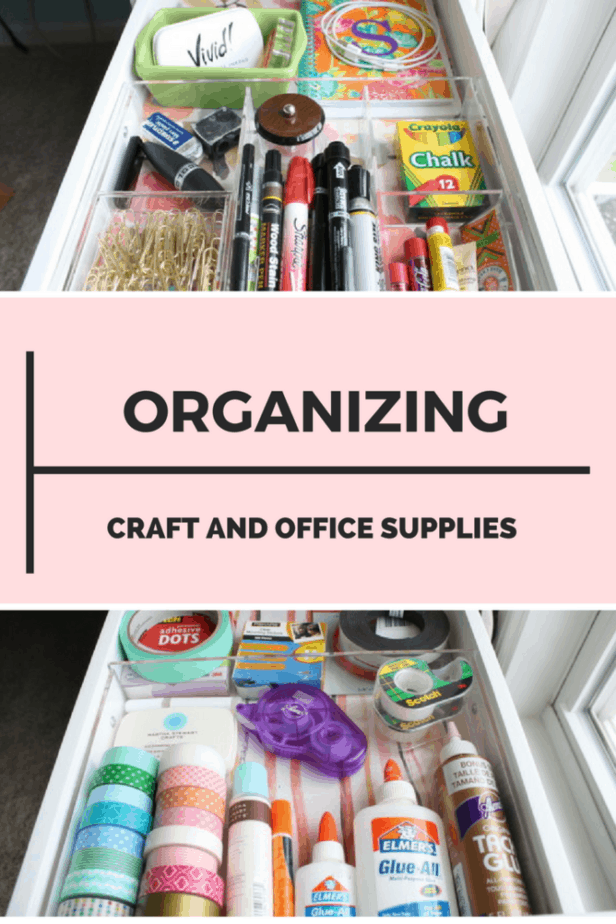
Desk Organization

My desk has an Alex drawer unit that holds the supplies that I use most often. I just recently bought this unit and am so happy with it because it has really long drawers and I have room to grow.

Craft organization

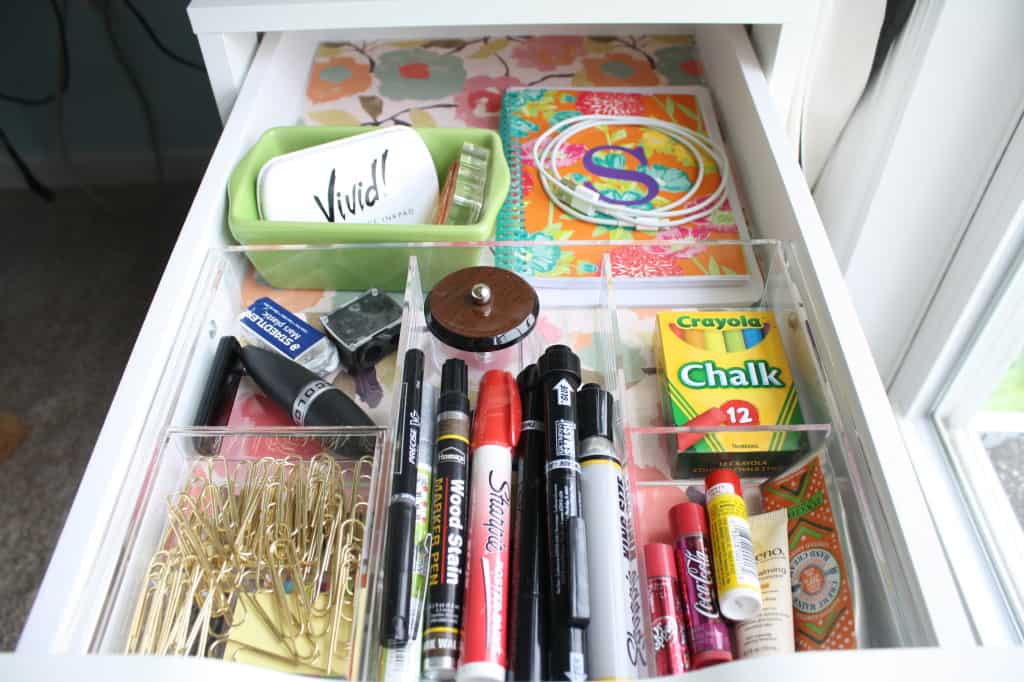
The top drawer has my favorite expandable acrylic organizer (I also have one for my makeup.) This drawer holds my paperclips that sit on top of my post-it notes. It also has my pencil sharpeners, eraser, USB stick, extra markers, lip chap, hand lotion, chalk, notebook, iPhone cable, return address stamp, ink and stamp roll.

Office and craft room organization

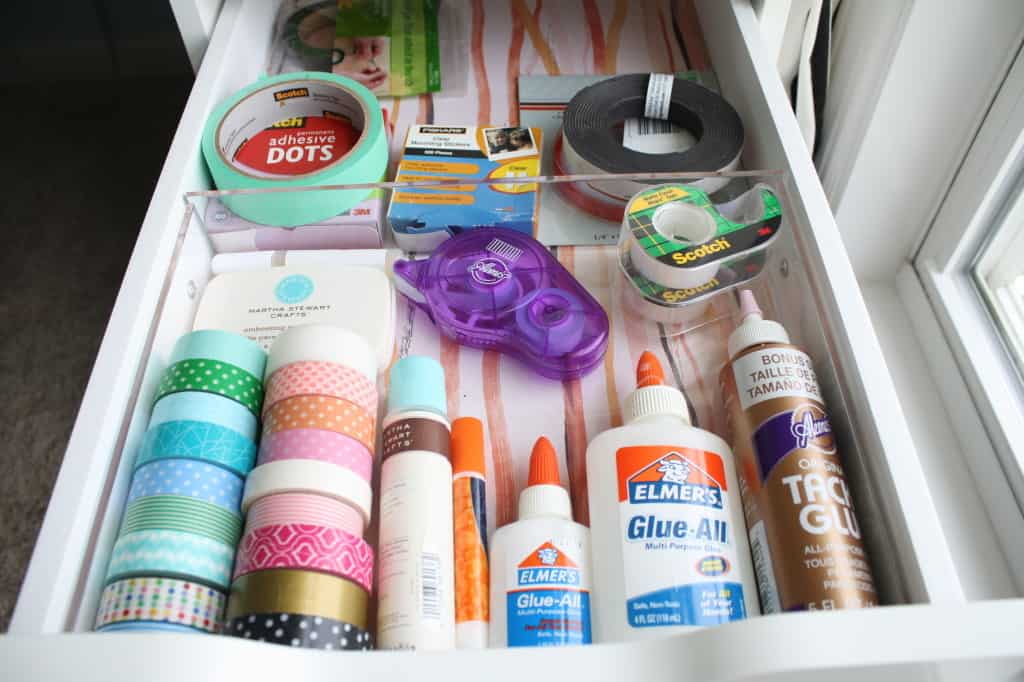
The second drawer down is my adhesive drawer. It holds my washi tapes, embossing pad, glues, scrapbook tape, magnetic tape, glue dots, floral tape, and acrylic tape.  My favorite adhesives, besides the beautiful washi tapes, are the Scotch glue dots and the Martha Stewart glue (in case you were wondering.) I also really love my Aleen’s scrapbook tape for scrapping.

IKEA Desk organization

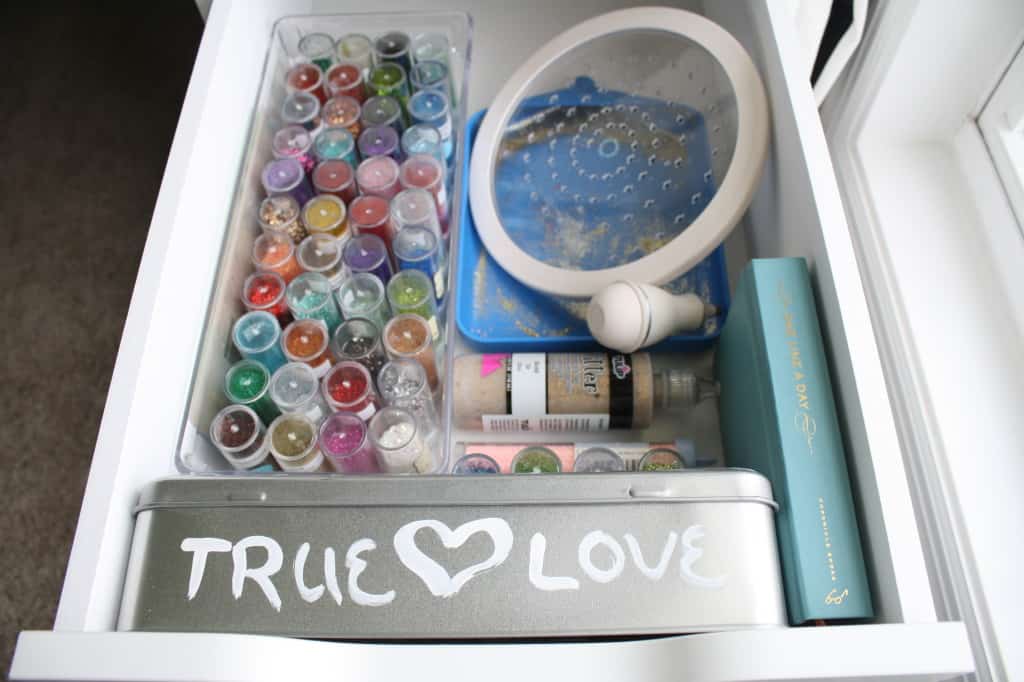
The third drawer down shows my unhealthy addiction with glitter. It also holds our True Love tin (a wedding gift from my sister) containing mosaic tiles. I also have my One A Day journal, and the Martha Steward circle cutter.

craft organization

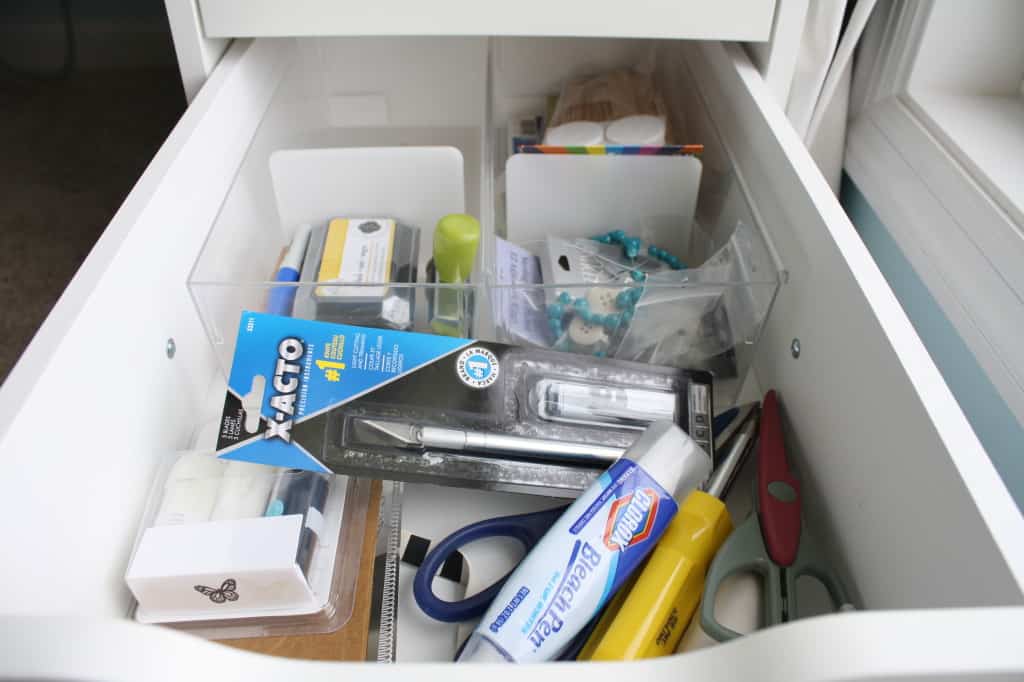
The fourth drawer is my obligatory junk drawer that has stuff that I use but don’t really have a place for. Embossing powder, extra x-acto, bleach pen, fancy scissors, screwdriver, date stamp, extra ink pad, stone beads (I guess I do know where those can go…) and buttons.

final-Alex-drawer-IKEA

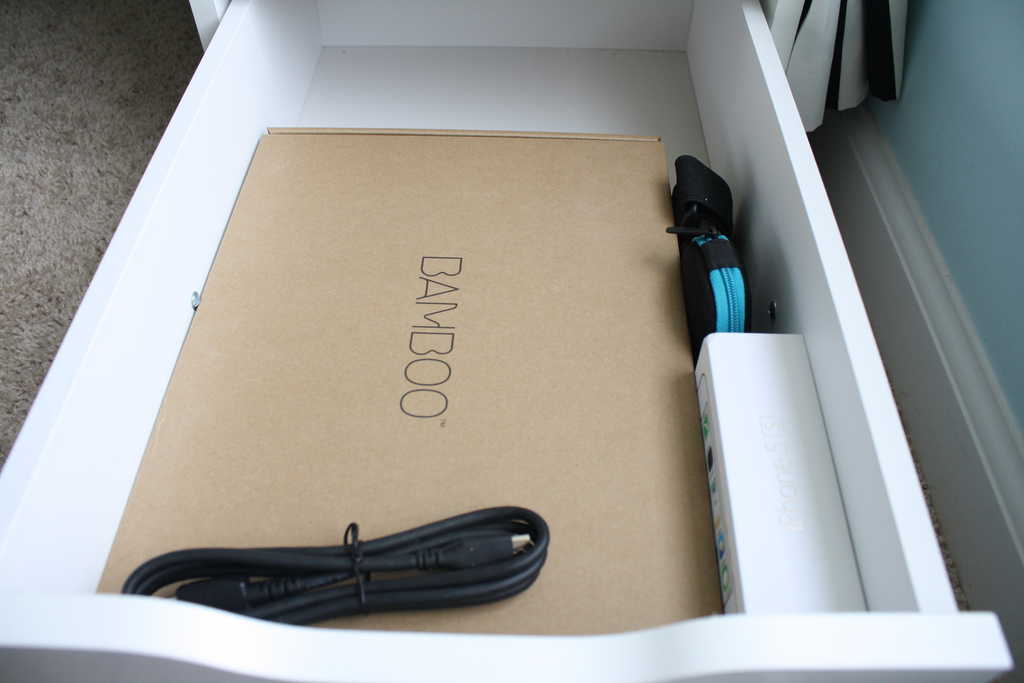
The final drawer is my techy drawer because it holds extra cables, my iPhone box, headphones and the awesome Bamboo tablet that I NEEDED but have hardly used. *looks down and shakes head*

If you’ve ever been curious as to where this blog originates, it is here:

blogging-desk

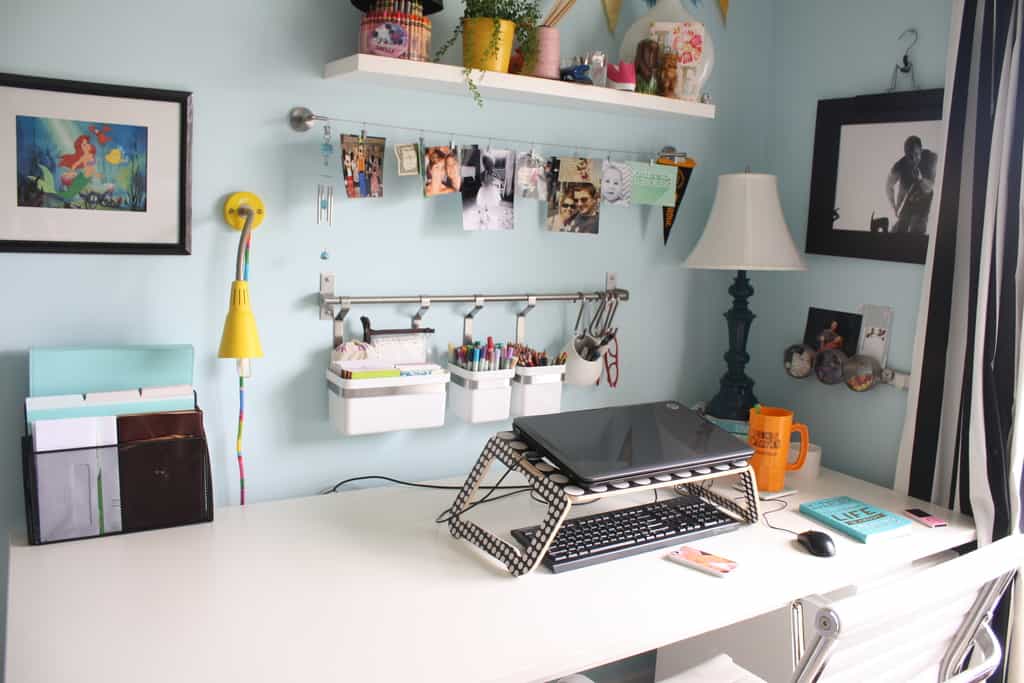
This shot was from a couple weeks ago, before I got my new lamp and before I started trying to make a dent in my scrapbook pile. I like using a laptop rather than a desktop so I can move it to the couch if we’re watching a movie or if I’m using the desk for an extensive project.

The shelf up top holds my ‘no touching unless you’re Shelly’ carousel of crayons, fake plant, twine, mini 3-hole punch, tape, stacking dolls and random vase. I also have my favorite Disney princess (Ariel) and favorite musician (Trent Reznor) on the walls. You’ll also probably recognize my friendship lamp!

wall-storage

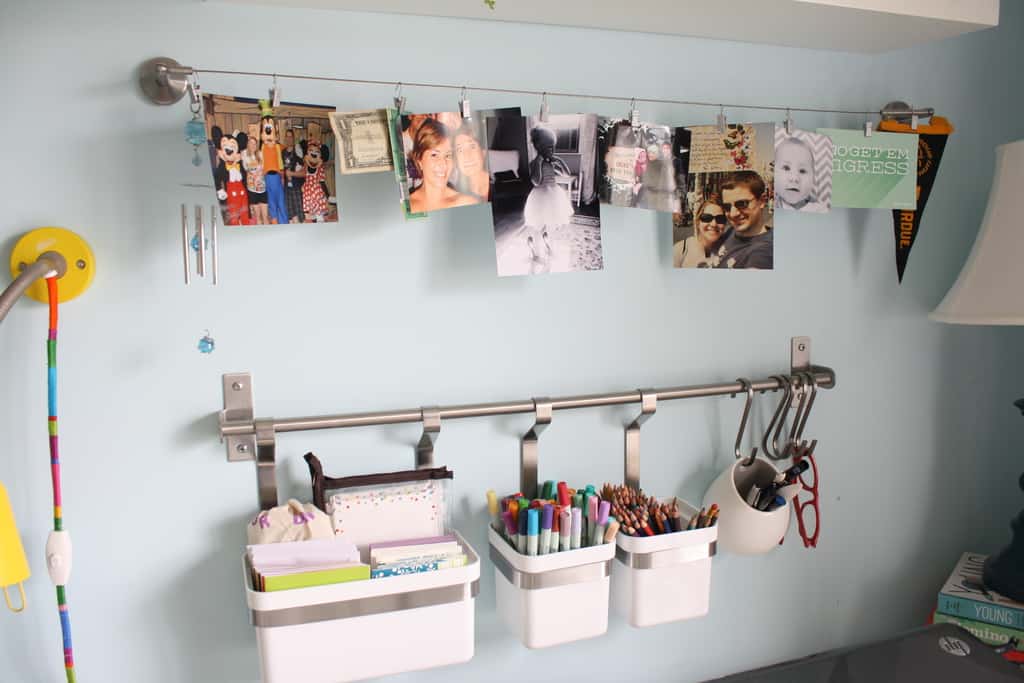
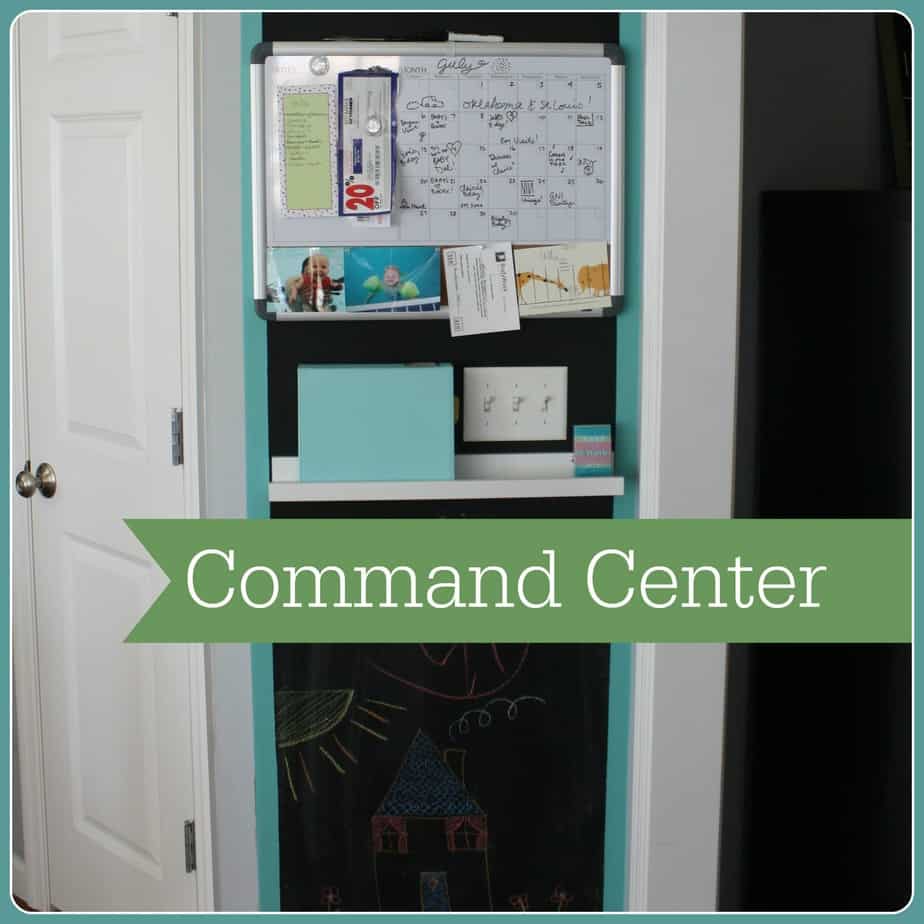
The area on the wall behind my computer holds the photo wire with some of my favorite memories that I often rotate. I also have a wall container unit that holds my stationery for quick thank you notes, markers, colored pencils, and my favorite writing utensils. I have to admit though, my desk does not always look this empty. I clean it to this state once every couple of weeks, but usually, it has some sort of project occupying at least half of the desk. Here’s what my desk looks like tonight:

messy-desk

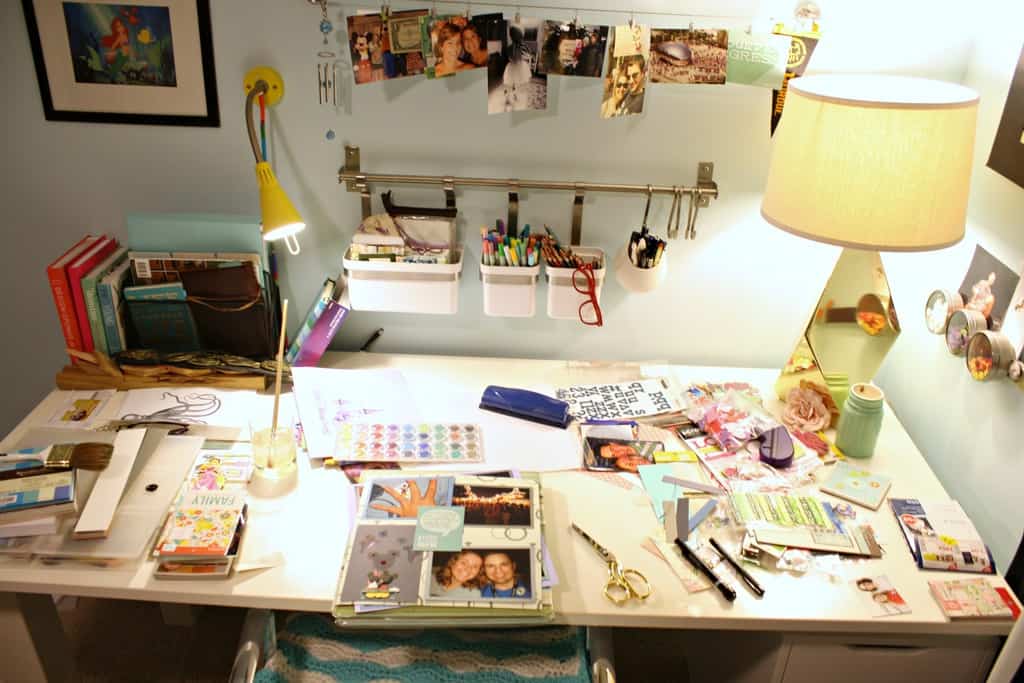
My desk will remain like this until I finish ONE scrapbook. In case you were wondering, I’m working on our Disney Trips album. All in all, I know where everything is and I don’t have to make too much effort trying to get it out or put it back away, which is key in keeping things organized. I have also promised myself to not buy any more scrapbooking materials until I go through half of my supplies.

This is hard because I really want to see what Project Life is all about! Does anyone else have a similar method or do you organize completely differently? Similar messy desk syndrome at least? ๐Ÿ˜‰ I’d love to hear how you organize your crafts or if you have any suggestions to help me improve my situation!

Related posts to Small Space Craft Organizing:

https://diymamablog.com/bathroom-linen-closet-organization/
https://diymamablog.com/homeschool-organization/

Pin it for later:

Organizing craft and office supplies like a professional organizer

Family Command Center

Hidy ho good neighbor! Do you have a hard time keeping everyone’s schedules in order, argue over what to eat for dinner or always looking for that list for the grocery? Well look no further! I’m going to show you how to create a family command center that can organize all of your family’s information in one place! Ok, I’m done talking like an infomercial. Not sure where that came from.

command-centerThis project was ultimately a success but there were a lot of failures along the way! It started back in February when I thought it would be a good idea to paint in the middle of the winter and not need to open all the doors and windows. I was very wrong. I started with a magnet paint so we would be able to put those magnet letters or other learning tools on the bottom for Sophie. 1. Magnet paint is extremely harsh smelling. 2. It takes FOREVER to dry before it stops smelling. 3. It requires more than one coat. After evacuating our home for several hours to Barnes and Noble, we come back home to the wall not even able to hold a piece of paper with a magnet (and still smelly.) I tried another coat and it still wasn’t a strong enough hold so I gave up on the magnet portion of the wall and waited until spring to do the chalkboard portion. Unfortunately, I can not give you any tips on doing a magnet wall since it didn’t work for me but I may try again in the future.magnet-wall

A few months later, I painted the chalkboard wall. I had to sand down the magnetic surface because it was too textured. Once I wiped my surface clean, I used a roller to apply two coats of the chalk board paint (letting it dry for 24 hours in between each coat and before writing on the wall.) I also taped off where I wanted my boarder. I had to use a boarder because I got outside of the lines with the magnetic paint and didn’t want to touch it up with our grey paint. Happy accident. Also, notice I painted this right before Father’s Day. ๐Ÿ™‚

chalkboard-paintI painted the boarder with a regular paint brush to make sure there wasn’t too much paint on the brush which kept it from seeping under the tape. I used Target’s smallest size tub of Devine Color in ‘Pond‘ for the border. Our command center is as you walk into our kitchen, making it a central location for us to easily access it. Once everything had dried for a day, I hung everything we needed to be organized.

locationFor us a large dry erase calendar works well for a monthly at-a-glance snapshot of the big events that are going on. There is also room for our to-do list, coupons, and a few pictures.

calendarUnder the calendar, I hung a picture ledge that holds our planner and chalk. Our planner has been used a lot more regularly now that we have it in a prime spot that is easy to access. We use it for all scheduling and meal planning making it easy for either of us to see what’s going on anytime.

planner-shelfThe bottom portion of the wall is reserved for fun! It is currently showcasing art by my niece, Fiona, and myself (who still draws houses like I did in 3rd grade.) I really love our wall. There are some splatter marks I’ll eventually (who are we kidding) never touch up, paint on the light switches and the frame at the top is not centered. This is what makes it a DiY project and is worth being proud of (even if it took 6 months to complete.)

artHow do you keep your family’s schedules in order? Anyone have their mail sorter in their command center? We’re terrible at going through our mail as soon as it comes in the door. I should probably go work on my house drawings. Let me know if you’ve used magnet paint and if you were successful!

Jewelry Dish

Hello Gorgeous! Do you love jewels? Do you have an amazing display for all your favorite pieces? Do you always take your jewelry off every night and put it back in it’s designated home? Me neither. I mostly wear the same gold triangle studs, wedding ring and very strong gold necklace that my daughter can not break no matter how hard she pulls. It has her name on it so I guess she assumes it’s hers. If I DO switch up my jewelry for a special occasion, it usually ends up sitting on the sink or my bedside table for…oh…weeks. This needed to change, which is why I made this jewelry dish.

jewelry-dishMaterials Needed:

  • White Plate
  • Spray Primer
  • (2) Spray Paint
  • Art Tape
  • Painter’s Tape
  • Mod Podge
  • Foam Brush

The first step is to wash your plate. Make sure all dust and residue is cleaned from the plate. The next step is to tape off the design you’re wanting with the art tape.

art-tapeOnce you have your design laid out you need to prime your plate so the spray paint will adhere. If you buy a spray paint that works on porcelain this step is not necessary (but I used spray paint I had on hand.)

primer-sprayOnce the primer has dried, tape off the first color section. Make sure to follow the instructions on your can for drying time. If it is too hot or humid the paint will not dry well and the finished product will look messy.

first-blue-tape

Once the first section of colored paint is dry, remove the painter’s tape and re-apply to the next section

second-blue-tape

This is the best part! Remove the painter’s tape followed by the art tape. When removing any tape, pull at a 45deg angle. This will make for a cleaner line. Once all of the tape is removed, add a coat or two of mod podge for protection. I knew I would be dropping watches on this dish so I wanted to be sure the paint would be protected.

jewelry-dish-closeI loved the way it turned out! It’s different than anything I currently have in my home. I knew I wanted a soft feminine touch (which is why I have the mint green) mixed with a graphic design (the gold stripes.)

jewelry-dishNow, if my jewelry is laying out for a few weeks before I put it away, it looks beautiful! It’s usually my most special pieces and I love looking at them all together on my bedside table.

bedside-tableWhat do you ladies do to keep your jewels organized? Anyone else call their jewelry ‘jewels’? It makes them sound more sophisticated!

Organization

organizationI believe this whole heartedly! People, like myself, may get anxious, irritated and disgusted with clutter but I also believe that I really am just too lazy to look for things. If I can’t find something in it’s first two places, I usually give up. I often don’t do craft projects JUST because my craft organization is insane. I do my best to completely stay out of the garage because it is a serious mess. I bought a small hammer, measuring tape and screw driver to keep in the kitchen JUST so I don’t have to go find one of the five we already have. Yes, if we just had LESS, it would be much more manageable and we’d have a place for everything and always be able to find what we’re looking for. In a perfect world. ๐Ÿ™‚

Shelly

Corner Sink Organization

Corner Sink

WARNING: This will be the ugliest photography you have and will ever see on my site. (And that’s saying a lot for my novice photography skills!)

I couldn’t shoot this area of the kitchen very well because it’s deeeep in the corner with all the beautiful windows above the sink! However, I posted it because I KNOW there has to be other people out there with these unfortunate corner kitchen sinks. I do not have a before shot of this ‘situation’ but I will tell you that nothing was accessible without something else falling over and leaking everywhere! The game changer:

51JhG8GBtwL

This is my new favorite kitchen addition (besides the automatic pantry light when we open the door…I know…my husband is a genius.) I want at least 2 more but would like about 7 more throughout the house! Only problem is, their a bit steep. The best thing about these drawers is that they come in many different sizes and shapes to fit your space!

Here’s the odd corner sink. See all the wasted space? See how easy it would be to just put stuff in there and only be able to access the front row?!

IMG_2202

 We had installed the wrap holder a few years ago (with wood brackets so the screws would not go through the thin cabinet fronts.) It’s an ok solution but I will be adding a second one to our pantry door for ziplock bags because there’s just not enough room under the sink.

The right side of the sink has our dish dryer and counter top cleaning products. You’ll also see our ‘oops’ for this project. The first time my husband installed it, he did not account for the fact that our cabinet has a TINY lip on the front edge. The first time we slid the drawer out to test it, the veneer got scrapped off. It was a quick fix though. He uninstalled the drawer and put some small shims under to lift it the slightest bit and it no longer scrapes the edge! I need to go over it with one of my walnut markers to fill in the color but I wanted you to be able to see what had happened.

under sink organization

The items we keep under the sink are solely kitchen related, mainly for cleaning.

  1. Sponges
  2. Disposal freshening beads
  3. Drain stoppers
  4. Fertilizers for my kitchen plants
  5. Stainless steel cleaner and Bar Keeper’s Friend for our white counter tops
  6. Trashbags
  7. Dishwasher soap
  8. Dishwasher rinse aid

under sink organization

All in all, no super WOW factor going on but the usage factor is WOW for me! Anyone else have a strangely shaped cabinet they’ve been re-organizing over and over? Anyone else use Bar Keeper’s Friend?! It’s amazing, right?! I’ll leave you with this shot that’s above my sink. Much cuter. ๐Ÿ˜‰

IMG_0517

Google+