Hey techies! Today I’m sharing another PicMonkey tutorial on how to watermark your photos. I did a post on making a PicMonkey Invitation a couple months ago and several people have asked what program I use to make my graphics. PicMonkey is extremely user friendly and free (unless you want to upgrade to Royale.)
I, personally, don’t use watermarks on my photos because I use a LOT of photos in my blogs and honestly, I just forget. It has nothing to do with the difficulty of the task. The first step is to open www.picmonkey.com in your browser (I know…duh…but it is the first step.) Next we’ll make a watermark that you can use to stamp onto each of your photos so you won’t have to re-create a new watermark every time you edit a photo. Click on the design button on PicMonkey’s homepage.
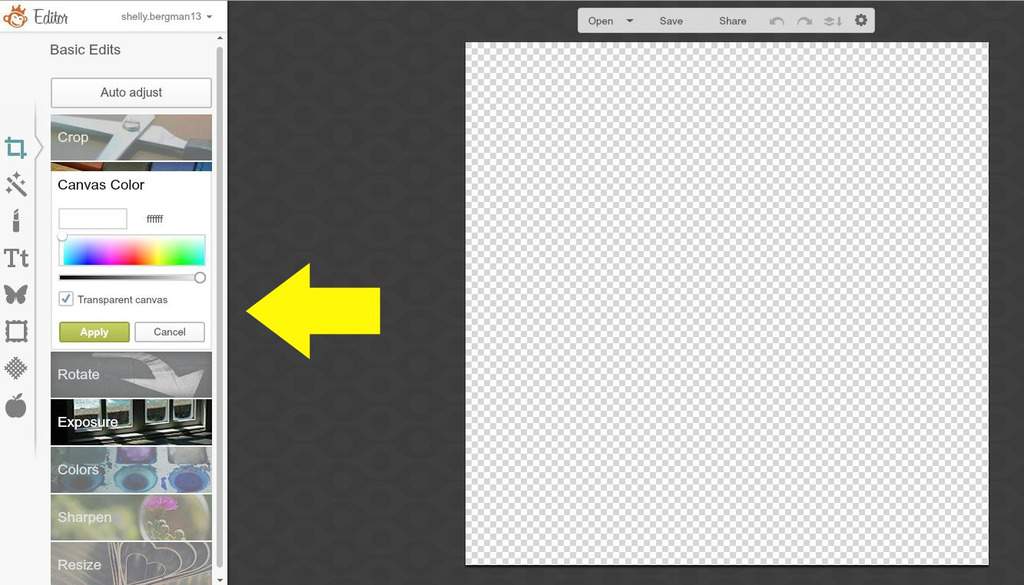 In the ‘crop’ menu on the left, click the box for ‘transparent canvas’ and hit ‘apply.’ This will make your watermark only show the text/image over your photo.
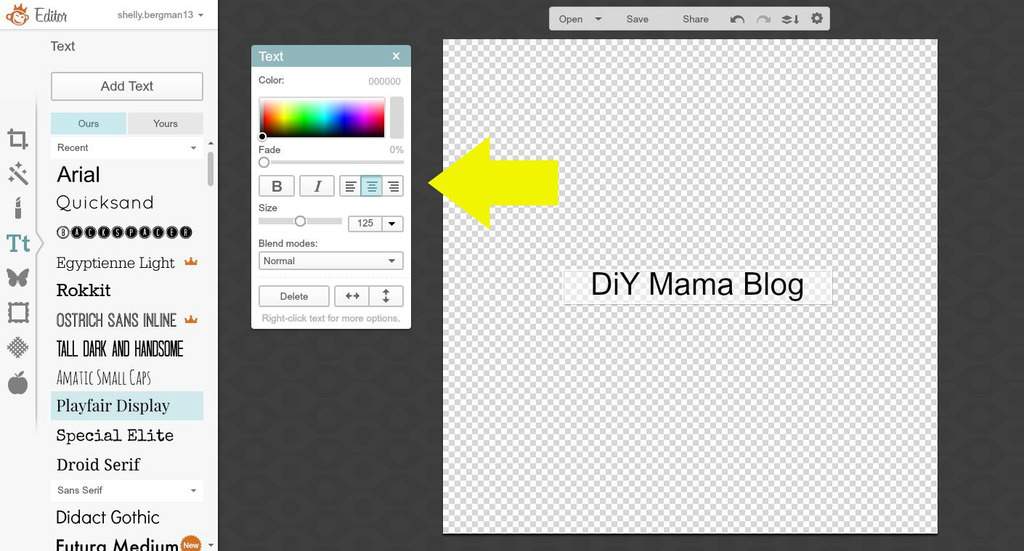 At this point, you’ll most likely want to use the ‘add text’ menu or the ‘overlay’ menu (the butterfly.) I wanted my name as the watermark so I clicked the ‘Add Text’ button and a text box popped up on my canvas as well as a text window to adjust the size, orientation, color etc.
 For the purpose of this tutorial, I left the text black but for my actual blog I would use white and fade it so it would show up better on my photos. I might even make a white version and a grey version in case I have an image with a white background. The above photo actually has the window for the arrow rather than the text but I wanted to point out where the fade slider is for the text or image. I love PicMonkey because you can use their free fonts, their Royale fonts and all of your existing fonts on your computer. If you want a TON of fonts but don’t want to pay the extra for Royale you can download free fonts at DaFont.com or Google.com/fonts.
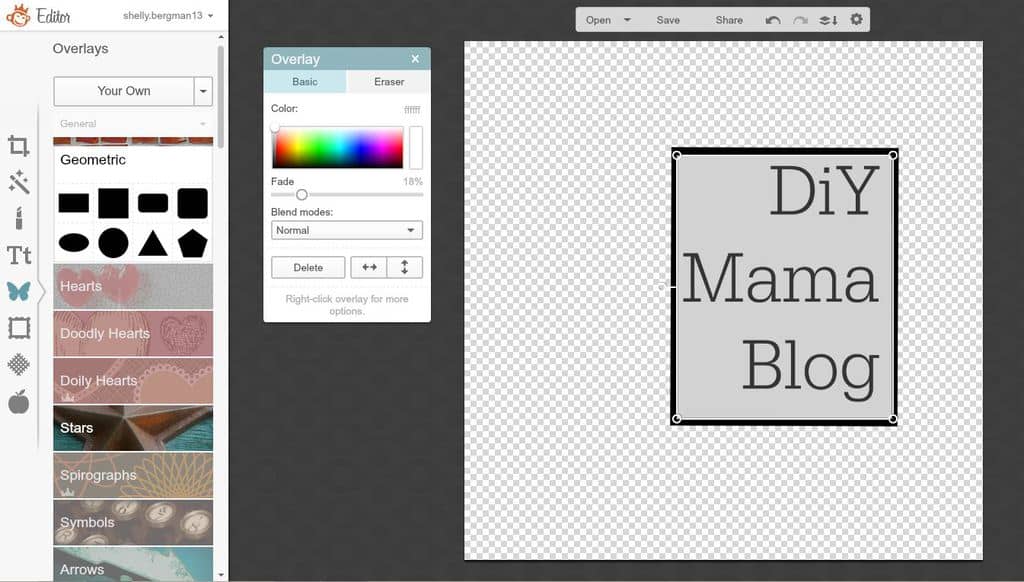
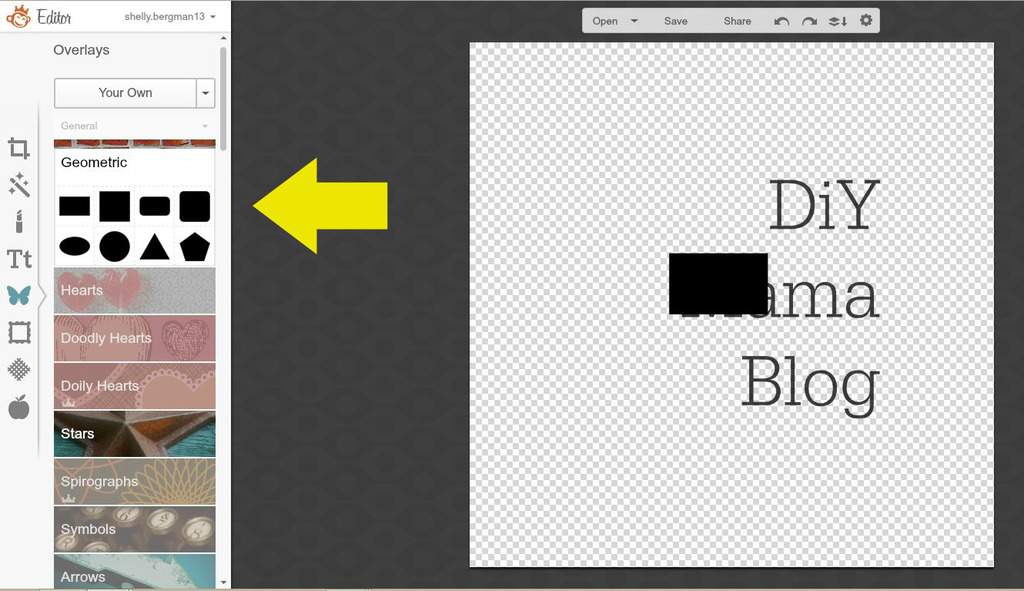 If you want some sort of boarder around your text you can use the ‘geometric’ option from the ‘overlay’ menu. I chose a black rectangle that I enlarged and rotated. I right clicked on the black rectangle to bring up a menu where I ‘sent to back’ so it would fall behind my text.
 There are literally billions of different options for making your watermark. A lot of bloggers write out their name or full url and place it in the lower right or left hand corner of each picture. Some bloggers have more of an image stamped with their ‘seal’ somewhere on their photo. You will only want to have the border if you want it to really stand out on your photo.
 You’ll want to use the ‘crop’ menu to crop your photo as ‘no fixed proportions’ so you can outline the area you’ve designed.
 Once you’re satisfied with your watermark, hit ‘save’ at the top of your screen. Name your file and re-size it’s dimensions. You’ll want to change your size to something much smaller; anywhere from 100-300 depending on how large you want your watermark. You can also just leave it large and re-size it when adding it to your photo.
 To add your watermark to a photo, open your photo in a new PicMonkey tab and click ‘edit’ from the homepage. Once you’ve selected the photo you want to watermark, click the ‘overlay’ menu (butterfly) and click ‘your own’ to add your watermark. Resize as needed.
 Here is the watermark I made for this tutorial but I’ve also made a few others in the past when I was trying to decide if I wanted to watermark my photos.


 Yes, the theme for the photo bomb was ‘my babies.’ If I come into a problem with people stealing my photos, I’ll probably start adding a watermark. For now, the disclaimer on my ‘about me’ page is comfort enough. I may be too trustworthy but that’s ok. Have you run into copy write problems with your photos in the past? Do you use a watermark now? Aren’t my babies the cutest?
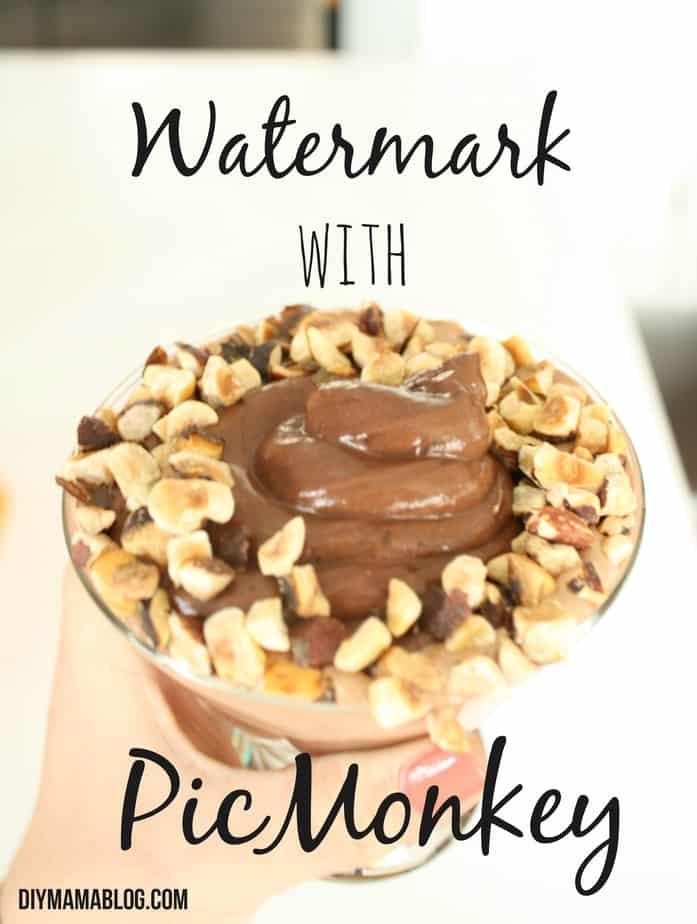
*For a tutorial on how to make the Nutella Parfait on the title photo, click here and for the Gooey Granola Bars click here (both of which will have you thanking me.)
I always forget to watermark my photos but thankfully I haven’t run into any stolen images from my site…yet. I hope I never do too. Which reminds me I do have a copy right info for my blog but silly me forgot to put it there. D’OH!
I’m glad nothing has happened with your photos. Get that copy right up there!
Great tutorial! PicMonkey has some great features. I never had a photo good enough to be stolen ;). I edit my photos in Lightroom and can export them to Flickr and a watermark will be automatically added. It’s nice because I don’t have to think about it. Sometimes the watermark falls on a white spot or on someone since it’s always in the bottom right, but I don’t mind since I want the process as easy as possible. If I’m doing a tutorial and making graphics, I put my blog url in the bottom right.
That is really cool that Lightroom does that! I’ve thought about looking into it but I don’t want to pay money until I get a bit more experienced. I currently have CS4 but haven’t tried it out yet.