Shelly

Peanut Butter Jelly Waffle Sandwich

Peanut Butter Jelly Waffle Sandwich- This post has been sponsored by The J.M Smucker Company, Pepperidge Farm®, and Ziploc® brand. All thoughts and opinions are my own.

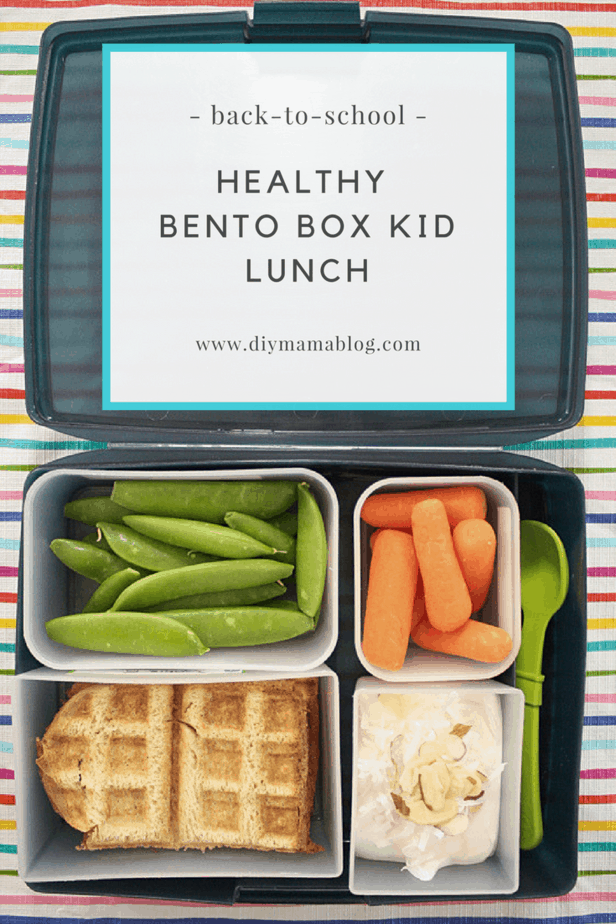
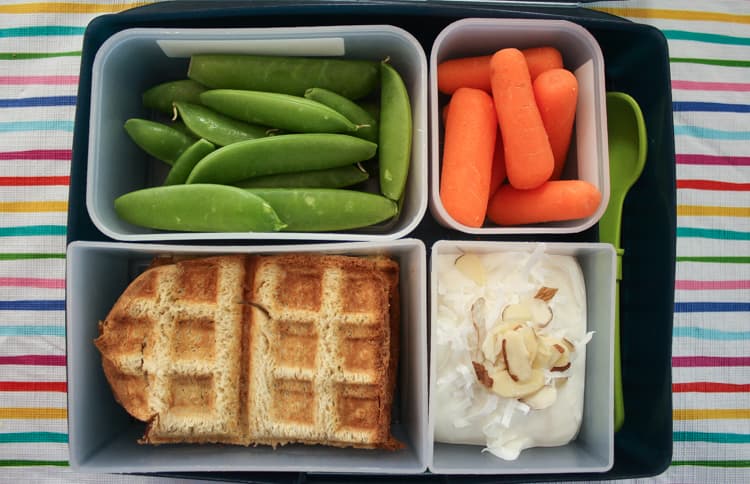
It’s back-to-school season and for us that means figuring out what to add to our daughter’s lunchbox that will keep her satisfied until after school snack. Our picky 3 year old does not always eat her PB&J sandwich but if I make her PB&J in the waffle iron she can’t refuse! I’m also sure to make her lunch balanced with veggies, grain, fruit, dairy and protein. High fructose corn syrup seems to be in every dessert item and most shelf items. I make it a priority to only buy breads that do not contain high fructose corn syrup like Pepperidge Farm® Farmhouse Breads.

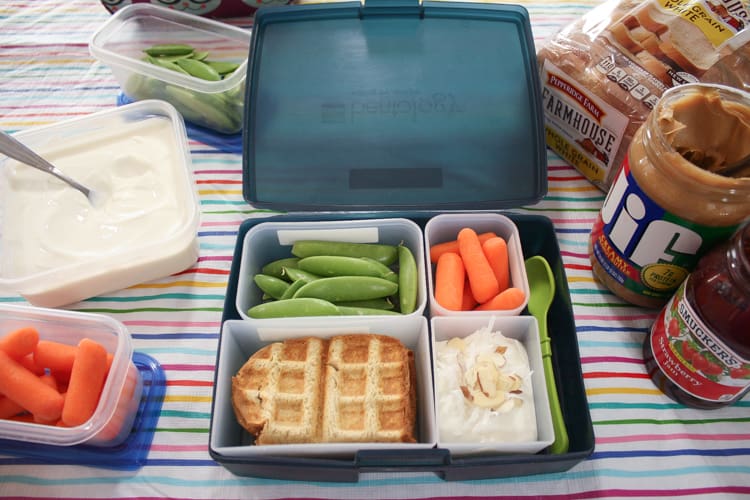
healthy bento box option for kids

One trick we’ve learned is to put her lunch in a bento box so each food is in it’s own special container. She gets excited to open the lid and see what treasures are in the small containers. In Japan, the word of bento, the container itself, has been around since the 16th century. The act of making a special meal with love using the compartmentalized box is what I like most about using a bento box.

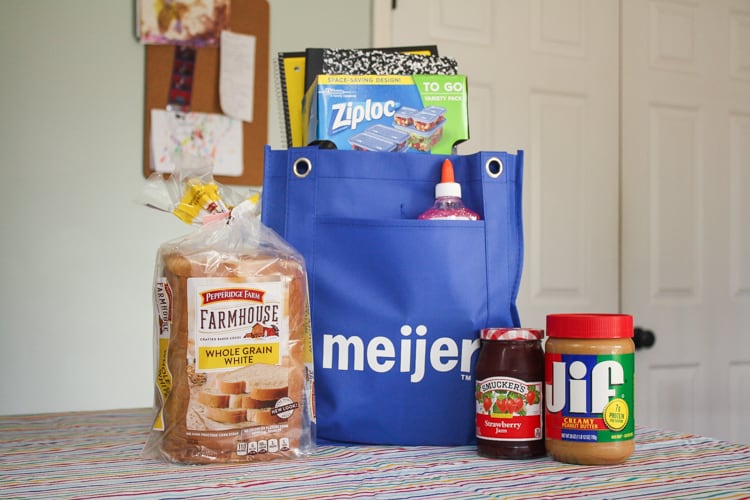
Meijer Back-to-School Shopping

With school just around the corner I will be very diligent with my Sunday meal planning and prep. Meijer has our favorite selection of exotic fruits and vegetables. Each Sunday I’ll pick up our groceries, chop the fruits and veggies and divide them into food storage containers for quick healthy snacks. For long road trips we usually pack a bento box but for short trips to the park or museum we always use Ziploc® brand containers Go To Variety Pack. Our favorite is their 14 piece variety pack that has one medium square (salad size), one small square (sandwich size), two small rectangles (strawberries or carrots) and two extra small squares (nuts & granola). Being someone that does not like to spend time in the kitchen, having food storage containers that can be tossed in the dishwasher and easily stacked in a drawer once cleaned is key.

For a video on how to make a Peanut Butter Jelly Waffle Sandwich click ‘play’ below or continue down to the recipe:

Peanut Butter Jelly Waffle Sandwich

Ingredients:

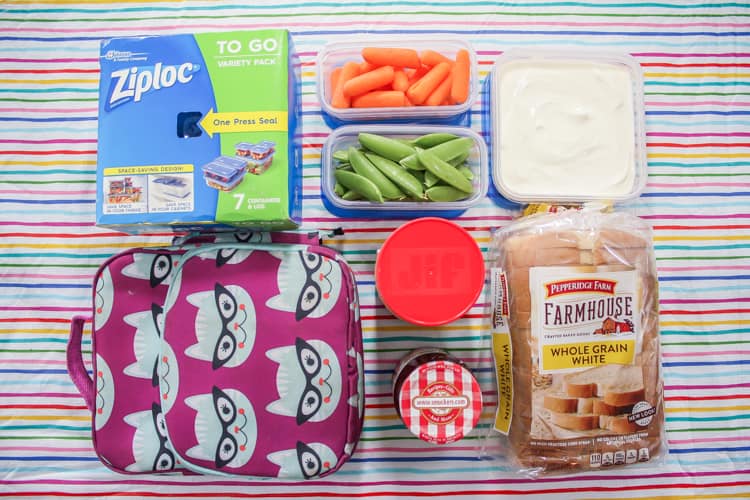
  • Jif® Peanut Butter (we use creamy for her but I would prefer crunchy)
  • Smucker’s® Seedless Strawberry Jam
  • Pepperidge Farm® 12 Grain Farmhouse Bread

Directions:

  • While the waffle iron pre-heats, spread the Jif® Peanut Butter and Smucker’s® Seedless Strawberry Jam on two separate slices of Pepperidge Farm® 12 Grain Farmhouse Bread (or any flavor you choose).
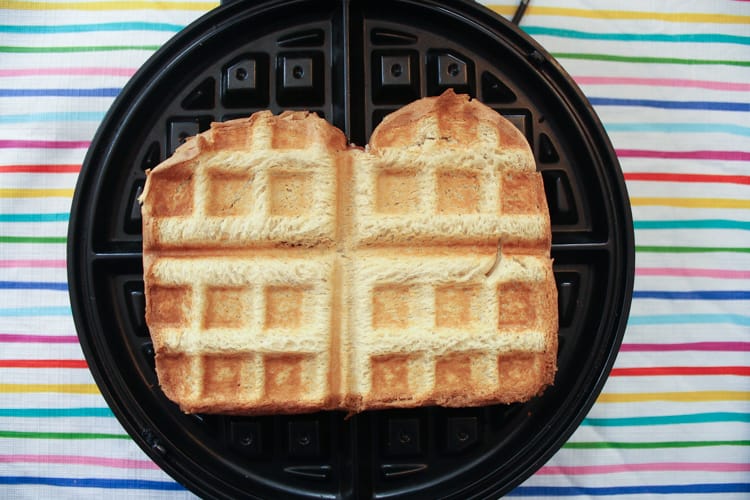
  • Close the Peanut Butter Jelly sandwich together and place in center of hot waffle iron.
  • Slowly press handle down until iron is mostly closed.
  • Cook for approximately 30 seconds to 1 minute or until you can smell the toasty goodness of PB&J.

healthy school lunch

peanut butter jelly waffle sandwhich

If you’re frantic with what to eat for dinner or what to put together for school lunch, I highly suggest my Sunday Meal Plan/Prep routine. When you shop at Meijer, be sure to use these special offers and your mPerks: 

  • Jif®- $0.35 off any Jif Peanut Butter 16 oz or larger 8/27 until 9/17
  • Smucker’s®- $0.65 off any Smucker’s® Fruit Spread 12 oz or larger 8/20 until 9/17

healthy school lunch for kids

I’ve always been a Jif® and Strawberry Smucker’s® girl. Isn’t it strange how you continue to buy whatever you ate as a child for your children? I’m thankful my parents fed us Jif® and Smucker’s®! What is your go-to for school lunch?

Pin for later:
Healthy Kid Lunch Idea

Green BEAN Delivery

When we first moved back to Indy, I didn’t know anyone that was less than a 45 min drive from our town. I got on MeetUp and found this mom group called theCityMoms and was excited but nervous to start making new friends from scratch. I’m now very thankful I ran across this group because I’ve met a lot of awesome women and done some pretty cool events with them!

GreenBEAN delivery vase
GreenBEAN delivery

Green BEAN Delivery

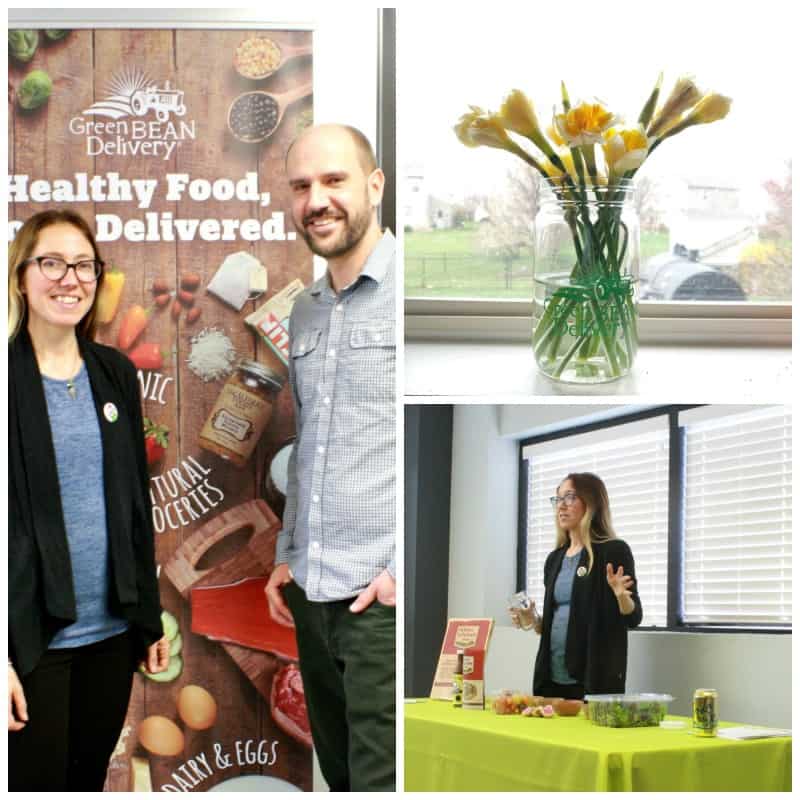
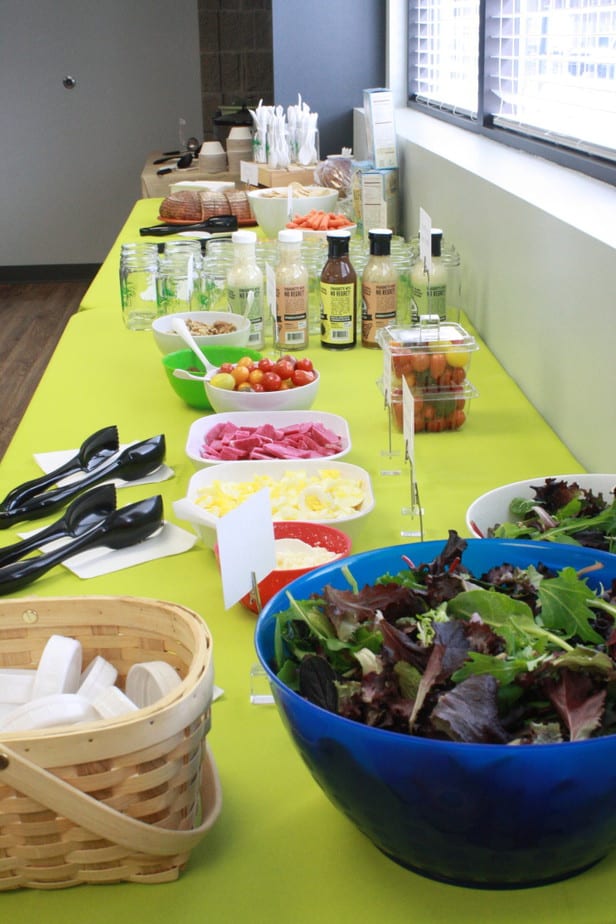
As a CityMom I was invited to attend a luncheon at GreenBEAN Delivery to better understand the behind the scenes business side of a product that makes a mom’s life so much less stressful. GreenBEAN Delivery is a grocery distributor that has this goal in mind:

‘Our goal is to make healthy and sustainably-grown local food affordable, accessible, and convenient to the Midwest communities we serve.’

Green BEAN has access to a large majority of their inventory through the two farms they own and operate in Sheridan, IN and Mason, OH. What does this mean for us moms? Fruit and veggies that will last over a week because it’s coming from the farm to Green BEAN and delivered to our table without the wait time of a conventional grocery store. For parents with toddlers who like a fruit one day and hate it the next, this is a huge money saver!

While we were at the Green BEAN headquarters in Indianapolis we were taught the importance of healthy eating and introducing it in fresh ways to our children. The husband/wife team Matt and Beth shared the importance of mending the America’s broken food system by connecting rural farming with urban communities.

GreenBEAN delivery

GreenBEAN delivery

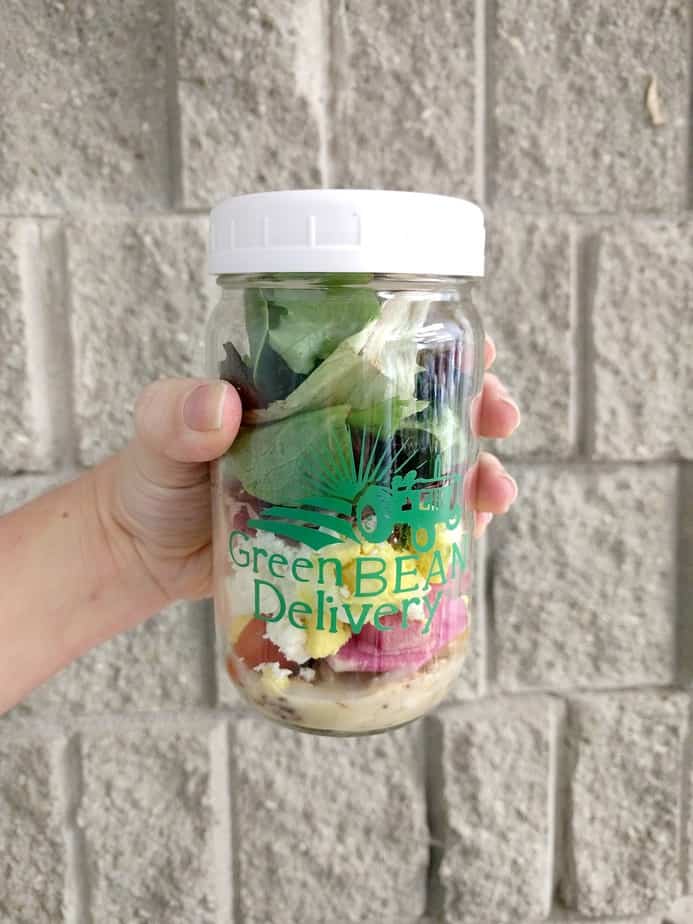
Beth gave a demonstration on how we can implement fresh veggies everyday for a quick delicious lunch. Her solution:

GreenBEAN mason jar salad

Mason Jar Salad

Mine included (in order from bottom to top)

  • Sweet Onion Dijon dressing (or dressing of your choice)
  • Pecans
  • Feta cheese
  • Watermelon Radishes (I can’t WAIT for these to be back in season!)
  • Hard-boiled egg
  • Heirloom cherry tomatoes
  • Leafy greens & spinach

There are thousands of combinations you could do to make your own mason jar salad. I recommend using a jar with a wide mouth opening so you can easily reach  your hand in while making it and eating it. The best part is that it doesn’t dirty up dishes! Just pull out your organic ingredients, add them to the jar and use that as your lunch box and bowl!

GreenBEAN Delivery

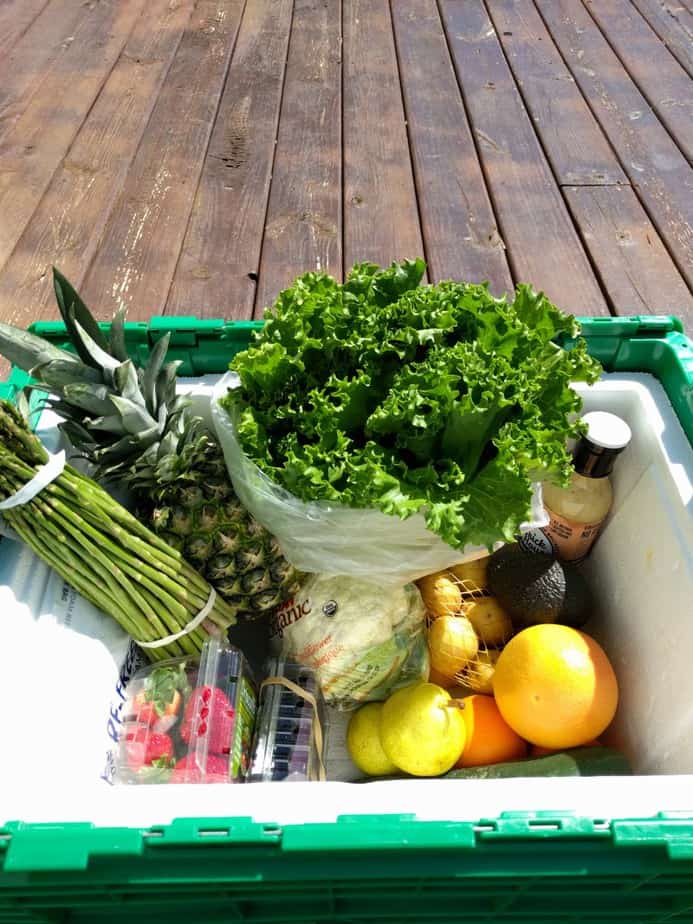
I love the food Green BEAN Delivery distributes almost as much as their heart behind the mission. Living in the midwest, we have a very short window of opportunity to get fresh veggies that are only found at the farmers market. Those naval oranges aren’t in season here in IN (not to mention you’d have to pay a pretty penny to buy a fresh orange in IN) but they’re straight from a farm in CA that has a great relationship with Green BEAN. Having fresh fruits for a snack with Soph after school and grilling fresh veggies on the grill made our family feel great. We were very surprised by the quality and longevity of the produce.

I’ve partnered up with Green BEAN to get you a $15 off your first order because I want everyone to have the chance to try those naval oranges, oh and the Sweet Onion Dijon, oh and the heirloom tomatoes, OH! and don’t forget about the watermelon radishes! Let’s just say, we’ll be eating more fresh fruits and veggies from now on.

Promo code: DIYMAMA

To win a $35 giftcard as a new member, go follow me on Twitter! Ends 8/20

This promo code is only valid for new members who are just signing up for Green BEAN Delivery and also for past members who are reactivating their account with us. The promotional code can’t be coupled with any other discounts.

Tie Dye With Your Toddler

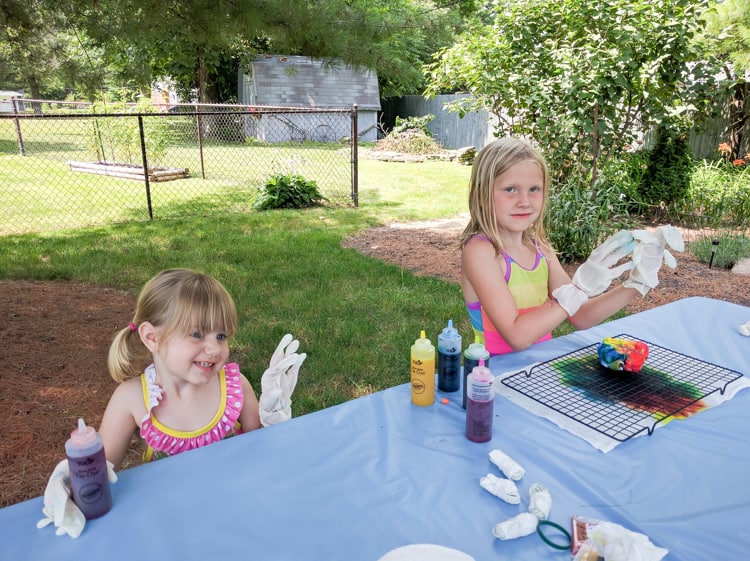
Tie dye with your toddler can be tricky but I’m not one to shy away from a craft project for fear of a mess. Starting my toddler off experiencing different art forms is more important than the mess. We went to the Farmer’s Market this past weekend and stopped at a Tie Dye booth swooning over their toddler summer dresses. I caved and bought one for Sophie with a $20 price tag. Thankfully she wants to wear it every day but that was a really hard purchase. She loves the swirly colors in the dress so I thought she’d enjoy making her own tie dye clothes.

There are several different ways to approach tie dye but I’ll be showing you the easiest way to tie dye with your toddler.

Tie Die with your toddler

Tie Dye With Your Toddler

What you’ll need:

  • White clothes, bags, bananas etc. washed and dried
  • Tie Dye Kit (I used the Tulip brand bought at Hobby Lobby but it is less expensive on Amazon)
  • Paper towels
  • Extra rubber gloves
  • A wire rack
  • Plastic tablecloth
  • A nearby hose


Step 1: Rubberband all clothing items. This step will mostly be done by an adult but you can ask your toddler what designs they want on their shirt. For example, I did a Mickey Mouse on my daughter’s shirt per her request.

Step 2: Lay your wire rack on top of a few layers of paper towel. We started on the table but moved to the grass once we saw how much dye gets on the table. I recommend wiping off excess dye between projects to avoid muddling of colors.

Step 3: Put gloves on yourself and your toddler. We used rubberbands to help keep the giant gloves on the kids. If you have kid gloves it would be much easier.

Step 4: Place the white clothing item on the wire rack and show your toddler how to squeeze the bottle on the shirt. I really enjoyed this video on simple swirls and this video on Earth Day shirts.

Step 5: Wrap clothing in plastic wrap or bags and let sit for 6-8 hours.

Step 6: Put on gloves. Rinse clothing in cool water until the water is murky. Remove rubberbands and continue rinsing until water is almost clear.

Step 7: Throw all tie dye items into the washer with a minimal amount of all® free clear detergent. I only use this detergent because it keeps the colors vibrant while still being gentle on my toddler’s sensitive skin.

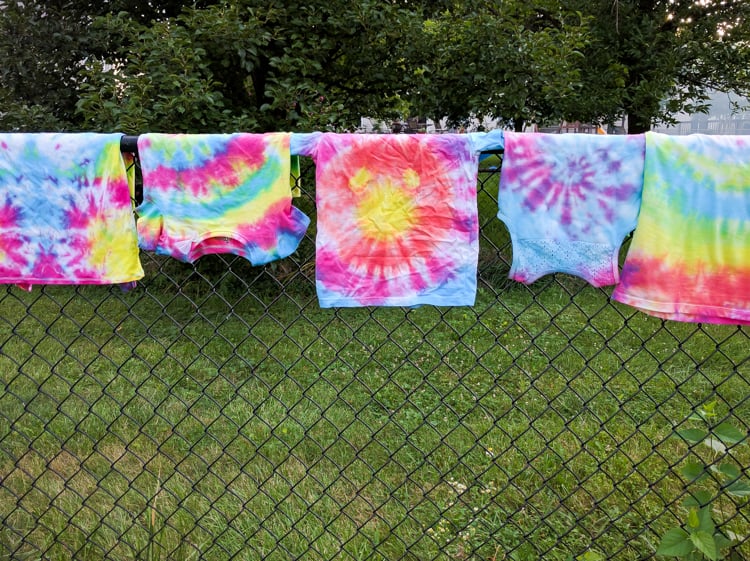
Step 8: Hang tie dye out in the sun

Step 9: Go out and PLAY!

tie dye tutorial

Tie Die with your Toddler

Do you have any tie dye experience with your kids? What worked best for you? What do you find to be the best way to keep your tie dye colors bright?

Related Posts:

Snack Necklace

Modern Crayon Holder

How to Make Time for Creativity with Kids

Pin this for later:

Tie Dye Tips with Toddlers


Easy DIY Tassel Placemats

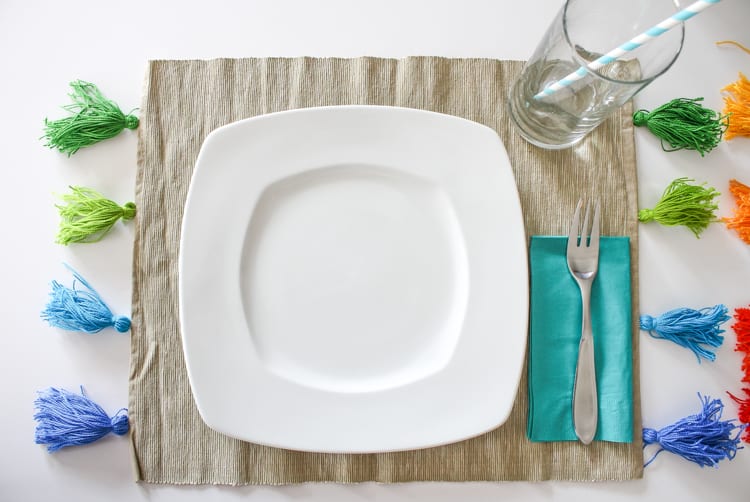
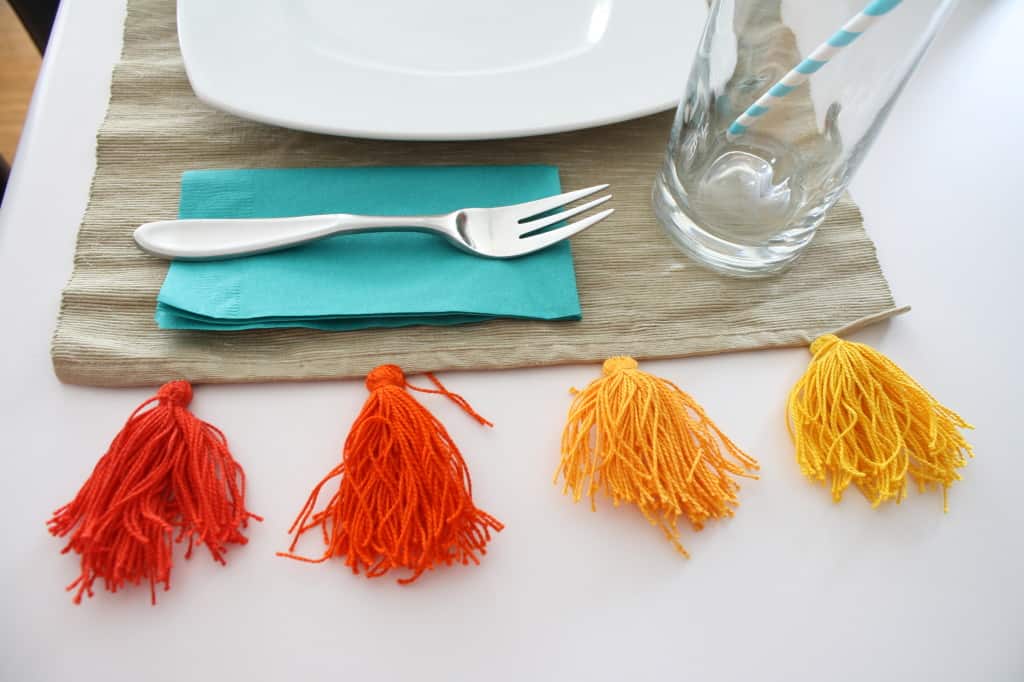
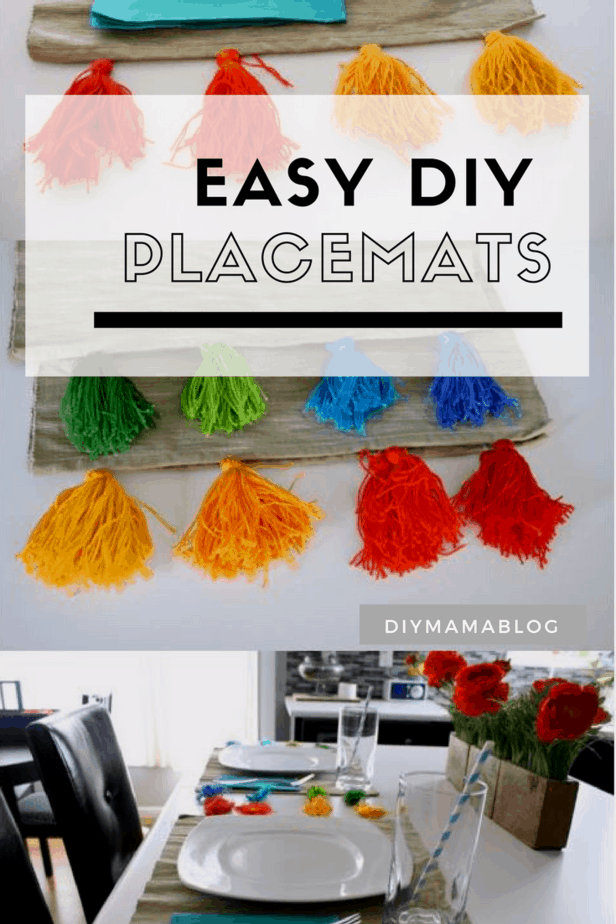
Tassel placemats are so easy to make from drab placemats. I love re-styling simple things for our home. It usually comes in the form of spray paint but this time, embroidery thread was the material! I recently did this to my happy yellow lamp and had been wanting to use my thread to make something else happier! I found two plain-Jane placemats that I had bought forever ago and thought they’d be perfect to spruce up with my thread.

easy diy tassel placemat


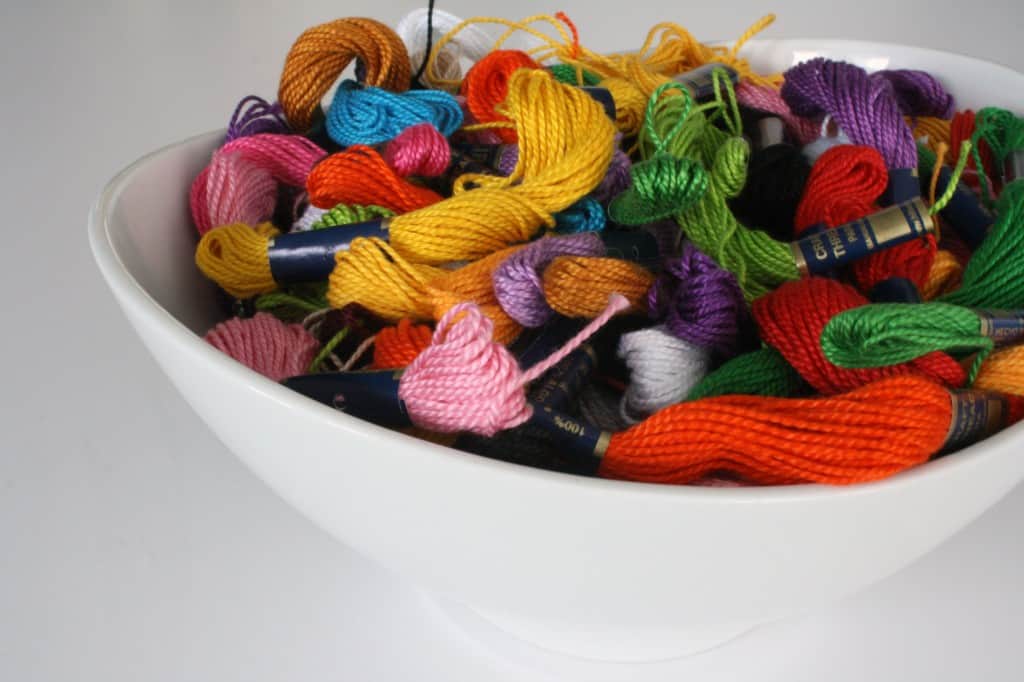
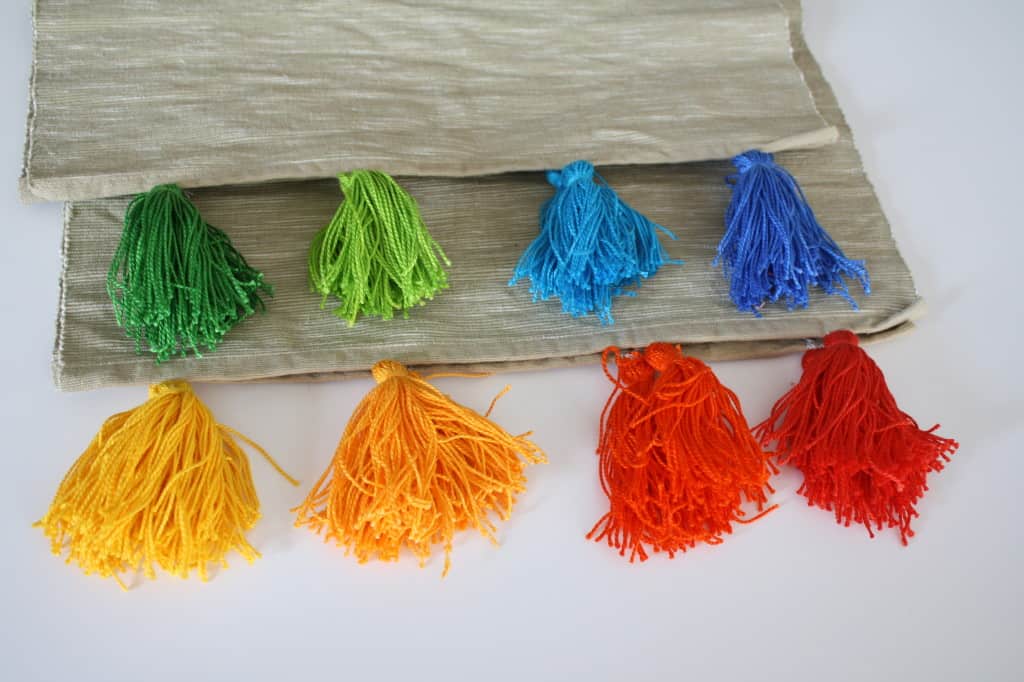
I’d seen this idea on Design Sponge a year ago and I’m not sure why I didn’t make these sooner because they’re super fun! I wanted to make mine a bit more bold so I used brighter thread and made my tassels larger. The first step was to choose my thread colors. I used a full spool of thread for each tassel.


thread

Easy DIY Tassel Placemats

I used my phone as a template for the length of the tassels. I wrapped almost the entire spool around my phone, leaving only enough to wrap the top of the tassel (around 4 inches.) This is not an exact measurement. Like all diy projects, just do what size you think will look best. If it doesn’t look how you envisioned it to look, just make a new one. 🙂

phone template

sew tassel

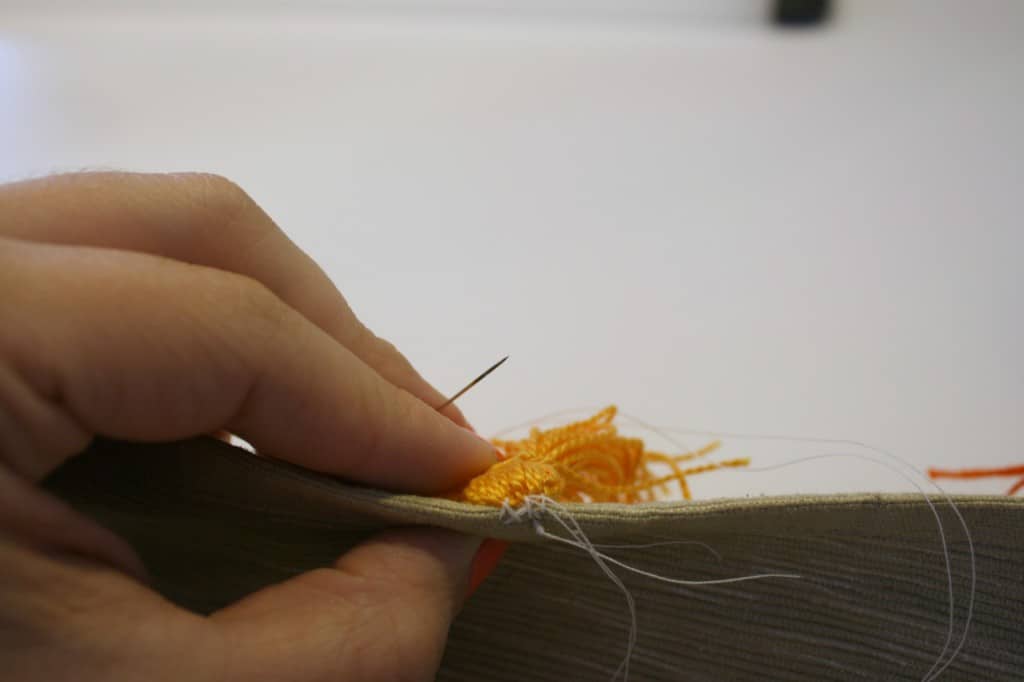
I followed this tutorial to finish each tassel and began sewing them onto the placemats. I had no specific way to sew the tassels on other than that I wanted them to be secure enough to not fall off after a few uses. It looks quite haphazard from the back but it’s not very noticeable from the front. If I were going to do this project again, I would have bought an embroidery needle to attach the tassels using the same thread.


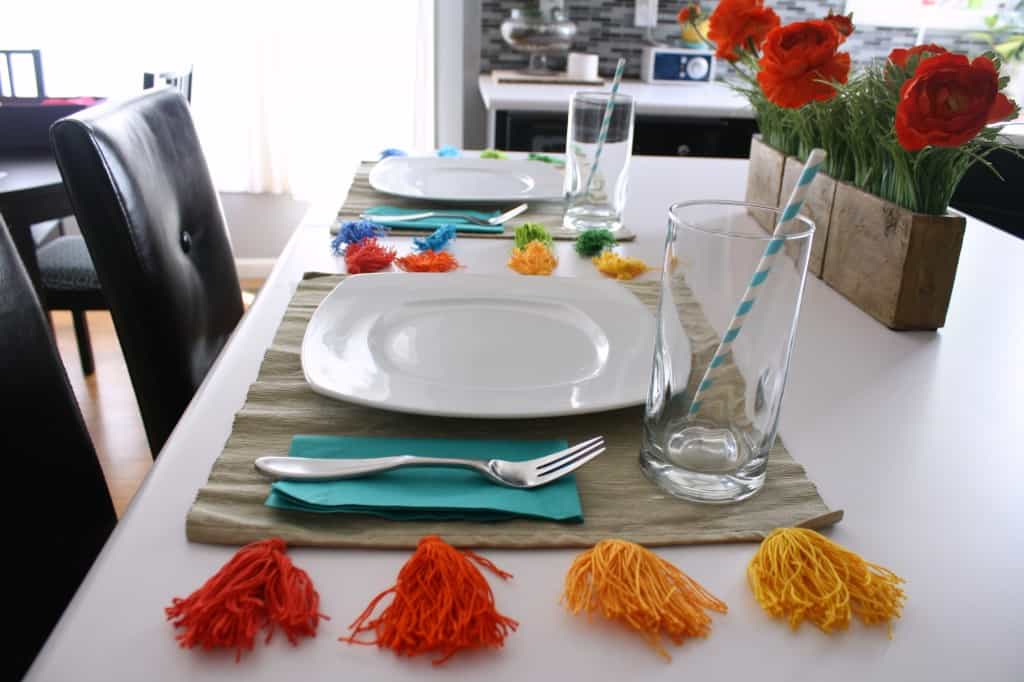
I sewed 4 tassels per side (16 tassels total) but you could do as many as you like. I think they turned out very festive! They’d be perfect for a Cinco de Mayo party or deck BBQ!

warm placemat

both placemats

placemats set

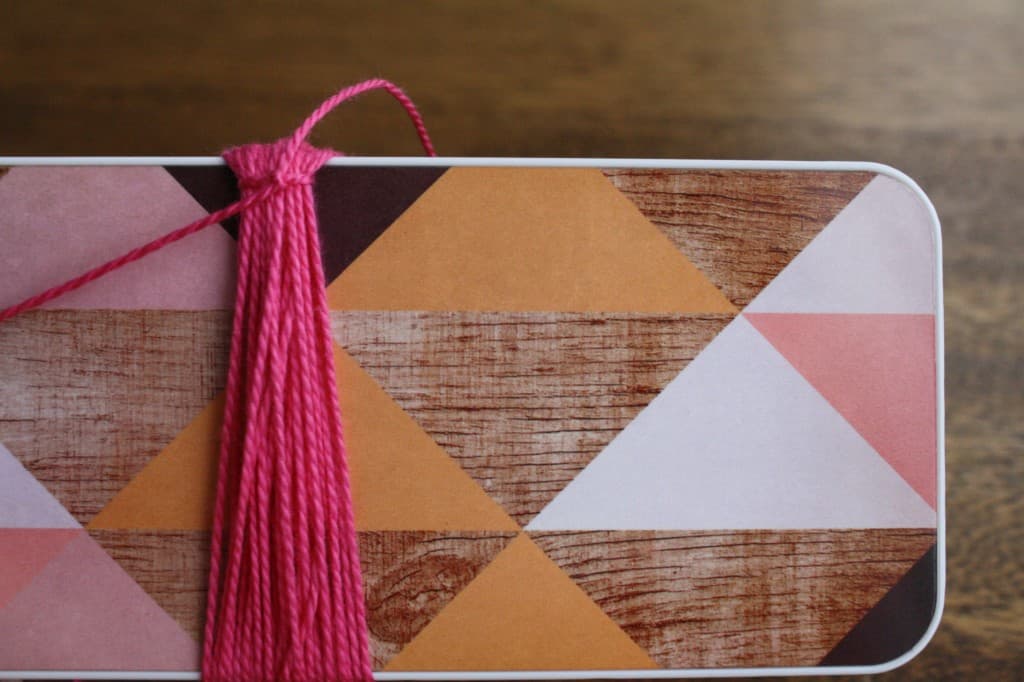
On a scale of simplicity I’d give this project a 2 out of 10. For me, it was free because I had all materials on hand but this project would be an inexpensive way to make plain placemats happier! I also made a few tassels as bookmarks and to put on my keyfab that make me smile to use them. 🙂 Has anyone made tassels for any of their projects before? Any suggestions on how I could have made the attachment cleaner looking? I’m sure no one would notice if I didn’t point it out but I always see those kind of ‘flaws.’ Now I need to go get some Mexican for dinner tonight since I have these set out!

Other simple crafts:

Simple Embroidery for Beginners

Sewing Machine Cover

Pin this for later:

Indiana State Fair with Kids

Indiana State Fair with Kids can be a lot of things. It can be loud, stinky, hot, expensive, overwhelming and frustrating. We experienced each of these things yesterday so I want to share with you ways to cut down on these negative experiences.

Indiana State Fair with Kids

Indiana State Fair with Kids

Despite doing my research before we went, we still continuously ran into problems. On our way to the fair we stopped at a local CVS to get our $7 fair ticket. They haven’t sold tickets in three years. The article I read did not have a publish date so I hadn’t realized this was old information. The first problem started with waiting for an hour and a half in traffic on Bradford and 38th street. It continued by finding a side street to park on that was way too small for cars to park on both sides (but free parking). Thankfully someone with a State Fair Staff T-shirt was scalping tickets outside the ticket booth. $15/2 tickets. At the moment it was an awesome idea but looking back, I don’t think she worked for the Indiana State Fair.

Once inside the fair, we know to bypass all the food vendors on the way in because their prices were sky high. We head straight to the IN Dairy Barn where Sophie has colored a coloring sheet for payment of a kid’s meal (grilled cheese sandwich, applesauce, chocolate milk and a prize (a swirly straw). I also got a strawberry milkshake for us to all share that was delicious (that line was 30 minutes but the food was good and inexpensive). From there we headed over to the Purdue Extension building having heard they have free samples and prize winning horticulture. As it being my alma mater we always stop in to see what’s going on and I had a chance to talk to the Master Gardeners of Hamilton County about replacing our fallen tree. Also in this building were many Indiana food companies like U-Relish, Green Bean Delivery, Warrior Mix and HercuLean.

Indiana State Fair

Indiana State Fair

The Big Scare

August 12th was Hoosier Lotto day so we headed over to the Lotto Tent to redeem our free ticket (with state fair admission ticket). We did not win anything but it was memorable because I had my first ever scare of losing Sophia in a busy crowd. To paint the picture, the tram was not running because of the massive swarm of people at the State Fair. We’d walked up to the Lotto Tent to figure out how to redeem our tickets. As I was getting the ticket stubs out of the stroller pocket, my friend had asked someone how we might redeem the tickets and Sophie was gone. In a matter of 5 seconds my friend had said ‘where’s Sophie?’ I did a quick scan and she was no where around us. She then popped out from behind the trashcan we were right next to saying ‘BOO! I was hiding!’ It was heart stopping and we had a little talk about when we should play hide-and-seek.

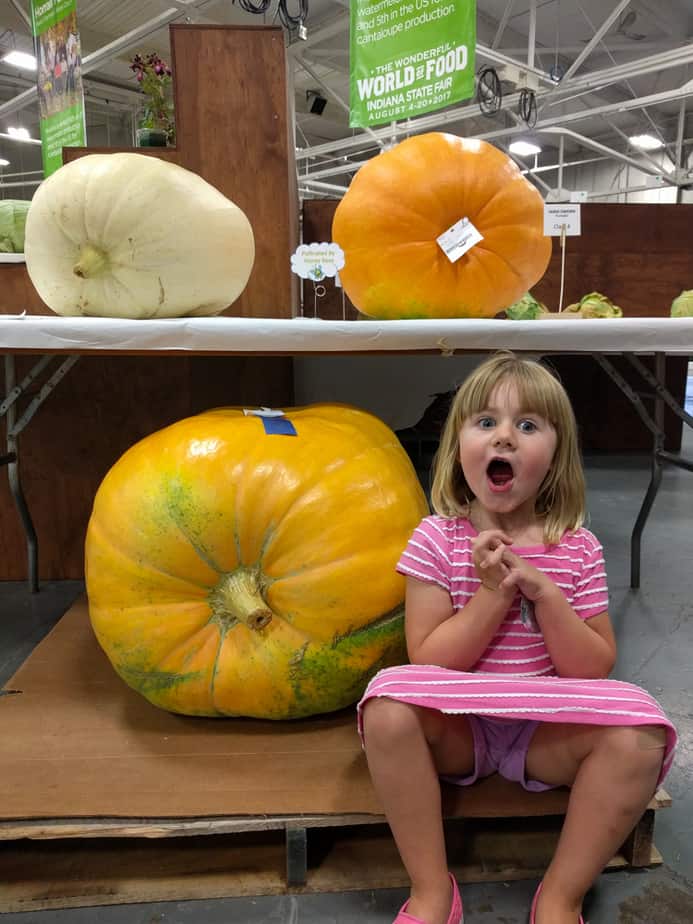
After our loss at the Lotto Tent we headed to the back side of the fair where we spun every ‘spinny wheel’ we could find and ran through all of the misting fans. This was one of my favorite parts of the fair. Sophie got such immense joy from these simple things! We headed into the Glass Barn hearing that they had a VR pig farm and coupons for $1 off at the pork and beef tents. On that back section of the fair we also saw the Pacer booth and had fun getting up on the John Deere tractors. By now we’ve walked at least 3 miles at the State Fair. TIP: wear tennis shoes because you will walk and stand in line the majority of your time. 

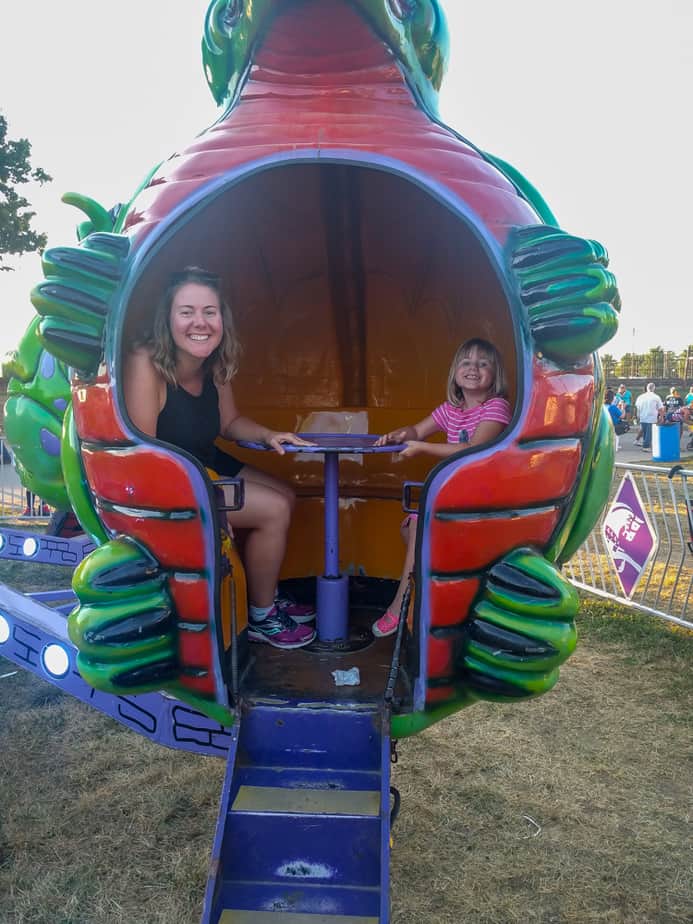
I’d encouraged Sophia to ride on a fair ride in the kiddie area rather than getting her face painted ($10). She obviously chose the spinning dragons that took another half hour to wait for and made my stomach swirl for another half hour after. We stopped to get dinner around the kiddie area (an elephant ear for Sophia and my friend and a cheese burger from the rib eye tent for myself.) I would not recommend the cheese burger from that tent and I would not recommend a lemon shake up or a soda from anywhere in that area (I have been disappointed each year from any of the booths in that area.)

Indiana State Fair

Indiana State Fair

The night ended on a high note by seeing the winning hog (at 1136 lbs), the sheep in their pjs (it was cool at night and they’d just been sheered) and the super tall horses. My favorite part of the entire fair is visiting the horses. They’re so beautiful and kind. Number one on my list for next year’s visit is to see a horse event at the fair. It was about 10 o’clock when we headed out and felt uncomfortable walking back to our car. There were several police cars who had stopped people on the streets and lots of loud traffic on 38th street. We will never skip the $5 parking again.

Breakdown of Purchases:

For two adults and a child for 6 hours at the fair:

  • 2 scalped tickets: $15
  • Dairy Barn Food: $3 (with coloring sheet)
  • Salt Water Taffy: $8
  • 1 Kiddie Ride: $5
  • Elephant Ear: $6
  • Cheeseburger: $4.50 (with $1 off coupon)
  • 2 Flat Pepsi’s: $10
  • Tenderloin, fries and drink: $14

Total: $65.50

I’ve been going to the Indiana State Fair every year since I was 3 and have had fond memories of the fair every year. Our mistakes for making this year’s visit worse than the past: going on a Saturday, not getting the tickets online ahead of time, not parking in the lot, expecting too much from the expensive food vendors. Nothing is a failure when you learn from it. I hope you learn from our mistakes and enjoy the fair!

Pin for later:

Indiana State Fair

Google+