This post is sponsored by Photowall. The Blue Lily wallpaper was gifted in exchange for this post. As always, I only work with companies that I have previously used as a product. We used and loved Photowall wallpaper in Lilly’s preschool Montessori bedroom.
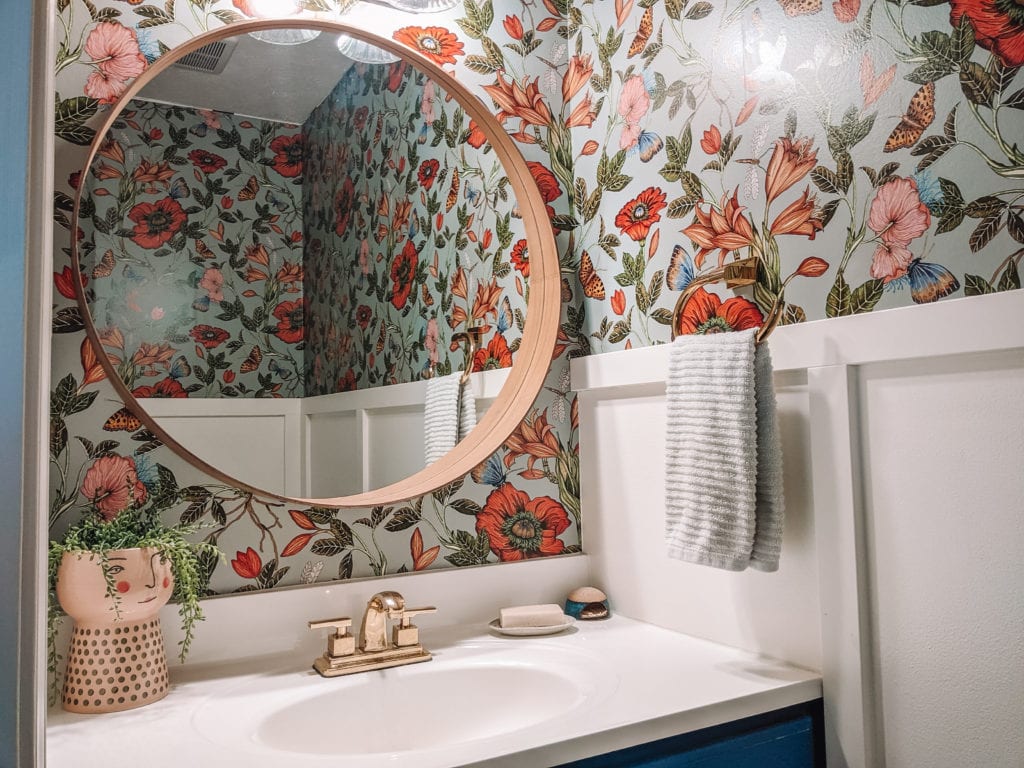
After a year of staring at the walls in my home, I started to get the itch to completely re-do every space. I’ve already done all the decluttering and cleaning projects and now I’m wanting more color and pattern! This past year, gardening as a hobby, brought me the most joy. I wanted to bring more plants and flowers inside. Especially to get rid of the grey winter blues, I needed to bring my garden inside! Que the birds chirping, sun shining and butterflies flittering around. That’s what my new bathroom is!
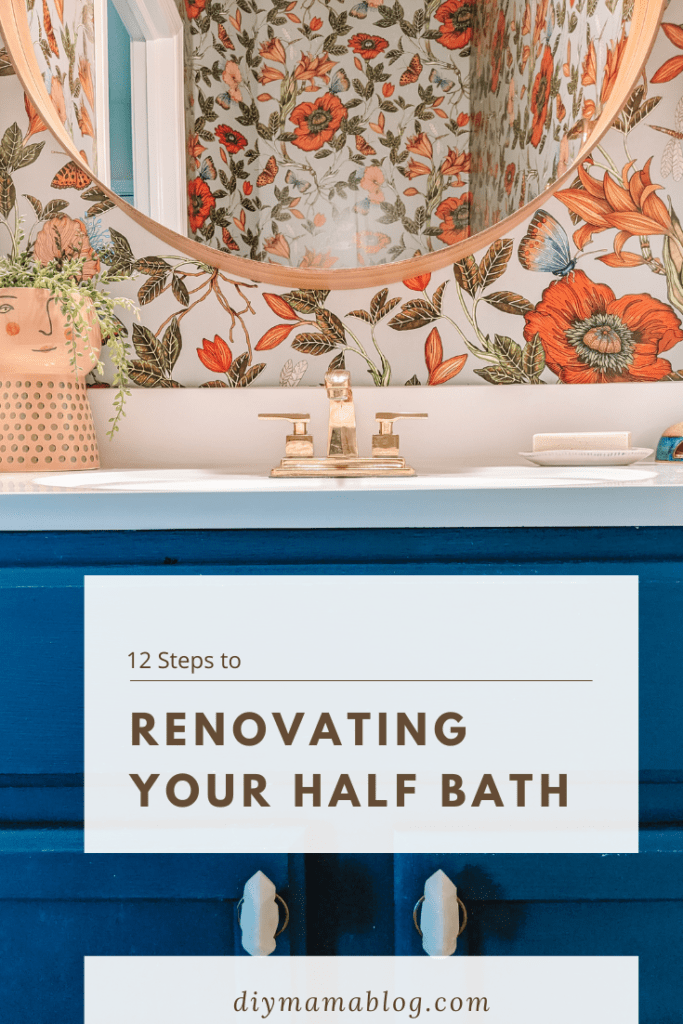
Photowall Wallpaper is Beautiful
As I mentioned I used Photowall for our daughter’s room and LOVED the product. (You can get 25% off your order of anything on the site until the end of May with code DIYMAMA25). Previously, we wallpapered one wall, ceiling to floor and it was gloriously easy. This time around, we had many obstacles. ‘It’ll be a super easy glow up’ I said. ‘It’s such a small room, what could go wrong?’ We learned a few things about how walls are never even but it’s nothing a little crown molding won’t fix.
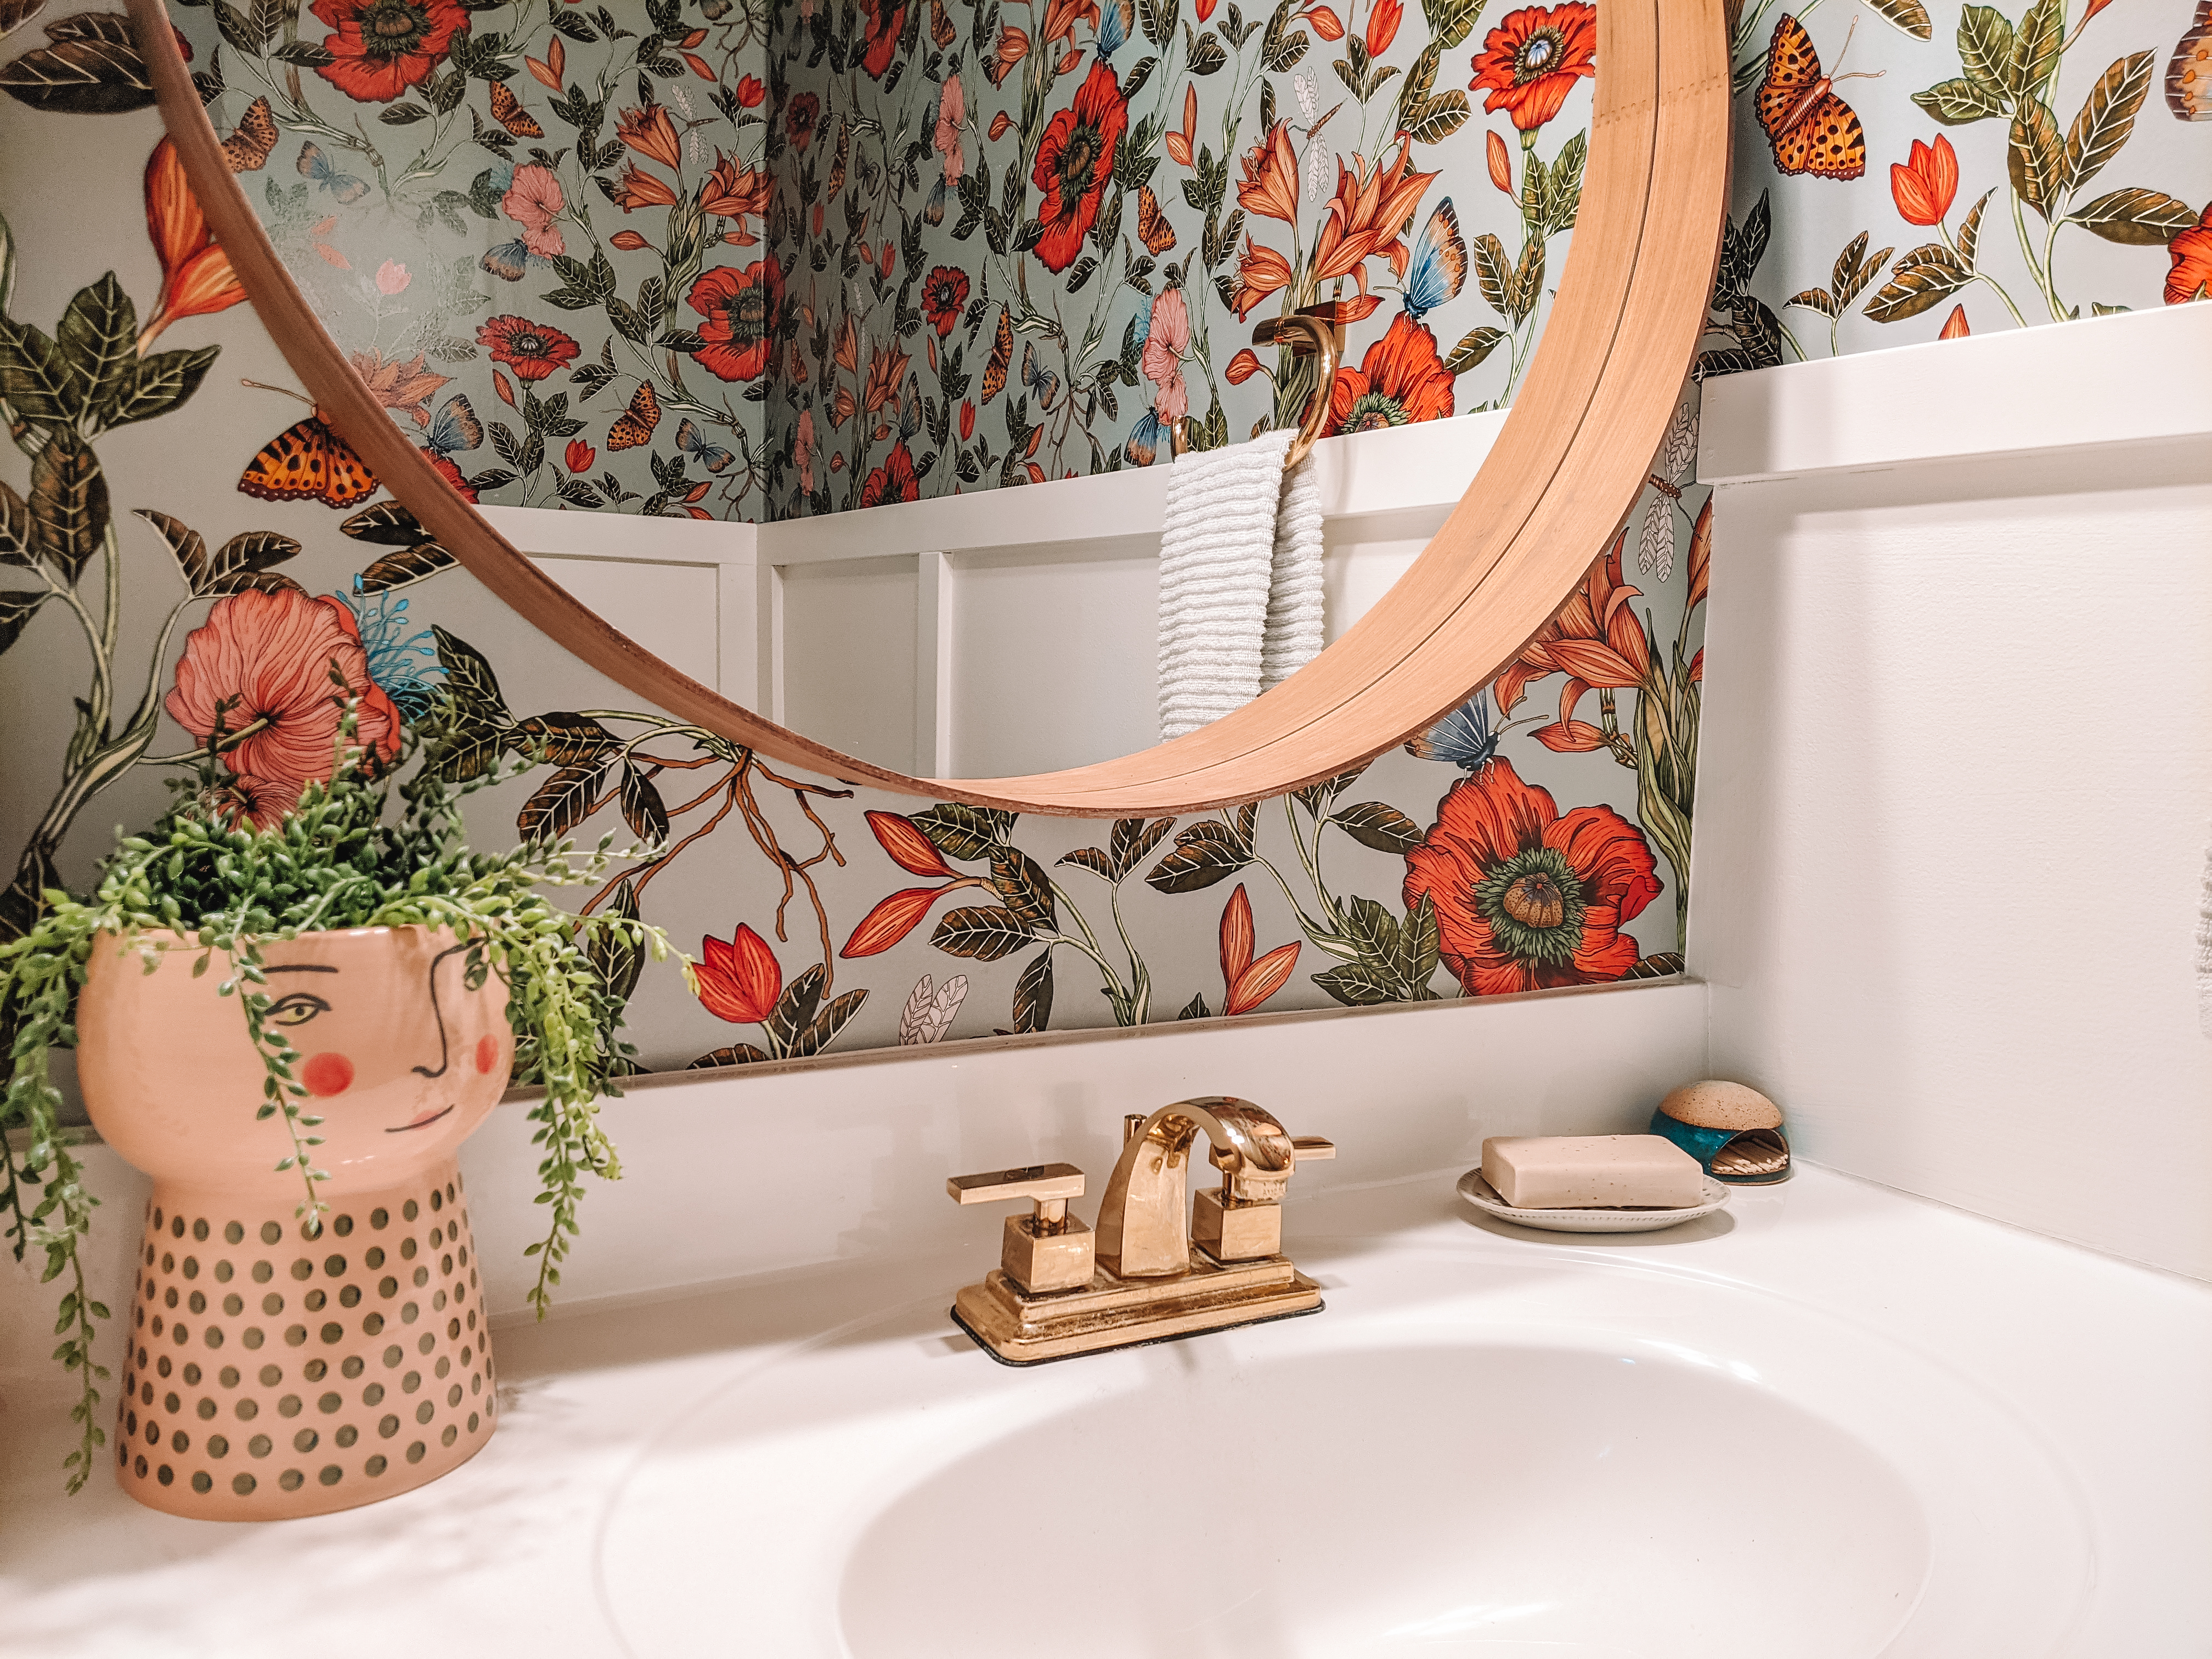
Because it is a small half bath (like really small), I wanted wallpaper on top with a board and batten on the bottom. This is a great way to save money on wallpaper. We easily ordered the wallpaper on Photowall.com by putting the dimensions we needed (measure the wall’s height and width and add 6 inches both ways for error). Despite Photowall being in Sweden (across the globe from the US), the wallpaper was on my doorstep a few days after I put the order in!

There were 12 steps to this bathroom renovation of adding wallpaper and board and batten. I want to remind you that this was not the first time I’ve assisted in helping put up wallpaper or board and batten BUT it’s the first time I did 95% of the project on my own.
The 12 Steps to Our Bathroom Renovation
- Remove everything from the walls- this includes a toilet paper holder, towel ring, mirror, and any art or shelving you may have hung in the bathroom. I left up the light fixture until I needed to wallpaper that section.
- Determine where you want your board and batten- We have an 8 ft ceiling in this room and I knew I wanted more white board and batten than wallpaper. The room is small and I didn’t want it to feel smaller with the pattern of the wallpaper. Once I found the height of the board and batten I drew a horizontal line around the room.
- Draw a vertical line the width of your first wallpaper panel- determine which corner you want to start at and draw a line to the ceiling the width of your panel. I knew I didn’t want a noticeable line where the end of the wallpaper meets up with the beginning of the wallpaper. I wanted that to be on the smallest part of the room which was over the doorframe. I started wallpapering with panel 5 in order to have panel 1 start over the door.
- Paint on wallpaper paste- you’ll want to fill in the area within your vertical line plus a couple inches past the line. It’s better to have too much paste than too little. If you miss a spot it could cause a bubble, whereas you can push out excess paste if there’s too much.
- Add wallpaper panels- line up the panel with the one to its left and continue around the room.
- Remove trim- I removed all trim around the door and the baseboards. Because we were adding board and batten I knew I wouldn’t need the baseboards.
- Trim excess wallpaper- use a wallpaper ledge (or any long ledge) to help guide a box knife to cut along the initial horizontal line. This will be where the top horizontal piece of the board and batten will be.
- Paint, cut, and add baseboards- this was the hardest part for me. Figuring out how the angles needed to be cut for the baseboard trim was confusing. We have an angled wall and I needed lots of help figuring this out.
- Paint, cut, and add vertical board and batten- using liquid nails and a nail gun I added the vertical pieces of board and batten.
- Paint the board and batten- once all of the board and batten are up you can paint the walls for the board and batten look.
- Caulk and fill nail holes- here is another place I learned a valuable lesson. Be sure to use paintable caulk when sealing your seams. I just used some random white caulk we had on hand that apparently repels paint. I had to go back over all the seams with paintable caulk before painting again. I also filled all the nail holes with wood putty. Touch up the nail holes once the wood putty is dry.
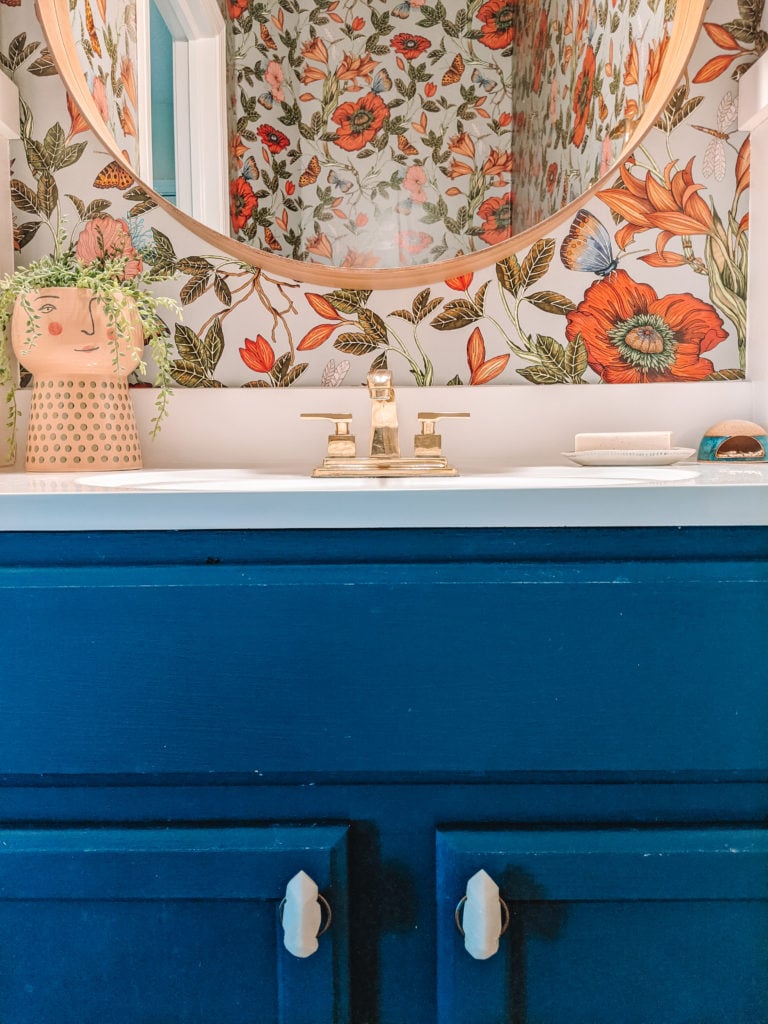
- Add decor- here’s the fun part! Add back all the decor you took down and admire your newly renovated bathroom!
I made a video tutorial of how I put up the wallpaper as well as the board and batten. There are tons of great detailed videos on how to add your Photowall wallpaper if you need more tips. Below is the video I put together of the steps I took to renovate our bathroom.
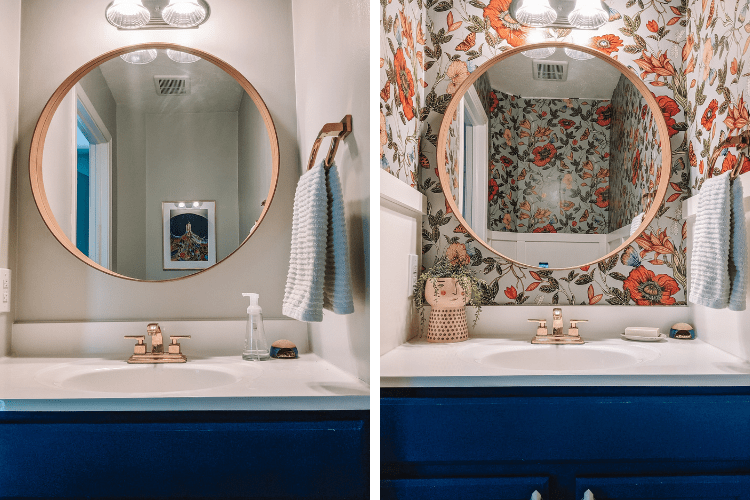
I’m really proud of how well the bathroom turned out. When I first told my family I wanted to re-do the bathroom (after we already painted and changed out the vanity) they were not looking forward to it. My daughter didn’t like any of the wallpapers I’d chosen and my husband was worried that he’d end up doing the project. Thankfully in the end, everyone was happy and now I can go in my garden bathroom anytime I need the feeling of spring!
Related Posts to Garden Half Bathroom Renovation
Preschool Montessori Inspired Bedroom with Photowall Wallpaper
Pin it for Later
Leave a Reply