Life

Top 5 WordPress Plugins

Hey techies! There are thousands of WordPress plugins. There are probably a hundred really awesome plugins. There are five that I LOVE having on my blog and I wanted to share those five with you today! These aren’t the core plugins that every WordPress site needs to function well but they’re still awesome at what they do.

wordpress-plugins(via)

  1. CommentLuv: This is my favorite plugin on my site. I love the community between bloggers. I want my readers to see what posts other bloggers are currently writing. I also like it because it’s an easy way to click over to someone’s site that has commented on my post.
  2. BJ Lazy Load: Makes a photo not load until you scroll down. This cuts down on load time immensely. I have a lot of photos in each post and it would take a long time to load without this plugin. My biggest turn-off for a blog is having it take too long to load. I’m too impatient. I don’t want that to be the reason someone skips out on my blog.
  3. Simply Instagram: I don’t use Instagram in the way of promoting my blog. Instagram is solely for me to post pictures of my life. I like having it on my blog so people can see what’s going on in my everyday life outside of my blog.
  4. Dynamic To Top: I REALLY dislike when blogs don’t have a ‘scroll to top’ button! A site that is easily navigated is critical in having return guests. A search function is another ‘must-have’ in my opinion.
  5. Engageya: Being able to have suggested posts at the bottom of each post is a great way to keep someone active on your blog. They might see my Life Planner post on Pinterest and at the bottom see my post about Magic Kingdom and click because they’re planning a trip to Disney.

Do you like these features on my blog? What are some of your favorite plugins? I might have some new favorite plugins after this post!

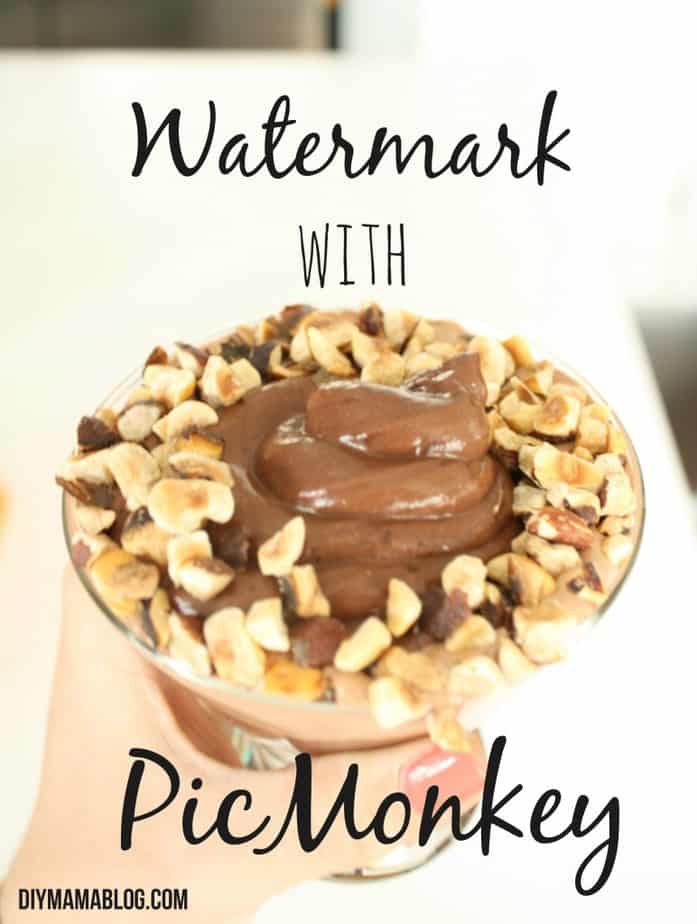
Watermark Your Photos-PicMonkey

Hey techies! Today I’m sharing another PicMonkey tutorial on how to watermark your photos. I did a post on making a PicMonkey Invitation a couple months ago and several people have asked what program I use to make my graphics. PicMonkey is extremely user friendly and free (unless you want to upgrade to Royale.)

watermark-with-picmonkey

I, personally, don’t use watermarks on my photos because I use a LOT of photos in my blogs and honestly, I just forget. It has nothing to do with the difficulty of the task. The first step is to open www.picmonkey.com in your browser (I know…duh…but it is the first step.) Next we’ll make a watermark that you can use to stamp onto each of your photos so you won’t have to re-create a new watermark every time you edit a photo. Click on the design button on PicMonkey’s homepage.

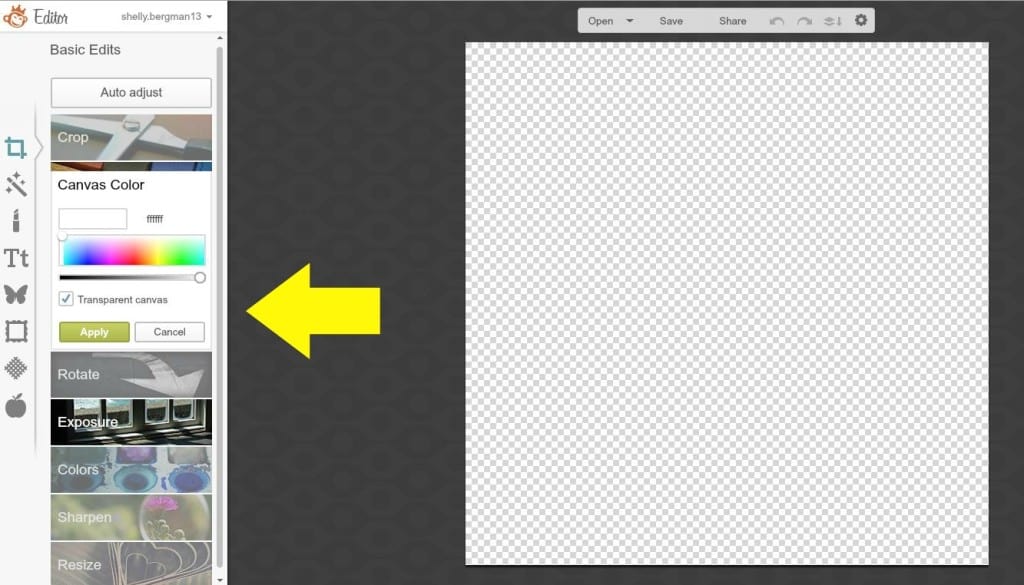
transparent-canvasIn the ‘crop’ menu on the left, click the box for ‘transparent canvas’ and hit ‘apply.’ This will make your watermark only show the text/image over your photo.

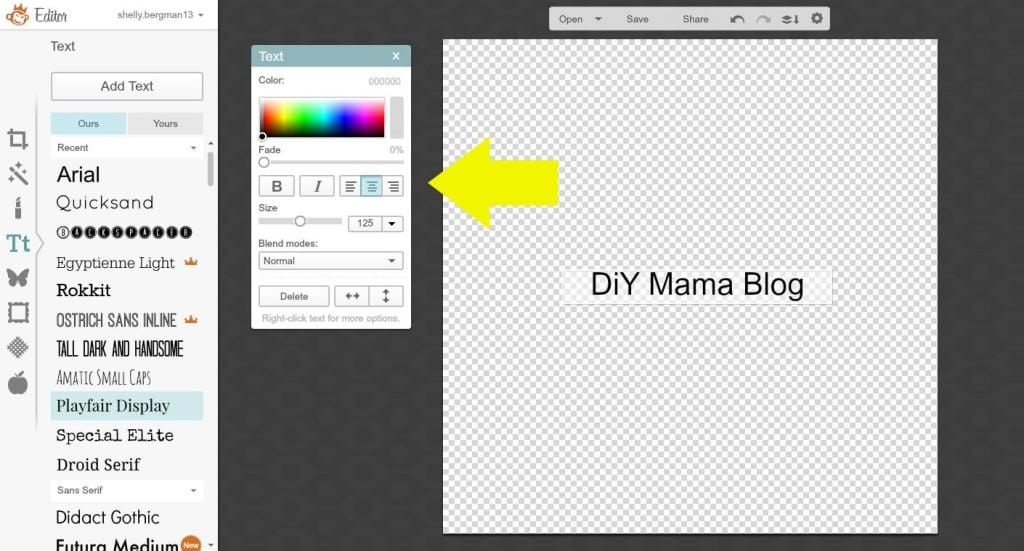
textAt this point, you’ll most likely want to use the ‘add text’ menu or the ‘overlay’ menu (the butterfly.) I wanted my name as the watermark so I clicked the ‘Add Text’ button and a text box popped up on my canvas as well as a text window to adjust the size, orientation, color etc.

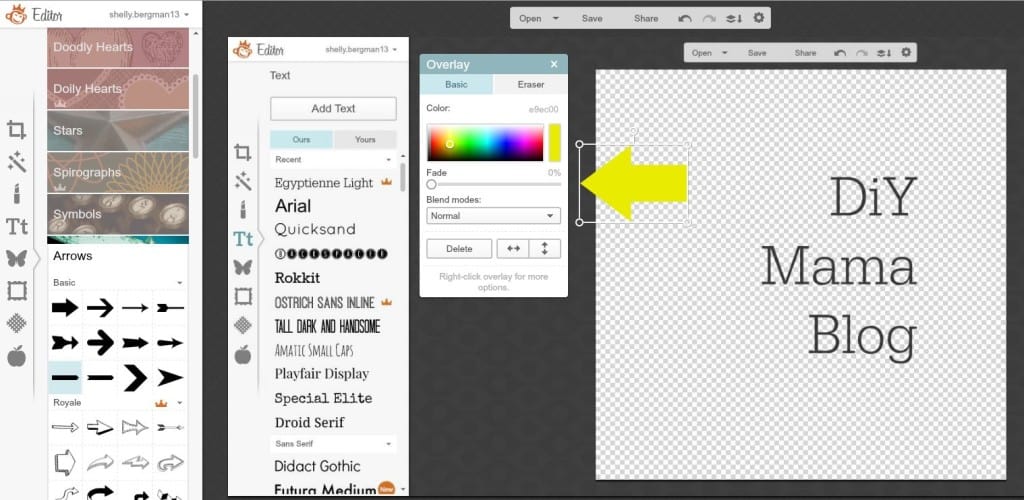
font-fadeFor the purpose of this tutorial, I left the text black but for my actual blog I would use white and fade it so it would show up better on my photos. I might even make a white version and a grey version in case I have an image with a white background. The above photo actually has the window for the arrow rather than the text but I wanted to point out where the fade slider is for the text or image. I love PicMonkey because you can use their free fonts, their Royale fonts and all of your existing fonts on your computer. If you want a TON of fonts but don’t want to pay the extra for Royale you can download free fonts at DaFont.com or Google.com/fonts.

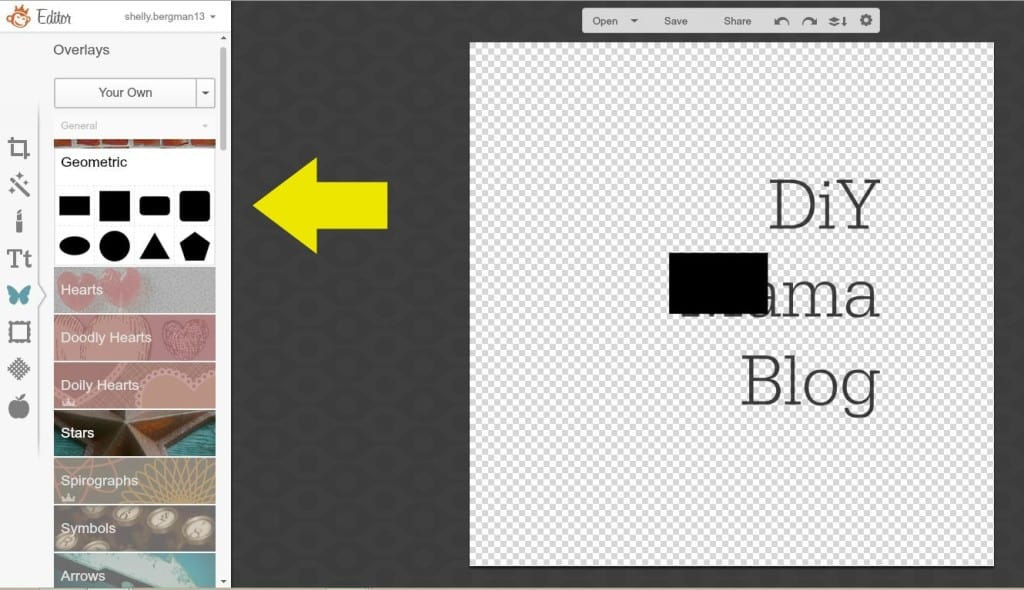
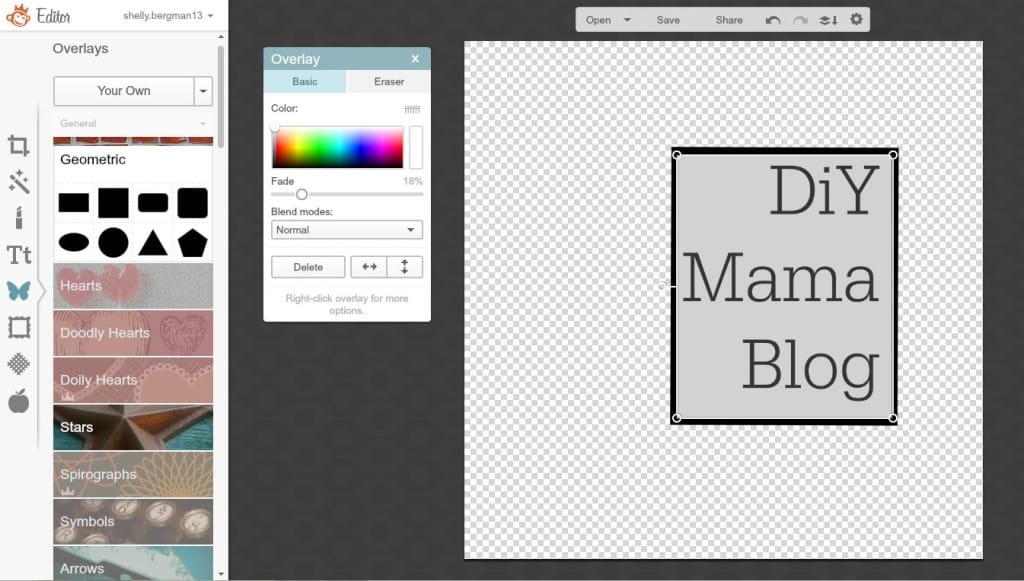
geometricIf you want some sort of boarder around your text you can use the ‘geometric’ option from the ‘overlay’ menu. I chose a black rectangle that I enlarged and rotated. I right clicked on the black rectangle to bring up a menu where I ‘sent to back’ so it would fall behind my text.

layered-boarderThere are literally billions of different options for making your watermark. A lot of bloggers write out their name or full url and place it in the lower right or left hand corner of each picture. Some bloggers have more of an image stamped with their ‘seal’ somewhere on their photo. You will only want to have the border if you want it to really stand out on your photo.

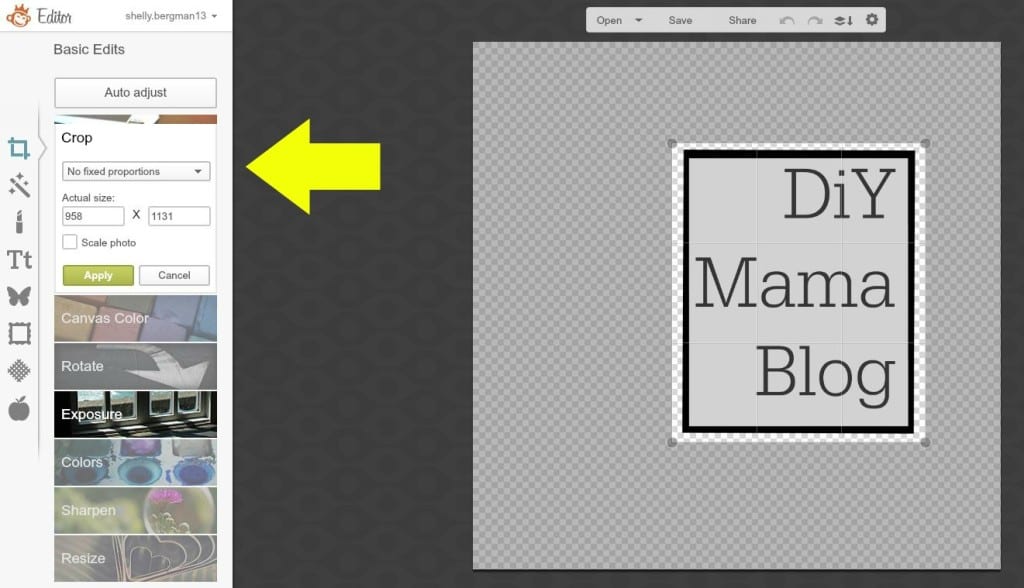
cropYou’ll want to use the ‘crop’ menu to crop your photo as ‘no fixed proportions’ so you can outline the area you’ve designed.

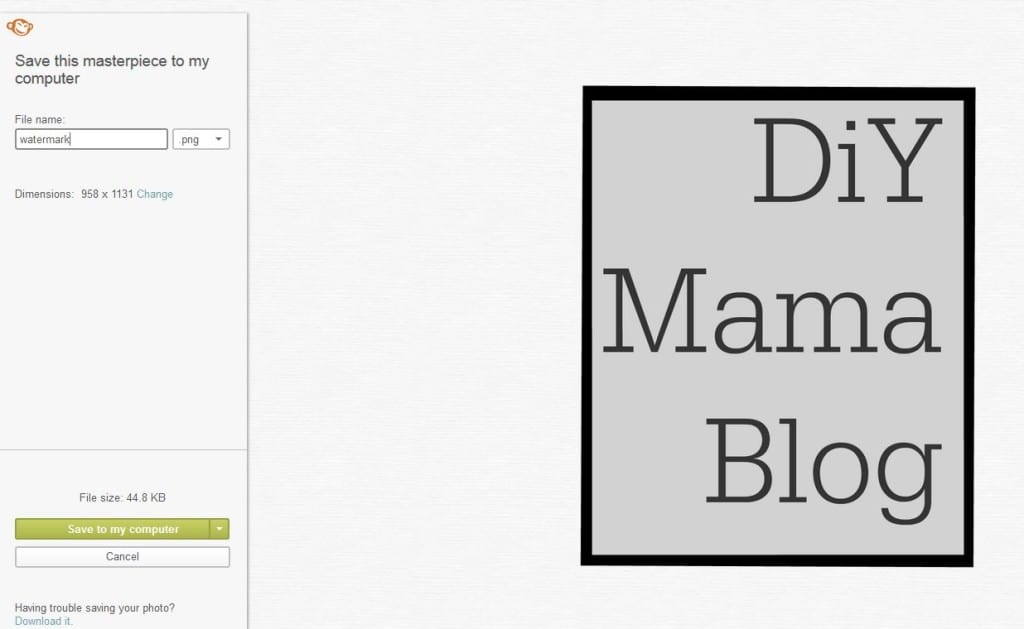
save-sizeOnce you’re satisfied with your watermark, hit ‘save’ at the top of your screen. Name your file and re-size it’s dimensions. You’ll want to change your size to something much smaller; anywhere from 100-300 depending on how large you want your watermark. You can also just leave it large and re-size it when adding it to your photo.

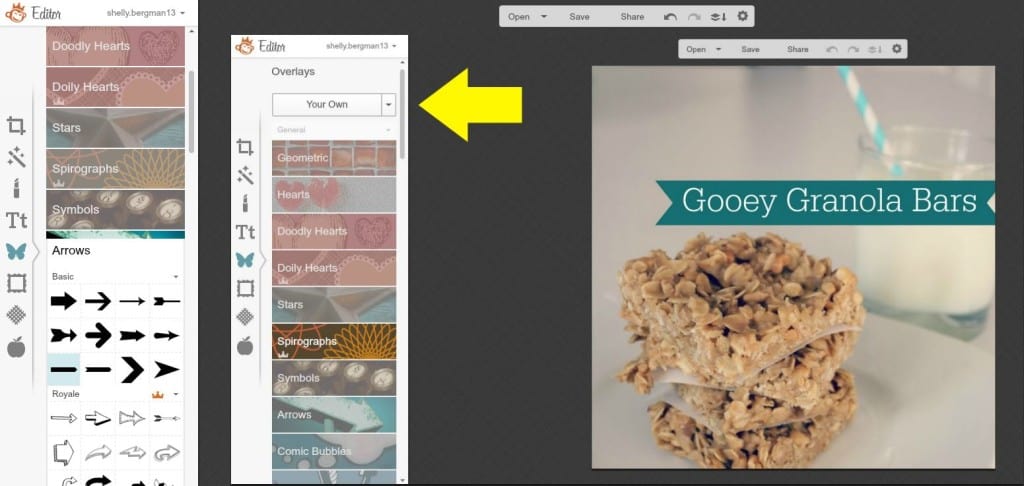
adding-watermarkTo add your watermark to a photo, open your photo in a new PicMonkey tab and click ‘edit’ from the homepage. Once you’ve selected the photo you want to watermark, click the ‘overlay’ menu (butterfly) and click ‘your own’ to add your watermark. Resize as needed.

watermark-example-1Here is the watermark I made for this tutorial but I’ve also made a few others in the past when I was trying to decide if I wanted to watermark my photos.

watermark-example-2watermark-example-4watermark-example-7Yes, the theme for the photo bomb was ‘my babies.’ If I come into a problem with people stealing my photos, I’ll probably start adding a watermark. For now, the disclaimer on my ‘about me’ page is comfort enough. I may be too trustworthy but that’s ok. Have you run into copy write problems with your photos in the past? Do you use a watermark now? Aren’t my babies the cutest?

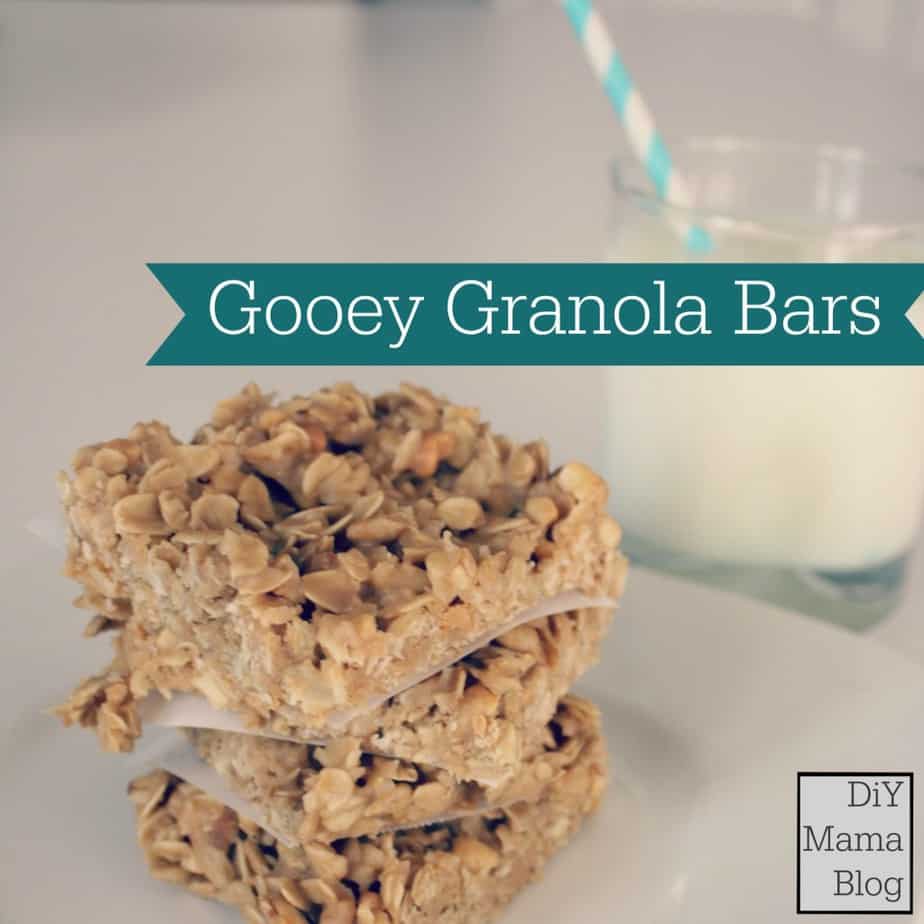
*For a tutorial on how to make the Nutella Parfait on the title photo, click here and for the Gooey Granola Bars click here (both of which will have you thanking me.)

So what’s aperture do again?

Hello shutterbugs! I am doing a new series on photography the next several weeks. Photography is a hobby that I wish I was more passionate about. I look up to the people who can really capture a moment in time to freeze it for all eternity. It’s a major talent to be able to see an image and re-create it perfectly as you see it in your mind. This is my ultimate goal and I’m starting today by learning about aperture. I believe the best way to learn is by teaching others, so hopefully this will help me in understanding my DSLR further.

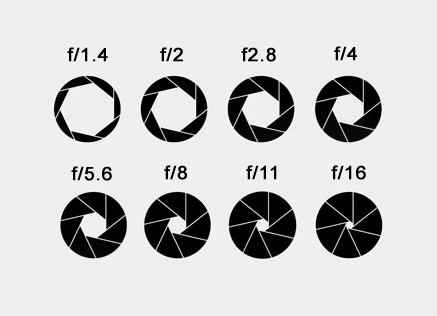
ApertureThere are three main areas of the camera that you can adjust to get your photo to turn out how you’ve imagined. The aperture, ISO and shutter speed can all be adjusted to get the perfect shot. Aperture refers to the adjustable hole in your lens that allows light to enter. Measured in f/stops, the smaller the number, the larger the hole and in turn, more light that can enter the camera. Imagine the aperture as your pupil; with low lighting, your pupil gets larger to allow more light to enter but when you’re outside where it’s sunny, your pupil shrinks to shield your eye from the light.

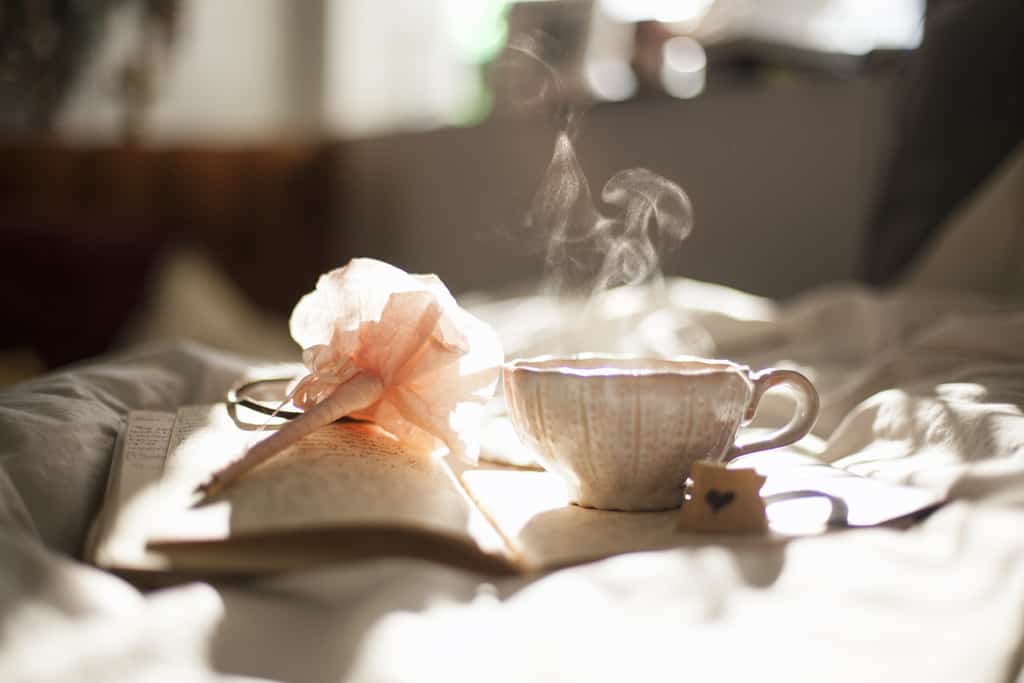
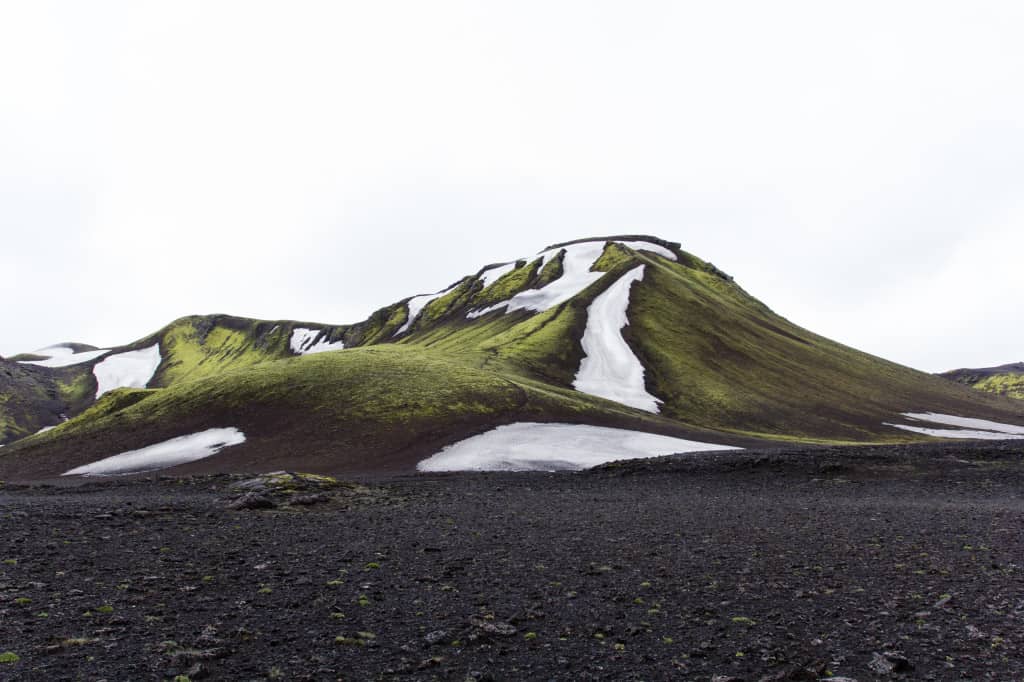
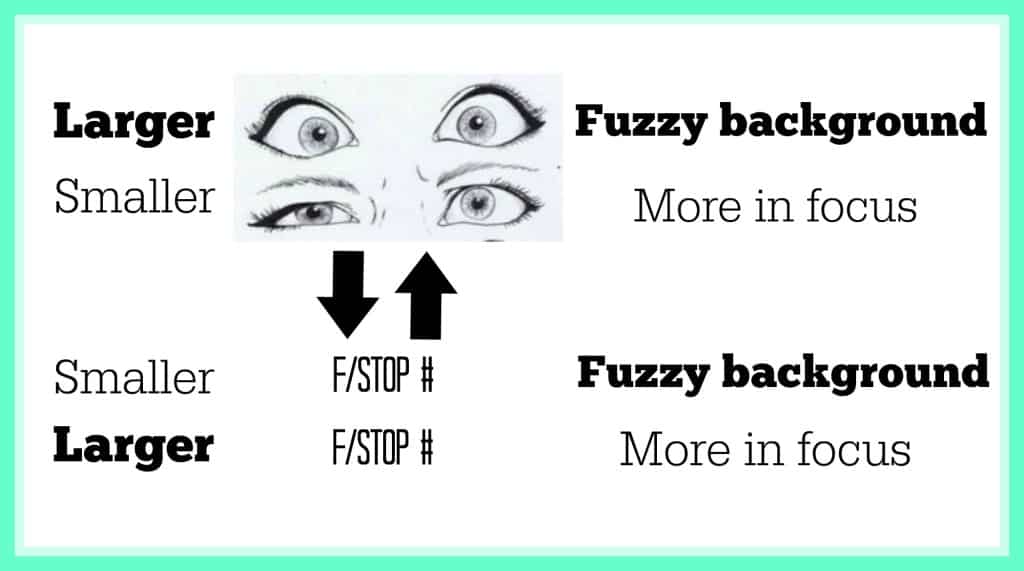
fstopsAperture is used in determining the depth of field (or portion in which your image is in focus.) The wider your aperture (low number), the shallower your depth of field making a smaller portion of your image in focus. The smaller your aperture (high number), larger your depth of field making a larger portion of your image in focus. I’m a visual person so here is an example of a low f/stop setting and a high f/stop setting.

tea-low-aperturemountain-high-apertureNotice how the tea cup is in focus but the background is fuzzy? There is a shallow depth of field because a low f/stop number was used. In the photo of the mountain, everything is in focus making the depth of field very large with a high f/stop number. The toughest thing for me to remember is that the smaller the aperture (hole), the larger the f/stop number. A good way to remember this is to squint and open your eyes real wide. People often squint to see things in focus (small eye = small aperture hole.) For an image with everything in focus squint or make your aperture hole smaller (f/stop number larger.) Basically, they’re opposites.

fstop2The best way to learn how aperture affects your photos is by taking the same photo several times, changing only the f/stop. Here are a few of my favorite explanations of aperture from my fellow bloggers:

i heart naptime
Kevin & Amanda
Click It Up A Notch
Snap Creativity

Now I must take advantage of Sophie’s nap and practice! What’s the hardest part for you to remember while changing the settings on your camera? Anything you’d like to learn more about that I can do in my photography series? Chances are, I need to learn it better as well! Just keep practicing!


Mountain and teacup photos were not taken by me. Click on the photo for the original photographer’s site.

Creative Summer Crafts

TGIF! I hope you’re all doing well and gearing up for a fun filled weekend! I was super inspired by the sheer number of creativity I saw on my fellow blogger’s sites this week! TONS of great summer crafts! It was actually really tough to choose only five that I wanted to do/share with you all! Anyone want to come babysit so I can just create all weekend?!

craftyMy top favorite crafts that I saw were projects that I’d like to make for myself or someone else. I like how some of them are things I’ve never done or thought to do but are simple to do and are inexpensive.

  1. The first project I fell in love with is trending all over the blogsphere right now! Weaving! I really like the thought of putting something textural on a gallery wall in whatever shape/pattern I choose. Rachel at A Beautiful Mess wove this darling pink and green piece with a loom but shows how to make your own with a board and nails!
  2. Ashley from Sugar and Cloth guest posted at Julep this week the most adorable way to liven up some simple candy jars! You could really do this with any container. She painted the bottom and added feet for just a few dollars to make them one of a kind.
  3. I spotted this summer outdoor sign painted by Ariean at One Krieger Chick! Ariean did a great job of writing the tutorial and showing how to do a great ombre effect with paint. I love how it livened up their outdoor space to make it more fun and personable to their family!
  4. Amy at Delineate Your Dwelling, once again, created something that I fell in love with. Stamping cocktail napkins as a gift using wine corks! The design possibilities are endless and it’s a great way to re-use something you already have!
  5. Kristy, from Diary of Dave’s Wife, posted this totes adorbs tote at Eighteen25 this week! I love it for so many reasons. 1. You can’t have enough totes. 2. I abrev ev. 3. I love stripes and the heart on the back!! Looks like a great tote to take to the beach or farmer’s market this summer!

Was I right or what?! Awesome job ladies! Lovin’ the creativity going on this summer! I think I’ll save weaving for this winter because I’ll get too restless doing it while it’s nice out, although I really want one for my gallery wall..hmmm… tough problems today. 😉 I also want to throw a party so I can make some cute jars, and instal a pool so I can make that sweet splash sign. 😉 Anyone throwing a party that I can make these cocktail napkins for? I’ll bring the wine in my totes adorbs bag! Now that I’ve got it all planned out…what are you going to try to make? Any fun crafts you’re going to try your hand at soon?

Happy Birthday My Love

Today is my second favorite day of the year (now tied with October 5th which is Soph’s Birthday!) Christmas is my favorite day but close behind is my husband’s Birthday! He’s not a fan of celebrating his Birthday because he doesn’t like attention, but I am so grateful that he was born, I must celebrate! Jeffrey is my best friend, biggest motivator and soul mate. I couldn’t have been luckier to find the best person to be Daddy to our Sophie.

purduehoneymoonsophie (51)1In honor of my love’s Birthday, I thought I’d ask him 10 simple questions to see how well I know him.

1. Where would you live if we could take our family and friends anywhere in the world?
His: Scotland
Mine: Germany

2. What is your favorite TV show?
His: Scrubs
Mine: Game of Thrones

3. Who is your favorite author?
His: Terry Pratchett
Mine: Steven King or Terry Pratchett

4. When were you most nervous in life?
His: Before auditioning for drumline…I knew your parents would let me marry you.
Mine: Asking my parents for permission to marry me.

5. When were you most happy in life?
His: Getting married to you…or Sophie’s birth.
Mine: Snuggling Sophie to sleep as a newborn.

6. If there were 5 extra hours in the day, what would you do with them?
His: Gosh…write and work out.
Mine: Write or read.

7. What is your favorite movie?
His: Come back to that one…Sophie what’s my favorite movie? Ummm Frozen? No…Probably Twilight… hold on, let me look…let’s say…why is this so tough? (it’s now been 10 minutes) The Matrix.
Mine: Probably Twilight… I have no clue…I feel it changes often…LotR?

8. What would you tell your 16 year old self if you could go back in time?
His: start writing and stop eating crap food.
Mine: There is a girl out there that is going to love you (nerdiness included) more than life itself.

9. If you were given $10,000 what would you do with it?
His: Save it.
Mine: Pay off loans.

10. If you were given $10,000 that you could only use for fun, what would you do?
His: Travel
Mine: Travel to Europe or buy Legos!

Man, that was soul searching! -Jeffrey

I was pretty close!! He thought it was funny that I knew to ask number 10 because number 9 would be boring. I really should have known Scrubs was his favorite TV show but I was surprised about his biggest nervous moment! I’ll love looking back on this in 10 years to see where we were at this stage of our lives. I wonder if he’ll still love Twilight as much as he does now? How would you score if you asked your SO these questions?! If you happen to see Jeffrey, wish him a Happy Birthday!

Shelly


Google+