Craft

Watercolor Postcards

Hello friends! Happy Monday to you! I hope you all had exactly the kind of weekend you were hoping for, whether it be exciting, relaxing or inspiring. My weekend was a mixture of all three. Friday night I got crazy with watercolors!

watercolor_postcards_DIYMAMA

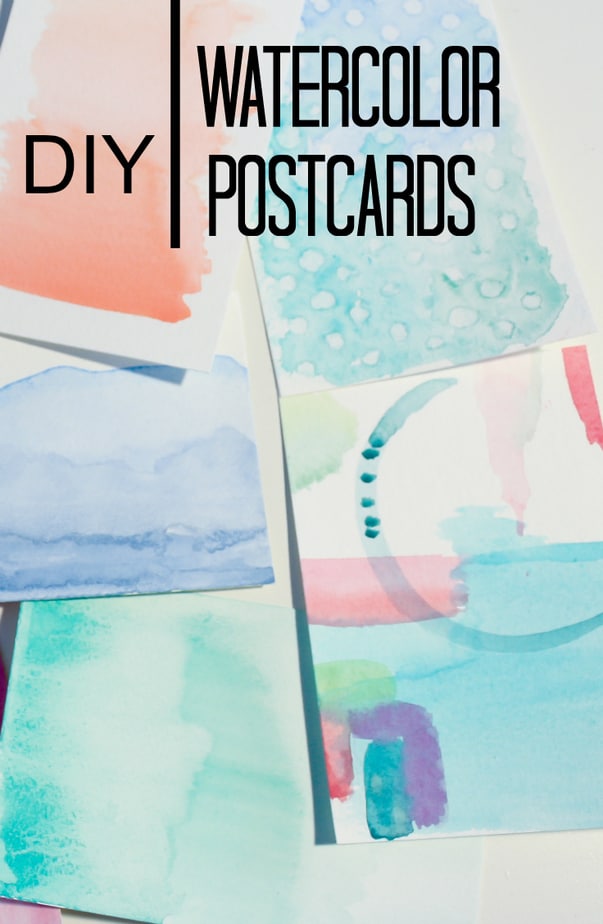
For Christmas I received watercolor postcards. I thought it would be nice to do a bunch at once so I’d have them on hand for quick notes. I couldn’t decide on a theme for my stationary so I applied many techniques to my postcards.
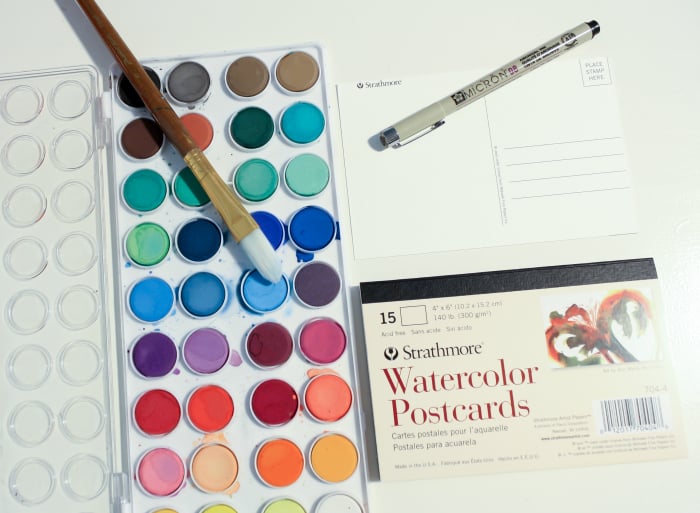
watercolor_postcards

Supplies needed:

watercolor_stencil

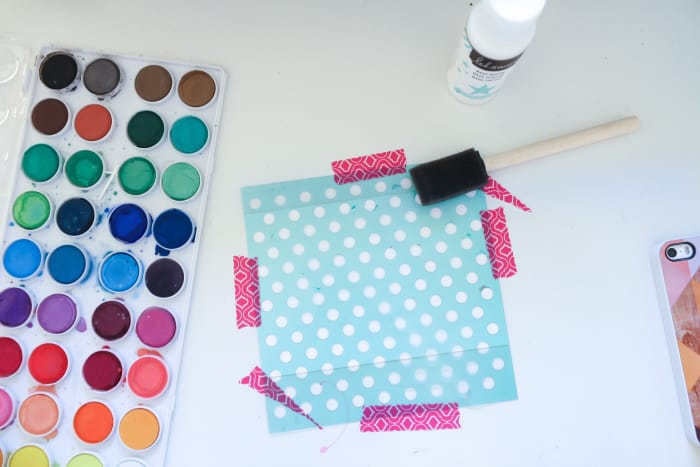
This was my first time using Magic Medium. It was also my first time using a stencil for watercolor. I wanted to make sure my stencil didn’t move since I knew I would be painting with a thicker consistency. I first taped down the post card, followed by the stencil.

watercolor_magic_medium

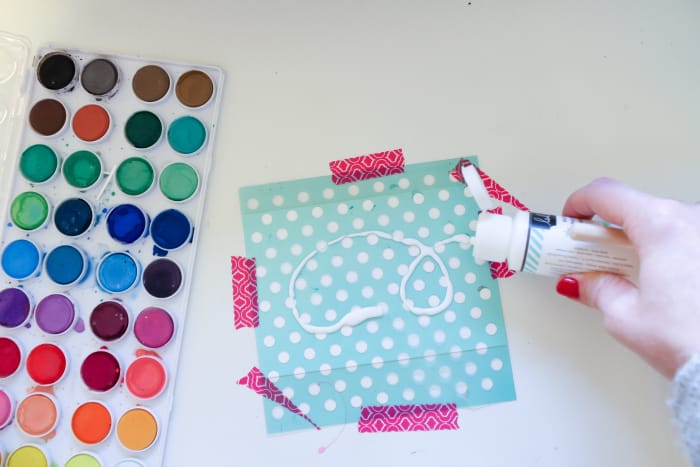
I guessed on the amount needed to cover the postcard in a relatively thick layer. I used a sponge brush to smear and dab over the stencil to make sure every hole was filled.

watercolor_dots

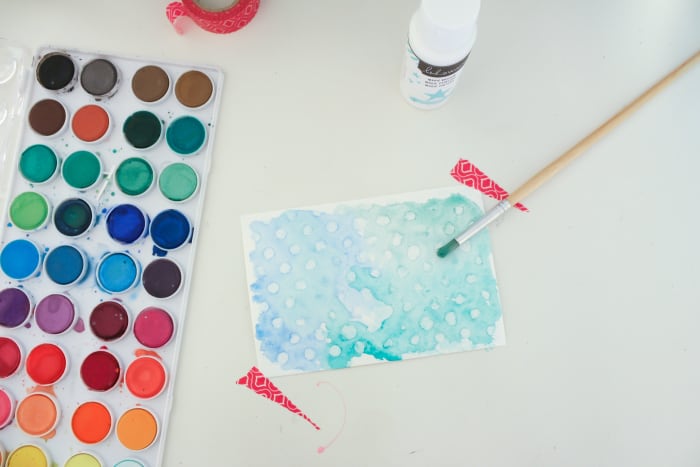
Once the medium was dry, I painted some blues and greens over the stencil and carefully removed the tape and stencil. I like how the dots aren’t perfect circles. This postcard reminds me of raindrops.

watercolor_cards

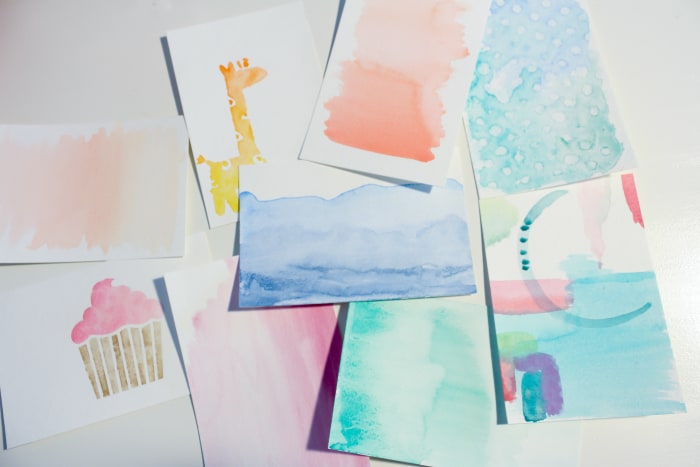
For the remainder of the cards I tried some ombre effects, other stencils and one abstract post card. I will write over the fronts of these cards when I go to send them but didn’t want to without knowing who they’re for.

Have you tried your hand at watercolor? I’ve only done one watercolor project before and I think it is the most forgiving medium. I really want to take this Watercolor Cards Made Simple class online but for now, it’s hard to make watercolor look bad! Which card was your favorite?

Let’s DIY

Let's_DIY_1

I decided to try a new series out this year called Let’s DIY! It’s a spin off of my Friday Finds series I had last year where I featured some of my favorite projects I’d seen the past week. This year I’m gearing it towards DIY projects that I think are inspiring and fresh!

These were my favorite five from this past week!

  1. Watercolor Stationary by Paper &  Stitch
  2. Leather Keychain by Homey Oh My!
  3. Dyed Favor Bags by Paper & Stitch
  4. Moon Phase Wall Hanging by Almost Perfect
  5. Layered Foam Wall Art by A Beautiful Mess

Jeffrey came home from work yesterday and said ‘I’m calling this weekend ‘Improve Yourself Weekend.’ What are you going to do to improve yourself this weekend?’ Which I thought was kind of funny because I LOVE that idea and had already deemed the entire week ‘Improve Yourself Week’ by learning Light Room, Photoshop, Google Analytics, AdSense and working out! I’m kinda wanting to run out to the craft store when he gets home to buy all the supplies for ALL of these crafts!

I’m really interested in making generic favor gift bags saying things like ‘hello’, ‘yay’ and ‘i love you’ to have on hand for easy wrapping! What DIY project are you excited to get started on this weekend? Any of the above spark an interest?

Busy Board

Hello Mamas and Papas (or anyone looking to make an awesome Christmas gift for a lil one!) I had been struggling with the fact that we don’t have a basement or play room designated for Sophie to have as her ‘fun zone.’
busy-board

I’d bounced it off of you guys and you put it into perspective for me. Kids are going to play wherever they can. It doesn’t matter if there’s a whole room or if it’s under your feet…they’re not picky. Sophie is usually under my feet, but when she’s not, you can find her at the latch board/ busy board we made for her.

She’s too young to practice latching, turning a key, and pretty much everything else on the board, but she still LOVES playing around with all of the different tools. Her favorite thing is the peek-a-boo doors that hide her cousin, Fiona.

Materials Needed:

  • Wood board of any size (we got one cut down to 2×2)
  • Stain or paint for the board
  • Brush or rag for the stain
  • Sand paper or router to make the edges kid-friendly
  • Tons of latches
  • Drill
  • Picture hanging cleat
  • Thin strip of wood

stain-board

It was fun going to the hardware store to pick out all of the materials needed to make Sophie’s busy board. First, we got the board cut down to size so we could hold up the latches to gauge the number needed to fill the board. In hind sight, that would have been an awesome idea but when you have a crying baby, you kind of just grab what you think looks best and save the receipt.

latches

Several days later (because we know that’s how projects happen) we chose the best of the best for the latch board. Some of the things we thought we’d really want on there, didn’t turn out to be the best idea (a tap light that could blind her with it’s super-bright LEDs.)

lay-latchesHere you can see how we’ve spaced things according to size, what she’ll play with and where cords/chains will hang. We probably spent too long trying to figure this out but I don’t regret the placement of anything on the board! Everything we bought came with hardware and was super easy to drill a hole and screw through the board. We used a counter sink on the drill bit to ensure everything would lay flat against the wall. As you’ll see below, there were a couple things that stuck out (the buttons) but it doesn’t seem to effect the board being unstable.

picture-hanger

We used a thin strip of spare wood to attach the picture hanging cleat to the back of the board. We’ve used these cleats on very heavy frames and mirrors and knew it would stand up to Soph pulling and hitting the board. The board does come off from the wall if she pulls a latch hard but it hasn’t left any dents in the wall (yet.) Nothing a little spackle and paint won’t fix when we go to move.

helping-daddy

We couldn’t wait to see her reaction so we brought it in to hang before she went to bed. She was so curious about the board and wanted to play with it right away! As always, she had to help Daddy hang it on the wall.

latch-boardWe’re super in love with her board. I’ve put it on ‘her wall’ where I have art that I’ve made for her and a sweet Muppets Alphabet print that she likes to sing to.

gallery-wallHere’s how sweetly nestled it is on the gallery wall. I like the fact that it’s a toy that’s on the wall, meaning I don’t have to constantly be putting it away or tripping on it in the middle of the night.

fiona-doorHer, and my, favorite part of the board are the peek-a-boo doors. She’ll pretty much play peek-a-boo with anything, but curtains and these doors are her favorite. The other door hides a photo of Jeffrey and I which she always takes off to hand to me. I think she’s asking when Daddy’s getting home! I have the photos up with washi tape because I wanted to be able to switch out the people as a fun surprise or even add flash cards of words she’s learning. Like I said, she pulls down the photo of us, but she always leaves Fiona, so that one may just stay there forever.

sophie-playI’m excited to watch her as she becomes more interested in the different latches and begins to start playing with the more difficult gadgets. Some of the latches are for a much older Sophie, which I LOVE! For now, the door stop, peek-a-boo doors and mirror keep her entertained for at least a few minutes while Mommy cleans up her lunch from the floor.

I’m proud of her latch board for a few reasons. 1. It looks stellar and she’ll be able to use it for years to come. 2. It was a fun project for Jeffrey and I to design and build together for our sweet daughter. Win win! What else would you put on the board to keep a baby-toddler busy? I was wanting to add a zipper, buttons or ties but wasn’t sure how yet. Any ideas?

DiY Terracotta Pots

Hidy ho crafters and green thumbers! Anyone else having beautiful weather today? It’s supposed to be nice here all week and I am extremely excited about that! I am still missing my lil bean but Lexi is getting better every day and today I was confident enough to run errands, which was a big boost to my mood (especially because I bought clothes for Soph!) I have been seeing pots on sale everywhere I go lately, which means it’s a great time to buy pots for next year’s spring lay-out OR to put some new greenery inside your home for the winter. I love how inexpensive terracotta is but never buy it because it cracks if left outside year round here in the midwest. I saw some small pots for $0.50 and couldn’t resist doing a little diy to bring some more green into our home.

pots-outside1Not pictured: me spray painting three coats of white Rustolium on the outsides of my pots. You never want to paint the insides of vases or pots where the dirt or water will get exposed to paint. The bare inside is never exposed once the plant is inside, so there’s no need to worry that it’ll look unfinished. Continue Reading about DiY Terracotta Pots

Google+