Make

Earring Holder

Hanging earring holder using a tray and wires

I first met Jocelyn while looking for a seat to have lunch in the cafeteria at BlogU. Feeling eerily like the first day of middle school, I spotted Jocelyn with a warm welcoming smile. We hit it off quickly chatting about the classes we’d taken and bonding over being moms of toddlers. I’ve since stayed in contact with Jocelyn through our tribe and have always loved her quick wit and funny spin on everyday life. I knew between my trip to ATL last week and our trip next week I’d be struggling to get posts up. I wanted to showcase a few of my favorite bloggers and was excited when Jocelyn jumped at the chance to help! So without further ado, meet Jocelyn.

What do you do when you own approximately a trillion pairs of earrings? …When they’re getting all tangled, mixed up, and separated from their twins in your otherwise trusty jewelry box?

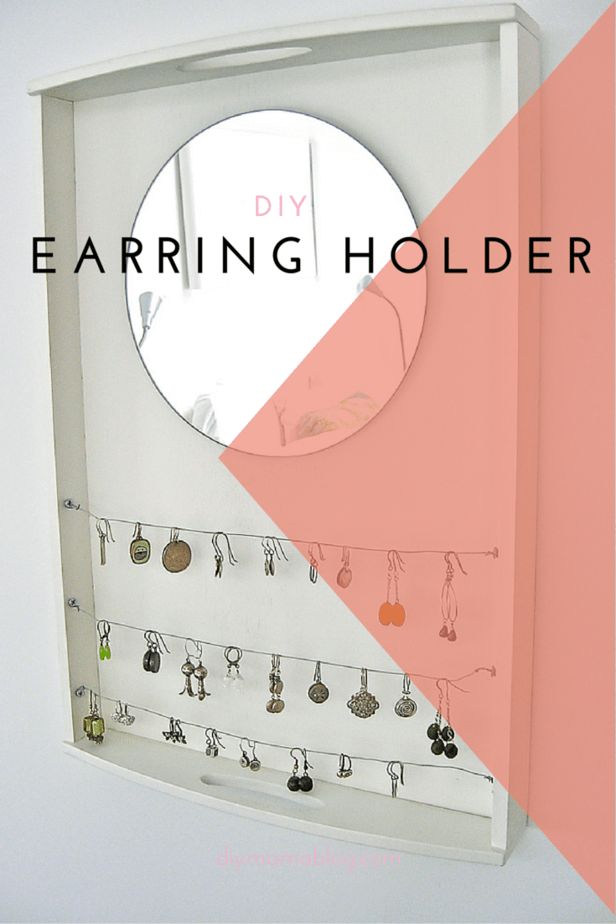
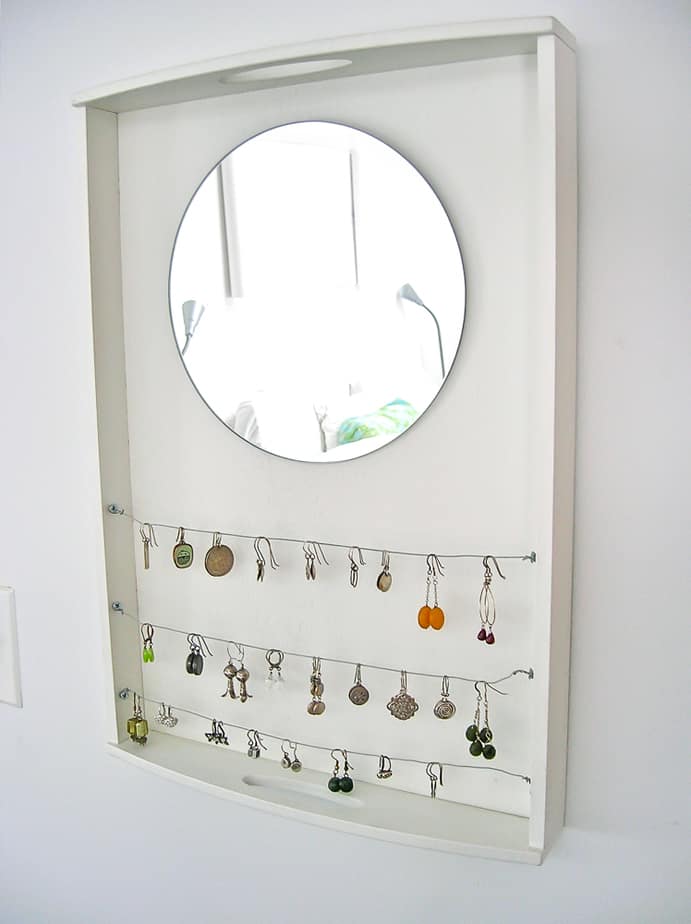
This of course is a very tragic problem and one for which there are only two solutions. 1) You can go out and get more piercings in your ears (or elsewhere on your body) in order to wear all of them simultaneously or 2) You can build your very own “Earrings on a Wire” display case, as pictured above. I recommend the latter, especially if most of your earrings are of the “dangly” variety, because wearing more than one set of danglies not only looks strange, but could turn you into a human wind chime as they bounce off of one other.

I got my ears pierced when I was 13. My mother wouldn’t allow me to do so earlier despite all my whiny begging. In order to ward me off of the concept, she assured me that the process would be VERY painful. She said, and I quote, “You know that they’ll have to hang buckets from each of your ears to catch all the blood, right?” This sounds evil, but my mother was always a jokester, so I knew she was joking. Kind of.

Once I got my ears pierced, on my 13th birthday (no buckets needed), I felt that I had officially become a woman. And I started amassing The Collection: most earrings weren’t all that expensive, didn’t take up that much room, and I derived an inordinate amount of joy from coordinating them with each day’s outfit. I still have most of them, and I am proud to say that my earrings from high school still fit. (Hey, just humor me – I can’t say that about much else from that time…)

In recent years, my husband Rob has turned out to be an excellent curator of The Collection, adding stylish silver danglies on my birthdays and on Christmas from places like The Clay Pot in Brooklyn and Fireworks Gallery in Seattle and The Sundance Catalogue.

Okay, so I have too many earrings. I can admit it. I really needed a way to keep them all straight. When we were living in the South Bronx, we rigged up a wire across a window sill for them to perch on, which worked out very well:
Earring holder using window frame

Note that, to avoid adding any more furniture to our bedroom, I further maximized the windowsill by storing the rest of my jewels in those skinny olive dishes (great for rings!)

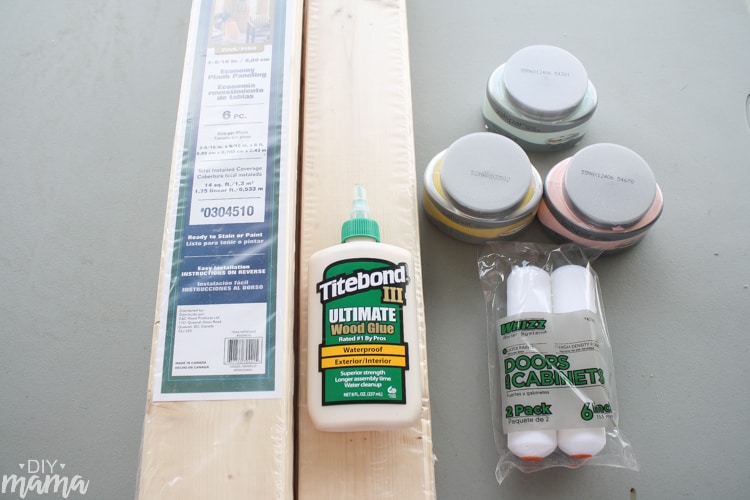
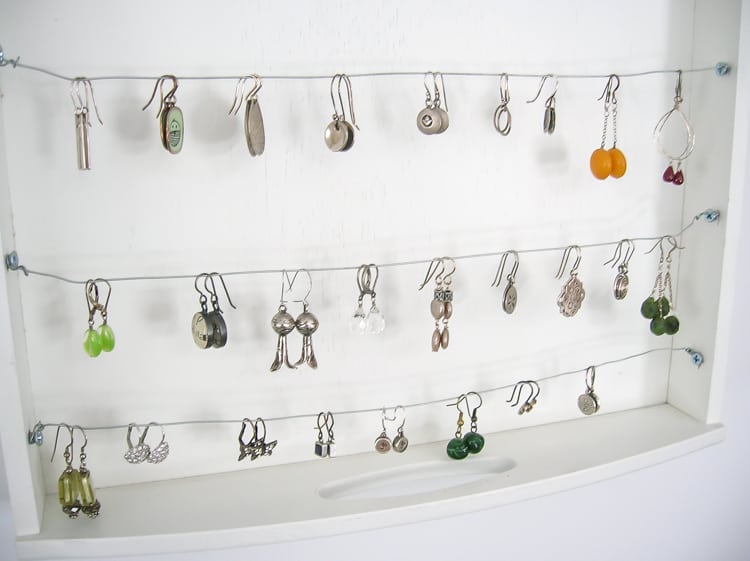
In our new house, the window idea wasn’t going to work, so I picked up a wooden tray from Target (I think it was about $12) and a little mirror from there as well. Rob strung some wires horizontally and connected them to the inside edges of the tray with short screws. And voila! Now I can see my earrings, even if I can’t begin to wear them all. (The other good news is that, up on the wall like that, they are well out of reach for our 2.5 year old…)

Earring_holder_tray_closest (1 of 1)

Earring holder using a tray and wire

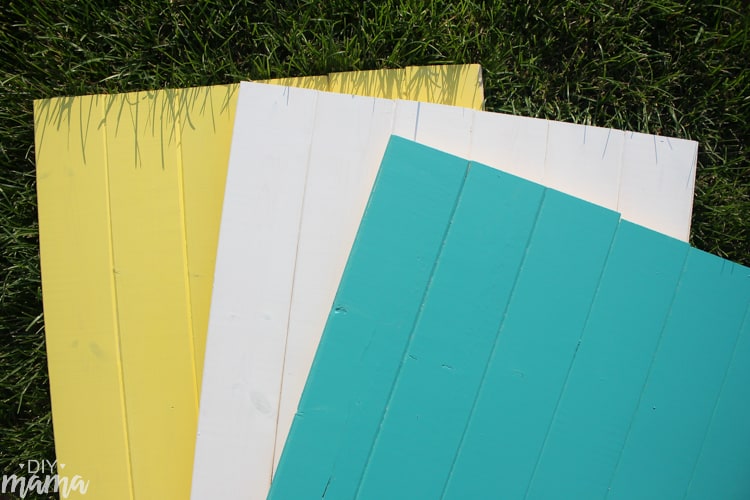
If you are experiencing a similar embarrassment of riches, I recommend that you try this easy DIY project. It would work well with round trays, different colored-trays, and with wooden picture frames, as well.

–Genius earring holder Jocelyn! This is one of the best earring holders I’ve seen and it’s super doable in one afternoon! You could even switch it up by using a colored tray or using wrapping paper as the background. Personally, I like the clean white tray you used because it showcases your earrings so nicely!

DIY earring holder by using a tray to organize

Bio: Jocelyn Jane Cox is author of the satirical Homeowner’s Guide to Greatness and blogs about the humorous side of parenting and homeownership at The Home Tome. She also tells it like it is on her bi-monthly column called, Chronicles of Parenting. Her humor has appeared onSlate, The Mid, The Huffington Post, Mamalode, Sammiches and Psych Meds, and Mock Mom. You can find her on facebook, twitter and instagram.


Let’s DIY

It’s common for bloggers to slow down during the summer months, not post as often because they’re spending more time with their families. All I know is the diy projects rolling through Pinterest are spot on! I’m loving all the creativeness and techniques that people are using this summer. Let’s DIY!

let's diyHere are my favorite craft projects from this week:

  1.  15 Minute Picnic Blanket by Bev
  2. Concrete Stool by Katie
  3. Concrete Tray by Amy
  4. Watercolor Pillows by Kristen
  5. Iron Transfer Tote by Rachel

As all of my crafting materials are boxed up and in another state, I’ll just be dreaming of these projects this weekend. I can easily see switching the water color technique to the tote and trying an iron on transfer on a set of pillows. What are your thoughts? Doing any craft projects this weekend?

DIY Photo Background

As one of my goals for June, I’ve made a few DIY photo backgrounds to spice up my photography. I had realized that my white foam board wasn’t cutting it anymore as it had hot glue and paw prints mucking it up. These photo backgrounds were extremely easy to execute but took several days as I had to wait during drying times for the glue and paint. The hardest part of the project was only choosing five paint colors!

Photo Background

Materials needed (for three backgrounds):

  • Pine plank paneling (found in the flooring department and cut to desired size)
  • Wood glue
  • Spare wood (I used wooden stakes but a 1×2 would work as well)
  • Paint (I used Valspar sample paint from Lowes)
  • Paint rollers (I suggest the rollers made for doors and cabinets)
  • Clamps or weights (I used paver stones)

Photo Background Materials Photo_Backgrounds_Layout (1 of 1) Photo BackgroundThis project was simple and cost under $20 for six photography backgrounds. My first, and most important suggestion is to lay out the pattern of your planks and make sure they all fit snug. A few of my boards were warped and I hadn’t realized until I’d already added the glue.

Photo BackgroundPhoto BackgroundOriginally I thought the planks would be sturdy enough. I let the glue dry between the planks and felt unsure about the longevity of my backgrounds. I used wood glue to add spare wood as braces on the back. I let the glue dry overnight being weighted by a heavy paver stone (a project Jeffrey is working on).

Photo Backgrounds Photo_Backgrounds_Background3 (1 of 1) Photo_Backgrounds_Background1 (1 of 1)
I rolled one thin coat of each color of paint, making sure it was evenly covering the board. I left one board bare on one side for a natural feel but painted every other side.

Let me know if you’ve made similar photo backgrounds or used different materials that are easy to store. I’m excited to start taking photos with my new backgrounds and hope they enhance your viewing experience.

Let’s DIY

Happy Friday and Memorial Day weekend! I’ve got some killer DIYs for you this weekend. Although I won’t be able to do any of these projects this weekend, I’m super excited to see my family and go to the Indy 500! This will be my 23rd year going to the 500 and the weather is supposed to be perfect.

Simple DIY Weekend Projects

Here are my favorite DIY projects for this week:

I might have to break out my yarn and Clover to make pom poms for my bike basket tonight because they are too stinkin cute! Has anyone tried giant crepe flowers? I’m wondering how well they would stand up for an outdoor party like a bridal shower or graduation?

If you’d like to see more DIY inspiration for this weekend, check out my board on Pinterest:
Follow Shelly @ DIY Mama’s board DIY Inspiration on Pinterest.

Beaded Tassel Bracelet

Anyone else have a huge tackle box of beads from when they were younger? I used to make necklaces and bracelets for my family, friends, teachers and just about anyone who would take one. I’ve been pinning to my DIY Jewelry board for over a  year now and have realized I have a lot of the materials to make these beautiful bracelets that I swoon over.

Today I decided to try my hand at a Beaded Tassel Bracelet that can double as mini Japa Mala beads (for me during times of need, such as, lunch time with a toddler).

DIY Beaded Tassel Bracelet
Simple Beaded Tassel Bracelet
Materials Needed: Continue Reading about Beaded Tassel Bracelet

Google+