Make

Wood Growth Chart

Hi friends! I’m super excited to share this tutorial with you because it was inexpensive, easy and fun! I love learning new crafting techniques and I learned how to do wood burning for this diy wood growth chart project.

wood-growth-chartGrowing up we had a growth chart that I have fond memories of being measured on. My parents now have a growth chart for the grandkids that I think is super cute. I wanted to have a hardy growth chart that we’d be able to take with us when we move and that might last through our grandkids.

stainMaterials Needed:

  • 8x8x1 Wood Board (we used Poplar because we liked the grain)
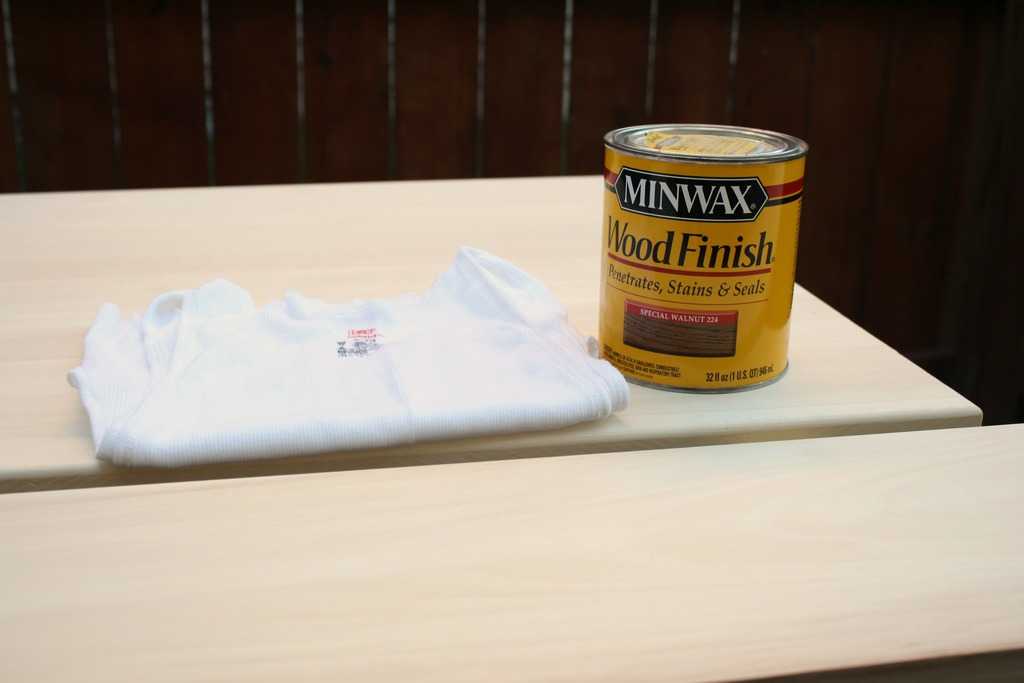
  • Stain
  • T-shirt or Cloth
  • Foam Brush or Large Paint Brush
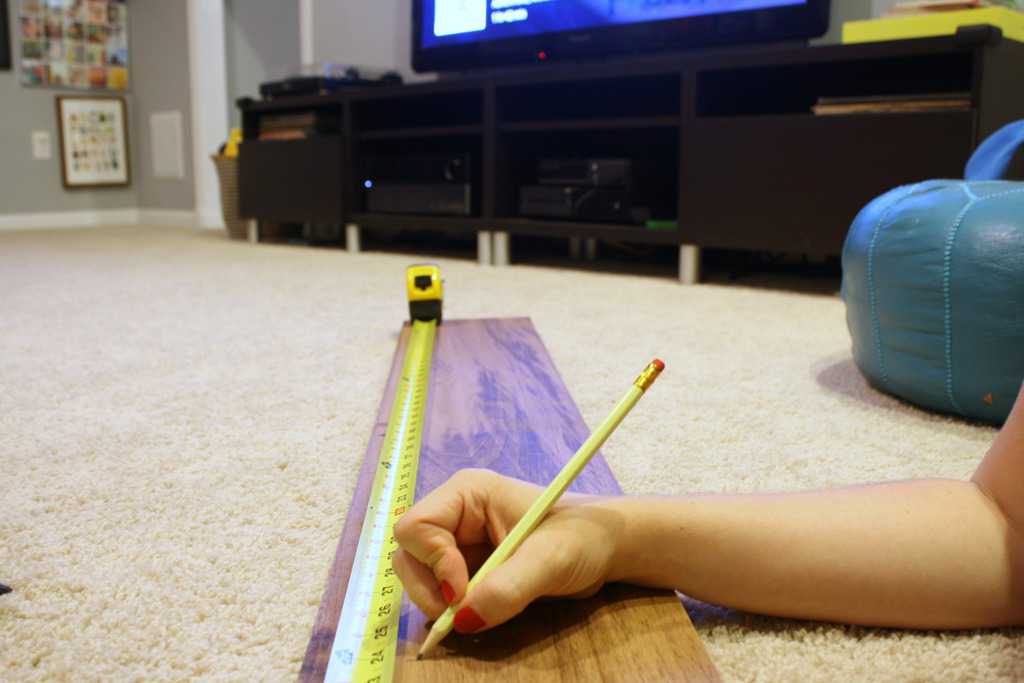
  • Measuring Tape
  • Cricut or Number Stencil
  • Cardstock
  • Wood Burning Tool
  • Metal Straight Edge

stained
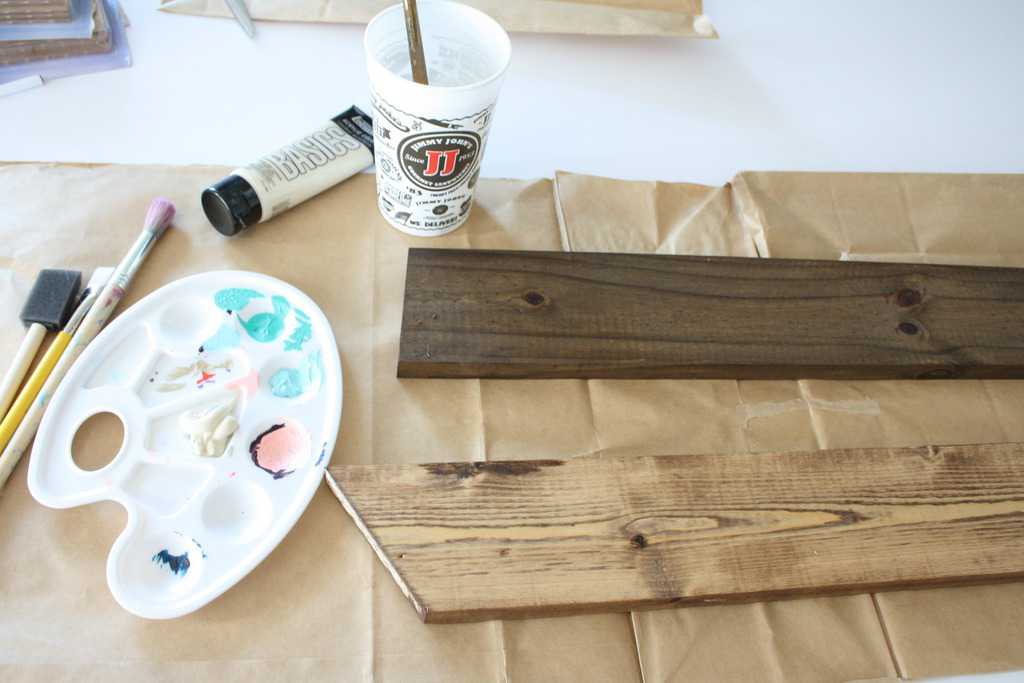
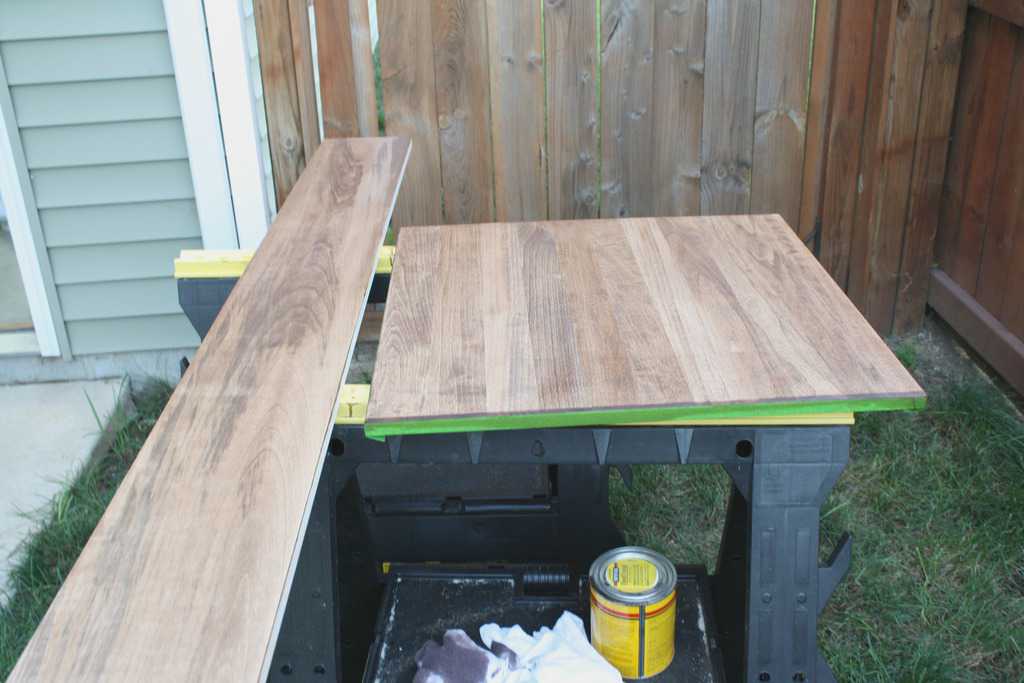
Stain your wood according to the directions on your stain. Here’s a sneak peak of the board I stained for Sophie’s latch board.

practice
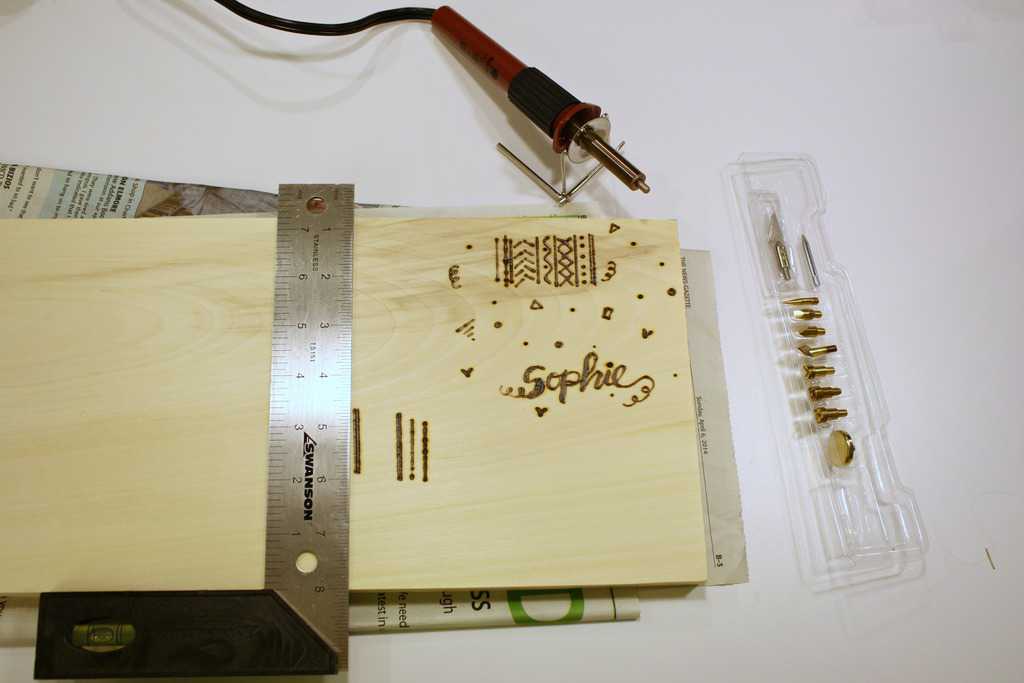
You’ll want to practice writing with the wood burning tool unless you’ve used one before. I read and watched a few tutorials before getting started and practiced on the excess wood we cut off the board (to make it 5 ft.)

measure1Depending on how precise you want your growth chart, mark out the numbers with a pencil as a guide for when you burn.

cricut
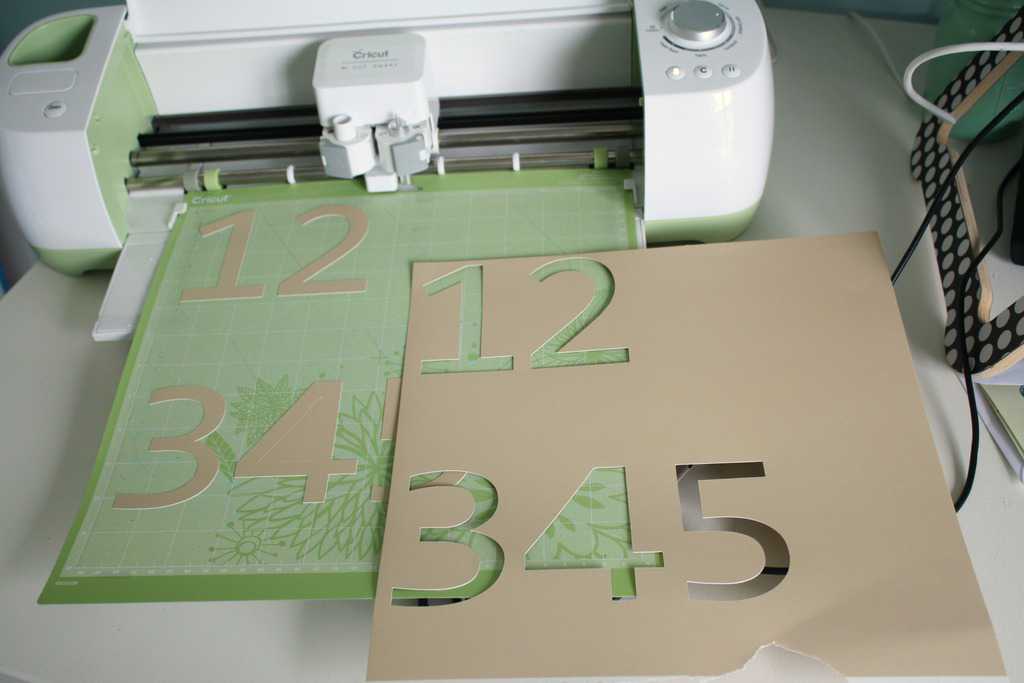
I used my Cricut Explore to cut out my numbers stencil. I liked making my stencil with the Cricut because the font options were endless. I looked for a font that was somewhat modern and didn’t have any extra curves or flourishes. You could also print out numbers using Word or find a stencil at a craft store.

number-stencil
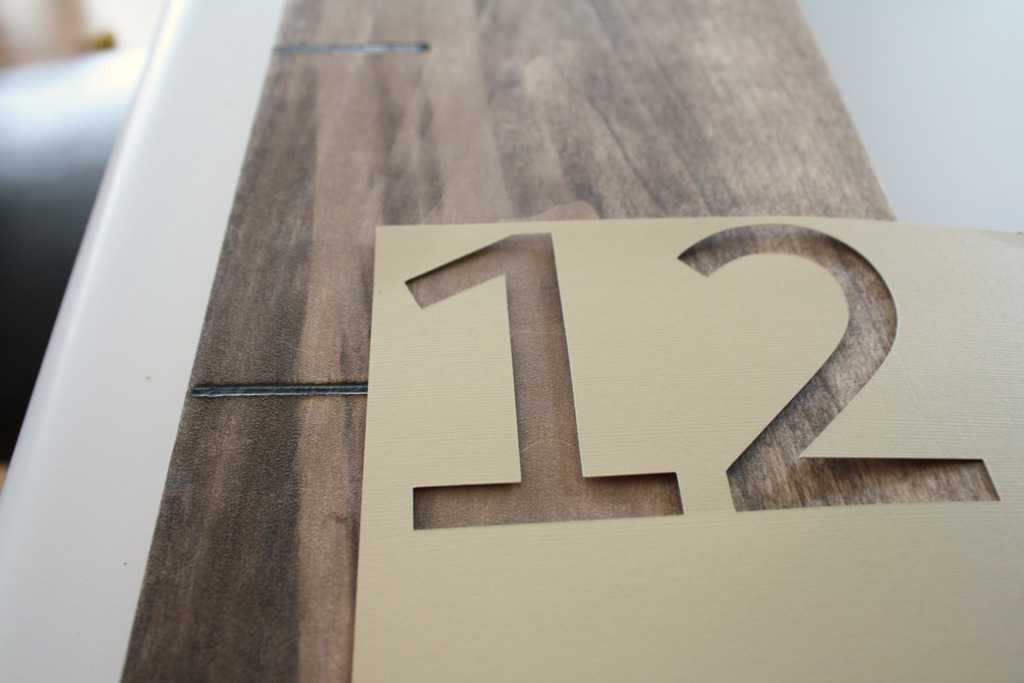
I used our metal straight edge to mark out every half foot on the board. I eyeballed where I thought the numbers looked best and lightly traced them with a pencil.

mistake1
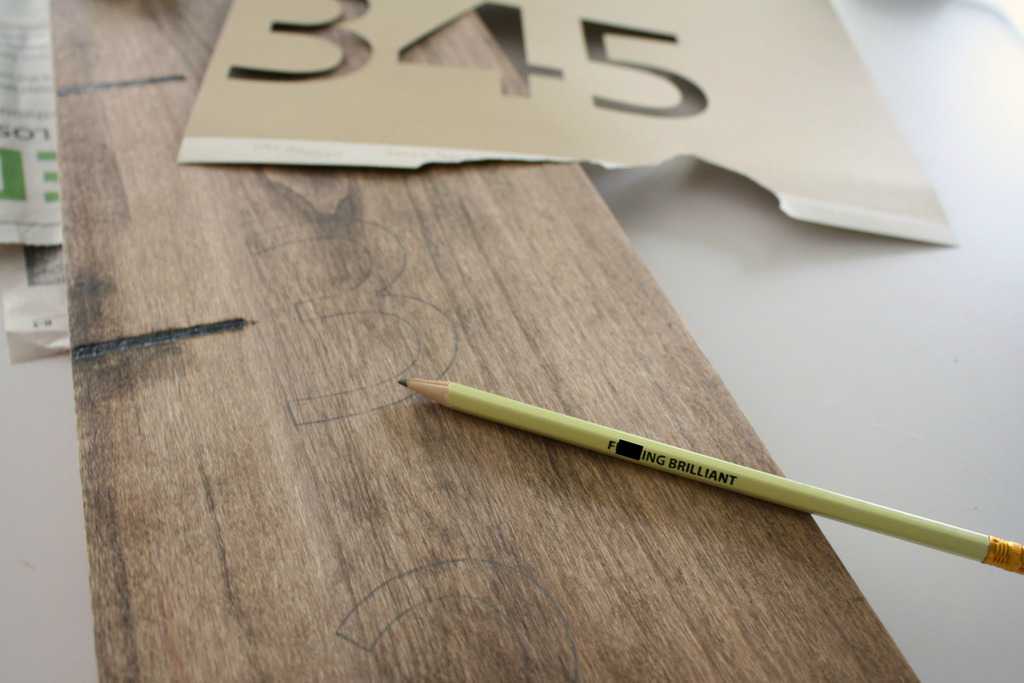
As always, I made mistakes, which is why I use pencils! I wrote the number on the wrong dash but the pencil markings came off perfectly.

IMG_6200
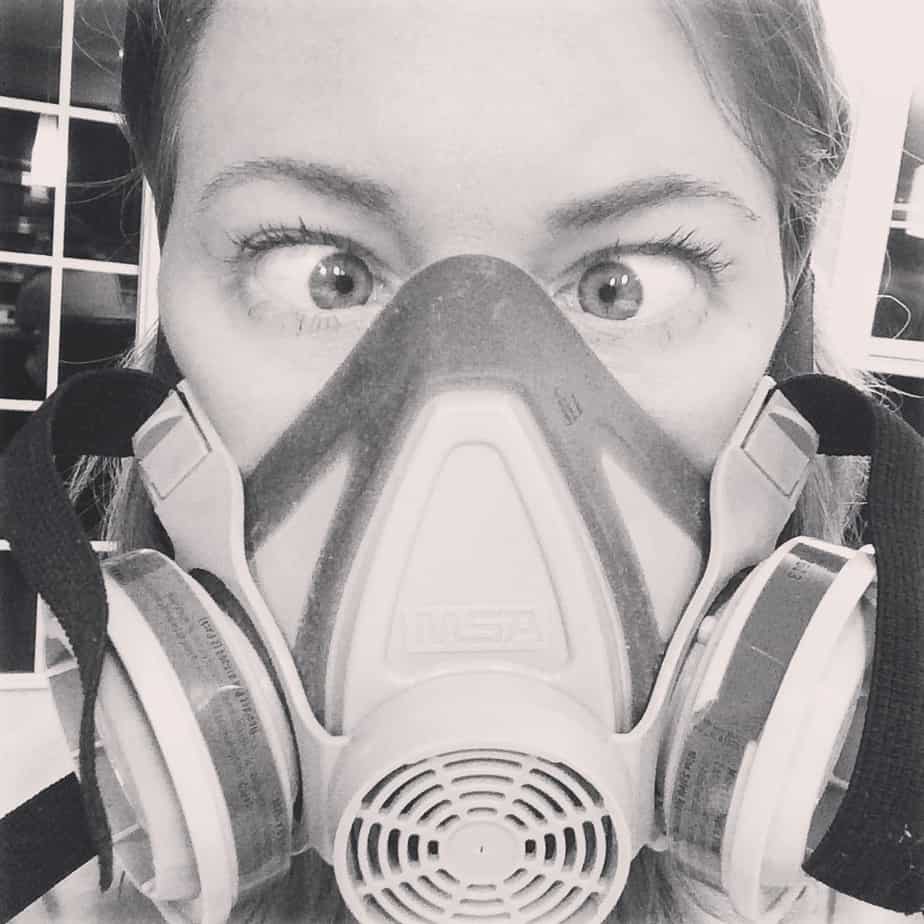
If you follow me on Instagram, you would have seen this monstrosity. I wore it while I burned because I thought the burning of the stained wood would give me cancer. I think any chemicals will give me cancer so this mask isn’t necessary…just a precaution.

wood-burning
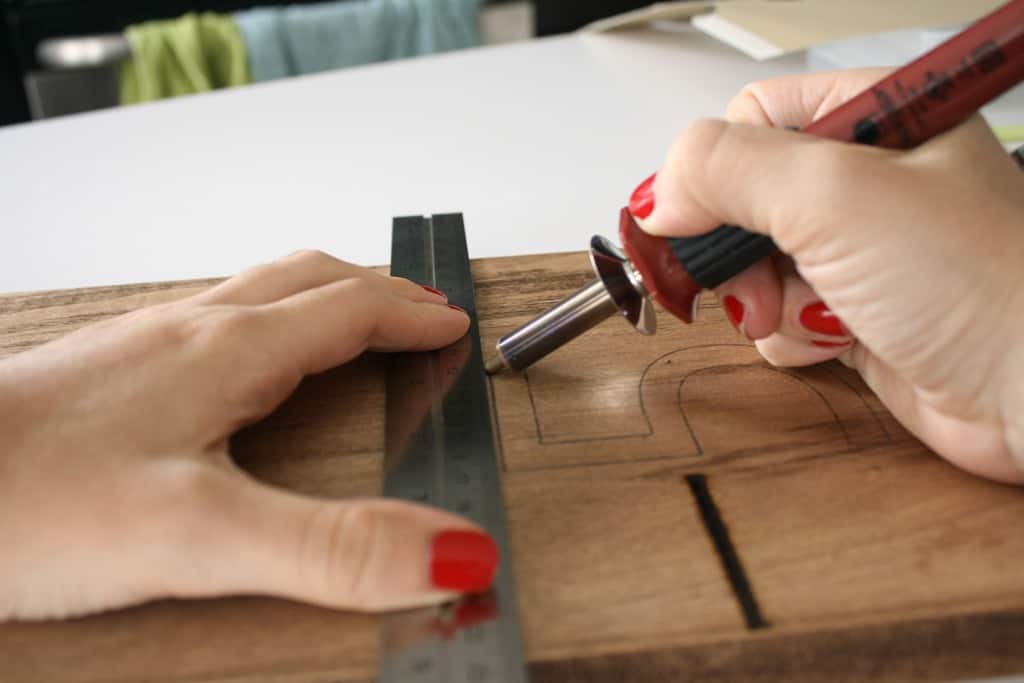
The thing I learned with the woodburning was to try to go as even paced as possible. I also figured out that the tip cools down as you have it on the wood surface. It starts out really hot and burns easily and as you drag along the wood, it looses heat, which causes a skinnier line. It was helpful to do the burning in small sections and letting the tool re-heat for a few seconds in between.

measure-soph
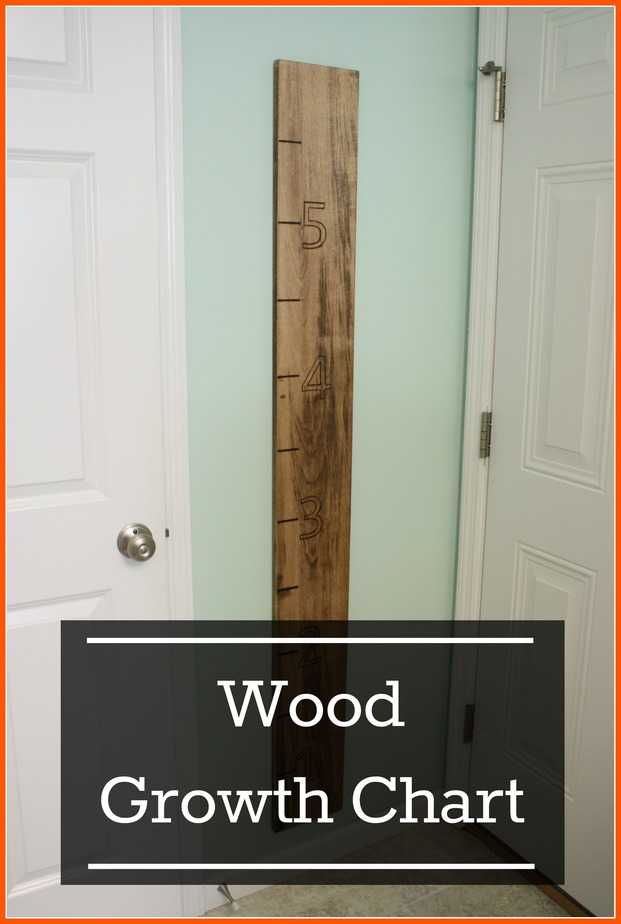
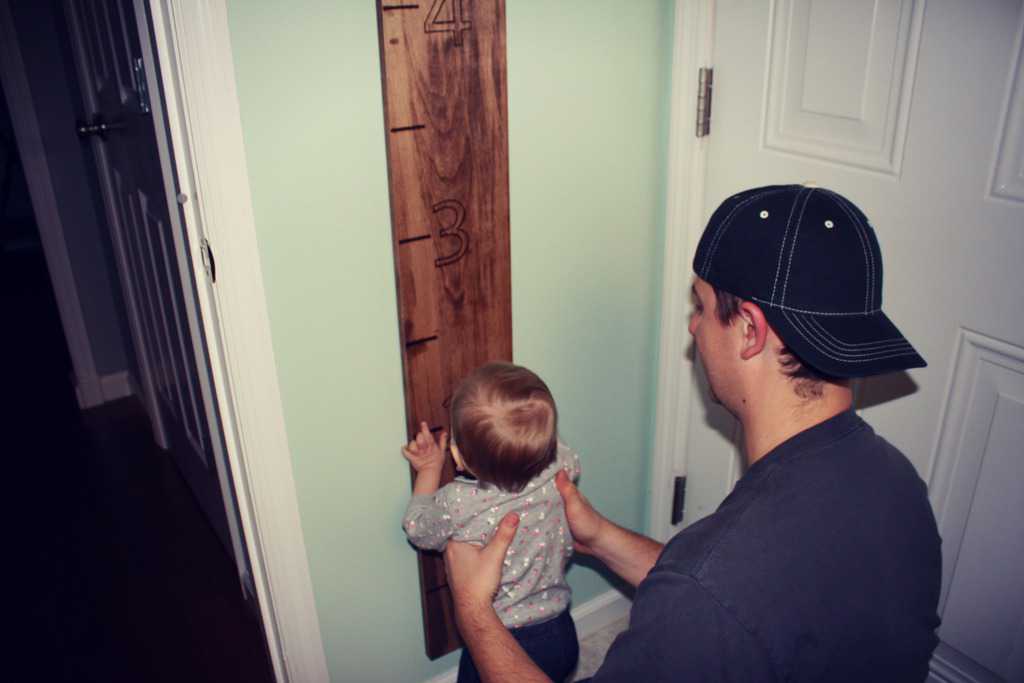
I attached the board with industrial strength velcro. It may rip the paint off when we leave but we didn’t want to risk the board falling since it’s on a wall between two doors. Sophie liked feeling the grooves in the numbers and is 31 inches!

Do you have a special place to measure your kids or do you remember being measured growing up? Have you done a wood burning project before? Have any tips or techniques to share on being a master wood burner? I’m excited to do more projects with my new tool…perhaps as Christmas presents!

Spreading Holiday Cheer with Basic Invite Holiday Cards

A huge thank you to Basic Invite for sponsoring this post, and for making all of my holiday card dreams come true!

Growing up I loved running to the mailbox during December to see what Christmas cards we’d received each day. We’d string them happily in our dining room and be surrounded by smiling faces of friends and family all month long.

Basic Invite Holiday Cards

As an adult I still love receiving holiday cards. I’ve even begun turning them into books each year when the season is over, by punching a hole in them and fastening them together with a large binder ring. They’re such a fun keepsake to have, and my daughter loves to look back through everyone’s photos from previous years. It’s also helpful to remember who to send cards to the following year.

As much as I love to receive holiday cards from others, I love to send them too! Which is why I was so excited to partner with Basic Invite this year to create the perfect cards to send out to all of our loved ones.

Basic Invite Holiday Cards

Basic Invite Holiday Cards

Basic Invite has become my favorite one-stop shop for purchasing cards for every occasion.  Not only do they always have an amazing selection of designs, but you can literally choose your cards, get personalized postage, and import your address book so that they will address your cards for you… when you take advantage of all that they have to offer, literally all that’s left to do is stuff the envelopes and stick them in the mail.

This was my first year using Basic Invite and I was amazed by the quality and beauty of the holiday cards we received. This year we chose the You and Yours Photo Holiday Cards design, in Luxe Velvet paper, along with the free white envelopes. I’m big into how something feels in your hands and I wanted these cards to feel special to my friends and family.

Basic Invite

Honestly though, it was tough to select just one design to go with, because there are over 250 beautiful holiday cards to choose from! It was a little addicting designing my holiday cards because the website makes it so easy to customize your cards. I designed five different versions and had them sent as samples to my home. Basic Invite is one of the few websites that allows customers the ability to order a printed sample of their actual invitation so you can see exactly how it will print as well as feel the paper quality before you ever have to place their final order. TIP: order each sample in a different paper type so you’re able to feel the different finishes. Get your family involved if you’re having a hard time choosing. I laid out all five and had our daughter and my husband choose their favorites. Luckily, they both chose the same one which happened to be my favorite as well!

Basic Invite Holiday Cards

Basic Invite Holiday Cards

I’m excited for another favorite tradition: signing of the Holiday cards with hot coco and Christmas music. We’re getting our cards in the mail December 1st so they’ll be up all month long! Basic Invite offers an address capturing service that allows you to simply share a link on Facebook, Twitter, Instagram, or any other form of social media to request your friends and family’s addresses which will be stored in your account and can then be selected during the design process. Basic Invite offers recipient address printing at no cost on all Christmas card orders.

I also wanted to let you in on a little secret. This photo was taken by myself in front of our shed in the back yard. You don’t need to spend a ton on a photographer to get a good photo of your family. The idea is to send something nice showing your friends and family you’re thinking of them during the holidays.

If you still haven’t ordered your own cards, you’re not too late. Basic Invite is currently offering 30% off through with the code: HOLI30 along with 15% off everything else using code: 15FF51. Be sure to check them out for your discount holiday party invitations and work Christmas party invitations!

Happy Holidays to you and yours!

Pin it for later:

Basic Invite Holiday Cards

Top 24 Cauliflower Recipes: Cheap and Healthy Alternative

Top 24 Cauliflower Recipes- I just finished up a year of working with a health coach to get me on the right track towards having another baby. Every couple weeks there was a new habit to add to my repertoire of healthy living. My biggest takeaway from the program was the importance of finding what food is good fuel for my body. There was a lot of trial and error through this process. While exercise is important for muscle growth and a healthy heart, a balanced diet is what helped me improve the most.

Neither my husband nor myself enjoy cooking. I learned that in order to eat good food I must meal plan on the weekends, purchase the groceries and prep the veggies. Prepping the veggies was key when it came down to making the meals. It is much easier to batch prep work all at once making dinner time a breeze. I also needed to be more creative with my meals. We’re on a tight budget currently so we’re not able to eat as much fresh fish and expensive meats as in the past. That’s where veggies come in! There are a lot of ways you can replace a main entree (meat) with a veggie and it doesn’t feel like you’re being forced to eat your veggies as a kid.

Cauliflower is my new favorite vegetable because it can be used in so many different meals. Honestly, you could eat cauliflower for breakfast, lunch and dinner and have such varied tastes that you wouldn’t realize you were eating the same food. I’ve rounded up the best of the best from the internet for you to give a try as we head into the new year and stay on track during the holiday season.

Top Cauliflower Recipes

Breakfast

Top Cauliflower Recipes

3 Ingredient Cauliflower Hashbrowns

low carb cauliflower breakfast casserole

Low Carb Breakfast Casserole

Appetizer

cheesy cauliflower nachos recipe

Cheesy Cauliflower Nachos

cauliflower crust stromboli recipe

Cauliflower Crust Stromboli

cheesy cauliflower muffins recipe

Cheesy Cauliflower Muffins

cheesy cauliflower breadsticks

Cheesy Cauliflower Breadsticks

garlic roasted cauliflower bites recipe

Garlic Roasted Cauliflower Bites

Sides

loaded cauliflower recipe

Loaded Cauliflower

cilantro lime cauliflower rice

Cilantro Lime Cauliflower Rice

roasted cauliflower salad recipe

Roasted Cauliflower Salad with Lemon Tahini Dressing

roasted cauliflower steak recipe

Roasted Cauliflower Steak

curried cauliflower rice kale soup

Curried Cauliflower Rice Kale Soup

mock potato salad cauliflower reicpe

Mock Potato Salad

cauliflower stuffing recipe

Cauliflower Stuffing

roasted red pepper soup recipe

Roasted Red Pepper Soup

Entrees

honey garlic cauliflower recipe

Honey Garlic Cauliflower

siracha and lime cauliflower tostadas recipe

Siracha and Lime Roasted Cauliflower Tostadas


chicken enchilada rice bowls recipe

Chicken Enchilada Cauliflower Rice Bowls

allo gobi

Aloo Gobi – Cauliflower Potato Curry

cauliflower fried rice recipe

Cauliflower Fried Rice

cauliflower fajitas recipe

Cauliflower Fajitas

mushroom risotto recipe

Mushroom Risotto with Cauliflower Rice

bacon cheeseburger cauliflower casserole recipe

Bacon Cheeseburger Cauliflower Casserole

baked sweet and sour cauliflower recipe

Baked Sweet and Sour Cauliflower

In what ways do you try to get more vegetables in your meals? It’s a great way to save money and be more heart healthy!

Halloween Candy Cookie Pizza

I  love Halloween. It’s definitely close behind Christmas on my list of favorites. Growing up my family celebrated the entire month of October with decorations, Halloween music, indoor haunted house, camping with ghost stories, apple orchards, pumpkin patches, hay rides and lots of leaf jumping. Halloween night was the icing on the cake. We would come home from school, finish our homework, have dinner and start the costume process. Rain or snow, we would layer up under our clown or bunny costumes and head out to collect our treats. My favorite part of the entire night was pouring out my bag of loot and organizing my candy by favorites.

Halloween Candy Cookie Pizza

This year I’m able to re-live my trick-or-treating days through the eyes of our four year old Sophia! The past three years have been really fun on Halloween but I continuously get more excited as the years go by. This year she’ll really understand what/when Halloween is and why people are giving her candy if she says ‘Trick or Treat!’

The first step in minimizing challenges is to prepare. The Girl Scout in me always sees the worst outcome of every situation and prepares accordingly. First up was preparing for the trick-or-treaters that come to our home. We live in a big neighborhood so I always buy 6 of the biggest bags of candy. We also participate in the Teal Pumpkin Project where we offer glow necklaces for children with allergies. Kids have the choice of chocolates or a necklace. If you’re super cute, funny or make up a Halloween cheer you can have both!

The second step is the busy night of waiting for Daddy to get home, eat dinner, put on costumes and head out for trick-or-treating while giving time for a little candy sorting before bedtime. We solve this issue by having a pizza waiting for when Daddy gets home so we’re able to spend more time on Halloween fun.

The third challenge in the midwest is preparing for weather. Since Sophie is such a big fan of dinosaurs, her Grandma found a dinosaur costume at a consignment shop that is perfect for her! We were sure to get it a little big so she will be able to wear warm clothes underneath. It also has a hood as the dinosaur head to keep her ears warm. There aren’t any restricting parts to the costume or extra accessories that she could lose on our walk. We also have a backup lighter costume of cat ears and a pink tutu if she refuses to wear the dinosaur costume.

The final challenge is figuring out what to do with all of the candy left over from trick-or-treating. When I was little, my mom and I always made cookie pizza for my Birthday and Halloween. This is my favorite dessert to make for parties because I can customize it using people’s favorite candy bars.

Halloween Candy Cookie Pizza

Ingredients:

  • NESTLÉ® TOLL HOUSE® Halloween Chocolate Chip Cookie Dough
  • 1/4 c peanut butter
  • 3/4 c NESTLÉ® Milk Chocolate Morsels
  • Candy bars of your choice
  • Candy Eyes and Halloween Sprinkles (optional)

Let the cookie dough sit out of the fridge for a half hour. Spread out cookie dough on a pizza pan being sure to use cookie spray on the pan. Bake according to directions on packaging. I used the shortest amount of time to start and kept an eye until it was the perfect golden brown.
Halloween Candy Cookie Pizza
While the cookie is warm out of the oven, dollop the peanut butter and sprinkle the chocolate morsels evenly.

Halloween Candy Cookie Pizza


Halloween Candy Cookie Pizza

Smear the two together to make the ‘pizza sauce’. If you’re a fan of peanut butter, switch the ratio of chocolate to peanut butter. 
Halloween Candy Cookie Pizza

Chop the candy bars into decent sized pieces and sprinkle evenly throughout pizza. Add the candy eyes and Halloween Sprinkles.
Halloween Candy Cookie Pizza


Halloween Candy Cookie Pizza


Halloween Candy Cookie Pizza


Halloween Candy Cookie Pizza

Cut and serve. Best eaten warm and with milk. 
Halloween Candy Cookie Pizza

Halloween Candy Cookie PizzaHave you been a fan of Butterfinger since Bart was the spokesman? It’s my favorite topping on Halloween Candy Cookie Pizza. What do you do with your leftover Halloween candy?

Other Halloween posts:

Halloween Party Treats

Halloween Home Tour

Pin this for later:

Halloween Candy Cookie Pizza Recipe

Halloween Street Sign

Hello to all you people itching to decorate for Halloween! I started early this year, by a week, and my husband was NOT happy. I had to though because our October weekends are already full and I really wanted to make a Halloween street sign! I’d seen street signs like this for weddings and have always thought they were cool but didn’t know when I’d ever use one…until now!

I loved making this sign because I could put our personalities into it. We made a list of scary/Halloween places and narrowed it down to our top 7 favorites. Unfortunately, the Shrieking Shack did not make the cut but I’m pretty happy with the ones that made it on the sign. Obviously to represent #teamEdward, I had to have Forks, WA. I also had a few nods to Disney with Jeffrey’s favorite Disney movie, Nightmare Before Christmas (as well as Monstropolis and The Haunted Mansion.) I’ve been told Crystal Lake and Elm St. are from popular scary movies of which I will never watch. I’m pretty sure everybody, young or old, knows the tale of The Headless Horseman so we threw Sleepy Hallow on as well. For us, this project was 100% free because we had every item on hand, but it would still be a fairly cheap project if you were looking to buy the materials. Check out the scrap wood pile at your local hardware store for free wood.

Materials Needed:

  • 7 ft 4×4
  • Several 1×3, 1×4, 1×5 or 1×6 boards cut at varied lengths
  • 8ft 2×4
  • Miter or Hand Saw
  • Chisel (optional)
  • Wood Stain
  • Brush and Rag for Stain
  • Screws
  • 2 Bolts & 2 Nuts
  • Acrylic Paint & Brushes
  • Letter Stencils
  • Polyurethane Spray

jeans

chisel-topThe first step is to wear the proper clothing. Flip flops are not the proper protection when working with large lumber and a saw but I can’t wear shoes because of my broken toe. Your husband’s jeans are the other piece of attire that you will want to wear, as you will get sawdust and stain on your clothes (don’t forget to ask first.)

Jeffrey had the great idea to have some of the boards angled, so he used the miter saw to cut the corners off the 4×4 and finished them off with a chisel to make the angles longer. This step is optional.

lay-out

base

As you cut boards, lay them on the sign to see how you like them spaced. By laying them out we decided which ones we wanted to have points on the end and made sure we didn’t have too many that looked the same. (Please forgive the photo as it was dark when we were building.)

For the base, Jeffrey used nuts and bolts to attach two 2ft 2x4s and screwed two 2ft 2x4s perpendicular on the ends of those boards, making an H.

painting-materials

forks

I stained the wood pieces according to the directions on the can. I stained them by the motion detective security light that constantly was turning off. Mistake number two (the first was wearing flip flops.) Thankfully, I didn’t mind if the stain was uneven and having some boards darker than others, because I wanted them to look different, as if they were added at different times. I also liked that we had several types of wood so the stain ended up being varying shades of brown.

I was not meticulous on my hand writing or the evenness of the paint. Not sure why, but in my mind, the people who would write the signs didn’t really care that they looked nice? Not sure where I got that, but I feel since it is for Halloween, it can be a bit sloppy. I used a round tip brush for the cursive signs.

halloween-town

stencilFor one sign, I did a sloppy job of painting an alphabet stencil. My husband suggested I use Sophie’s hand in red paint to smear on the sign. I thought using a baby’s hand print would be too creepy. Also, by adding another element on top of the words, I’d probably mess up the sign and make them too hard to read.

street-signs

attatching-signs

Once I wrote on all of the signs, we sprayed a clear polyurethane on the front of the boards. See the bottom right area where it’s sprayed white? I had the wrong can of spray paint and used white instead of clear! Mistake 3. I mimicked the white spray paint up in the top left to even it out and didn’t worry about it. Mistakes happen!

We attached the boards by pre-drilling a hole in each sign and then screwing it to the 4×4. We used only one screw in each board so we could adjust them once they were all added to the post.

Tada! Our sign up in the yard! I still want to do quite a bit more decorating on the porch for Halloween (the leaves are just fall decor.)

finished-sign

finsihed-sign-2I’m going to add tomb stones around the base and light everything with can lights. I may add a few skulls or bone or spiderwebs as well. What do you do to decorate for Halloween? Do you decorate outside too? Are you the playful Halloween decor type  person or a gruesome decor type person? Sorry, neighbors, for being ‘that neighbor’ who puts their Halloween stuff up in September!

Pin it for later:

office-garland

Fall Leaf Garland

Google+