I’ve been a real slacker in the world of baking lately. One, because I’m supposed to be on a diet. Two, because it’s just so much effort when I’d rather be doing…anything else. I wanted to think of an quick and easy recipe with very little ingredients but still looks cute and tastes good. That’s a lot of wishful thinking but I was successful! My Mom always used to make Jello and pudding parfaits with fruit in the Jello for a quick, light dessert. I used this idea for my Nutella Parfait dessert but it turned into being more chocolate based and then more Nutella based in the end.
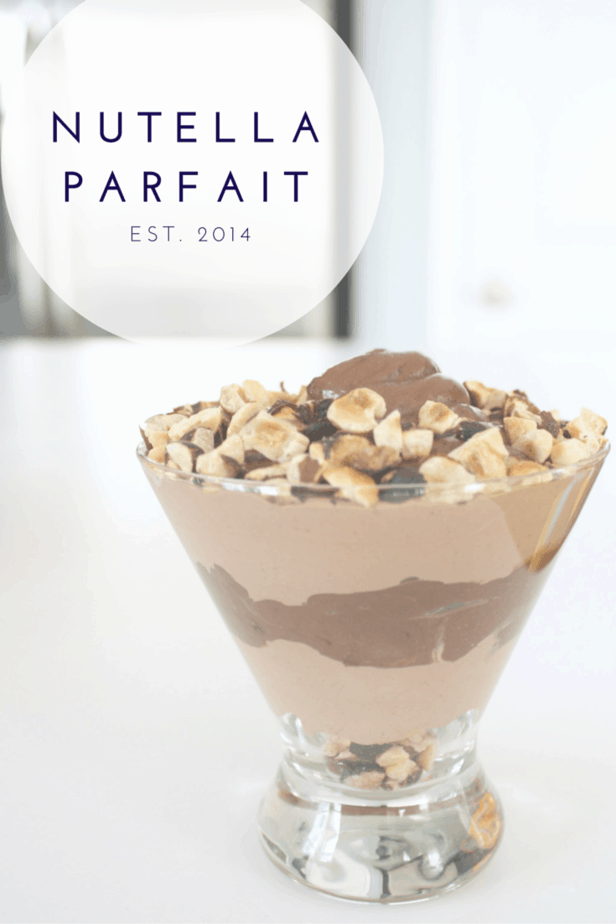
Nutella Parfait Dessert
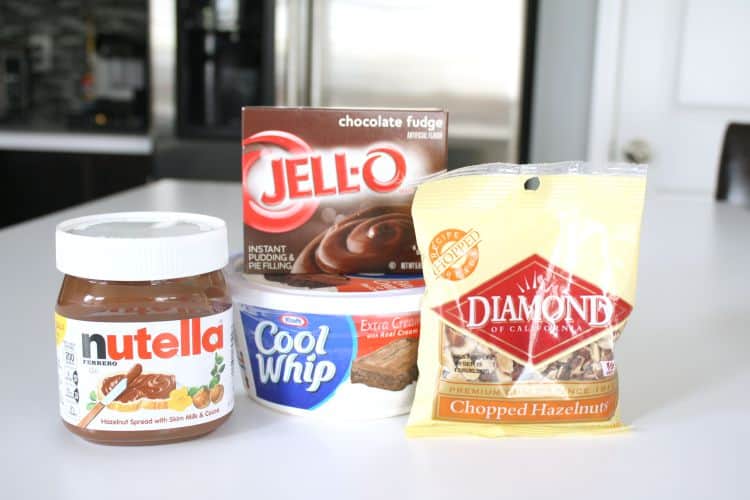
The ingredients are easily found at any grocery store and can be switched up to customize to your tastes. The recipe I made up includes the following:
Ingredients:
- 3 c. 2% milk
- 1 box of Chocolate Fudge Pudding (you can substitute this flavor for any other flavor)
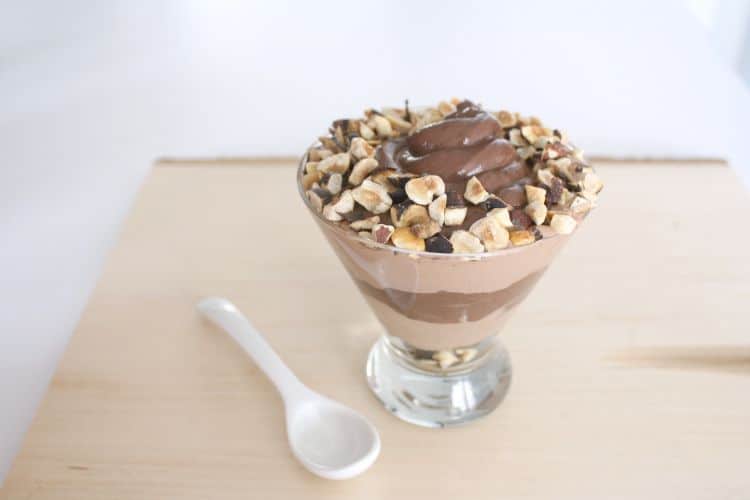
- 1 bag of chopped hazelnuts
- 16oz whipping cream (not creamy Cool Whip like I did)
- A few heaping spoon fulls of Nutella
Just so you know, I’m not a real stickler for following directions when cooking. USUALLY when baking, I like to follow to a T, but since I was making this recipe up as I went, I don’t have exact measurements for everything. As any good chef will tell you, the best part about cooking is tasting it along the way. If you can’t taste the Nutella well enough, just add more!
The first thing I recommend doing (because I wish I had) is to chop the hazelnuts smaller before laying them out on a pan to roast in the oven. I put them in our toaster oven at 325F for 12 minutes, tossed them around a bit and put them back in for a few more minutes. This time will probably vary slightly if you chop the hazelnuts smaller so check on them before 12 minutes.
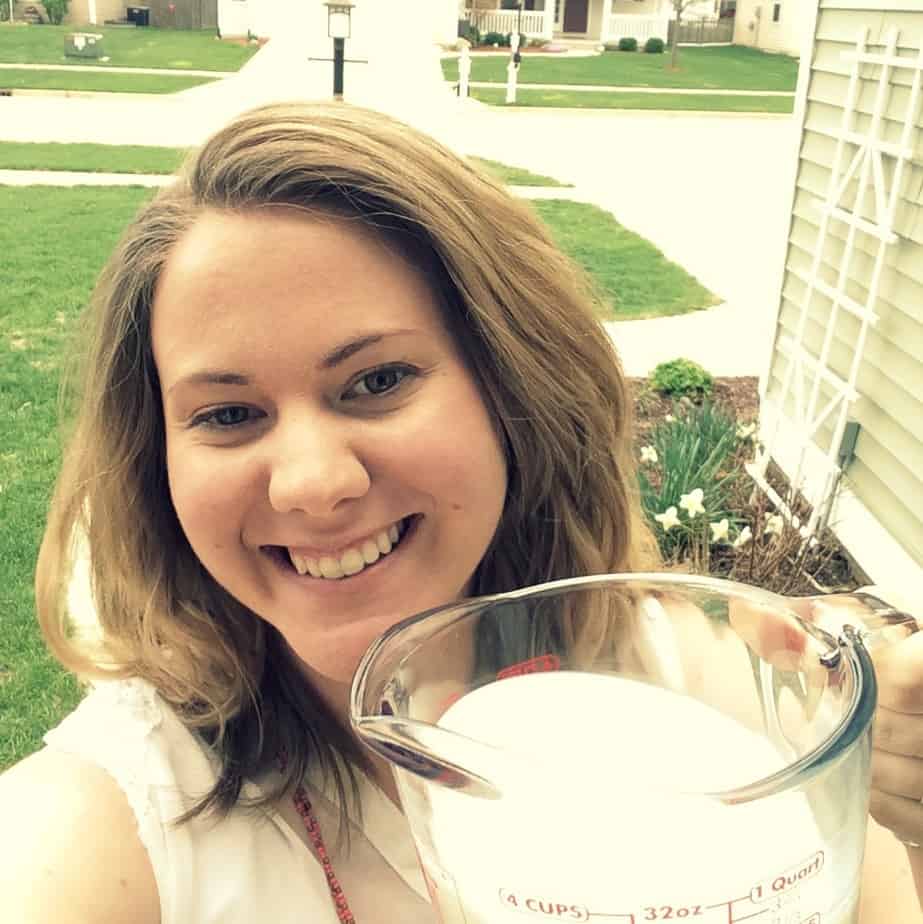
While your hazelnuts are roasting, make your fudge pudding according to the directions on the package. It should only take 5 minutes to set in the fridge. At this time, if you were me, you’d realize you didn’t ever drink milk, and contemplate if pudding could be made with water. Do not attempt this. Run to the neighbor’s to borrow some milk. (Thanks neighbor!)
While the pudding is setting, you can move on to the part that I demolished, the whipped Nutella! What you’re supposed to do: ‘In the bowl of a mixer (or using a hand-held), add the cold cream and begin whipping; once thickened slightly, sprinkle in the sugar and finish whipping just until stiff peaks form; set aside for a moment.’ I thought I was doing this but mine turned out a bit more like this:**
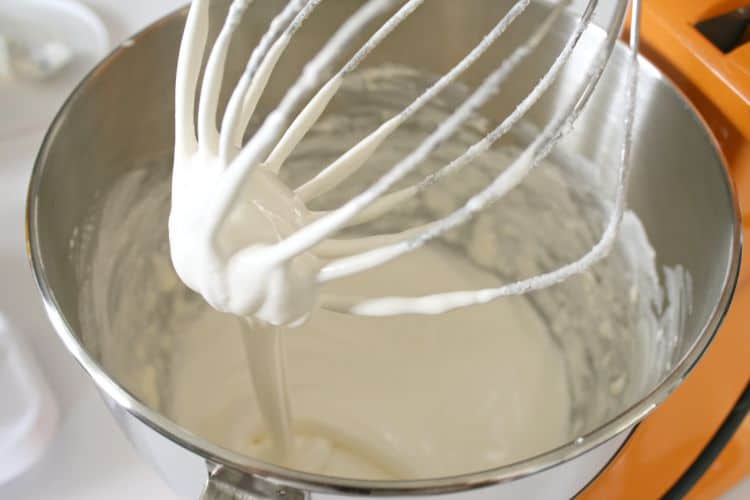
*womp womp* I didn’t let it stop me! I mixed in my Nutella and just pretended it wasn’t supposed to be light and fluffy. It still tasted amazing! Now that all the fixins’ are ready, it’s time to layer in your dish. This recipe makes 6 servings in 6 oz glasses or 4 servings in 10 oz glasses. To make clean layers, put your fillings in two separate icing bags (or Ziplock bags like I used) and cut the corner. Layer as you wish. For mine I layered hazelnuts, Nutella, Nutella ‘whip’, fudge pudding, Nutella ‘whip’, a dab of fudge pudding and sprinkled hazelnuts on the top. Let’s just say my husband wasn’t upset about this dessert.
In the end, I will definitely be trying this dessert again, but with more attention to the whip! I think it’d also be good with Oreos rather than hazelnuts. There are a ton of different flavor combos you could do for this dessert. Don’t be afraid to try things and mess up because you’ll always learn something! Even if I would have had to throw the whole thing out, there’s always Dairy Queen. What would your favorite combo be?
**While re-reading once finished, I’d realized I used Cool Whip rather than whipping cream! Major rookie move that I should not have made and will not make again!
Other posts you may enjoy:
Pin for later: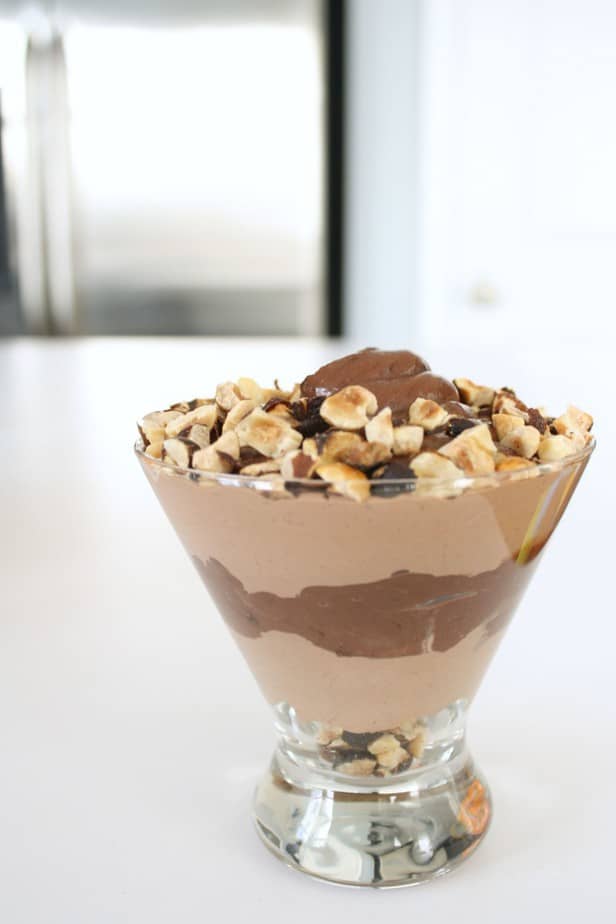


